Table of Contents
Hostinger WordPress setup might sound technical, but what if you could launch a fully functional blog in under 10 minutes?
How do you go from purchasing hosting to publishing your first post without feeling overwhelmed? Is it really possible to set up WordPress so quickly without cutting corners?
This guide will walk you through each step of the process in a way that’s simple, fast, and reliable.
Choose the Right Hostinger WordPress Plan
Picking your Hostinger WordPress plan is the very first fork in the road. If you get this right, you’ll set yourself up for smooth sailing later. If you pick the wrong plan, you may find yourself upgrading sooner than expected.
Let me break it down for you.
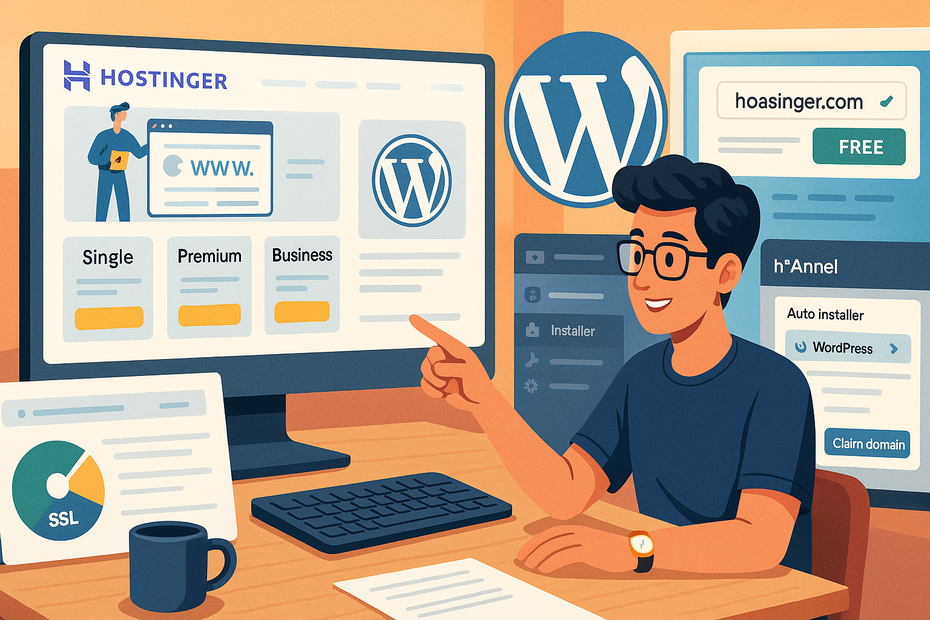
Compare Single vs Premium Hosting Options
Hostinger keeps things simple, which is one of the reasons I like them. The two most common options for bloggers are:
- Single WordPress Hosting: Ideal for beginners testing the waters. It hosts one site, comes with 50 GB SSD storage, and offers free SSL. Think of it as a cozy one-bedroom apartment—it has what you need, but not much room for expansion.
- Premium WordPress Hosting: Perfect if you plan to take blogging seriously. You get hosting for up to 100 websites, a free domain, 100 GB SSD storage, and unlimited bandwidth. This is more like renting a house—you’ve got space to grow, add roommates (extra sites), and throw parties (traffic spikes).
In my experience, the Premium plan usually pays off in the long run, even if you’re starting small. It saves you the hassle of upgrading when your blog gains traction.
Understand What Features Actually Matter for Bloggers
Not every shiny feature matters when you’re starting a blog. Here’s what actually makes a difference:
- Free SSL Certificate: This little lock symbol in the browser bar is non-negotiable. It keeps your site secure and boosts trust with readers. Hostinger includes it even on their Single plan.
- SSD Storage: Fast storage means faster load times. And speed matters—Google research shows 53% of mobile users leave if a site takes longer than 3 seconds to load.
- Bandwidth: If you’re planning on growing traffic quickly (say through social media pushes or SEO), you’ll want the flexibility of unmetered bandwidth from the Premium plan.
- Free Domain: Buying a domain separately adds cost and setup steps. Premium takes that off your plate with one free domain included.
I suggest ignoring the noise around “unlimited email accounts” or “extra subdomains” at this stage. They’re nice perks but won’t impact whether your blog launches smoothly.
Pick a Plan That Balances Cost and Performance
Here’s the honest truth: if you’re truly just testing the waters with one small blog, the Single plan is fine. But if you know you’ll put effort into growing your site—or you want the free domain bundled in—the Premium plan gives you better value.
Think of it this way: the Premium plan costs about the same as one fancy coffee each month, but it gives you breathing room to expand without stress.
I usually tell new bloggers: if you’re serious, invest in Premium from day one. It avoids the “I wish I upgraded earlier” problem later.
Register a Free Domain With Hostinger
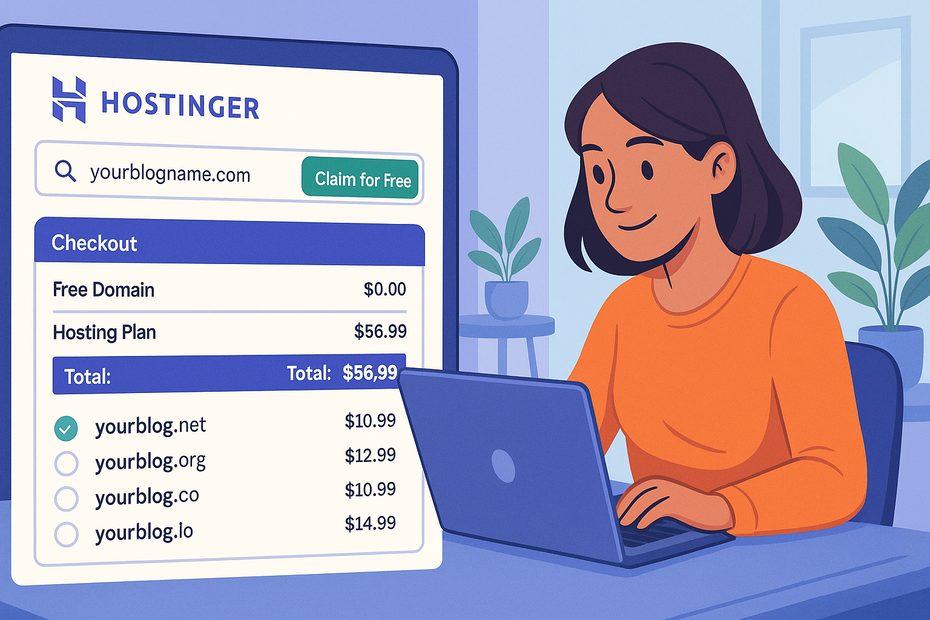
Once your hosting plan is sorted, the fun part begins—choosing your blog’s name and securing a domain. Hostinger makes it painless since a free domain is included with Premium WordPress Hosting.
How to Claim the Free Domain During Checkout
Here’s exactly how it works when you sign up:
- During the checkout process for the Premium plan, you’ll see the option to “Claim Your Free Domain.”
- Type in the name you want (for example: “thegreenkitchen.com”).
- Hostinger’s domain search will instantly check availability. If your first choice is taken, it’ll suggest variations.
- Once you’ve got a free one, simply click “Add” and it’s automatically linked to your hosting plan.
That’s it—you don’t need to go through the hassle of buying from a separate registrar like GoDaddy and then connecting DNS records manually. Hostinger keeps it all under one roof.
Tips for Picking a Blog Name That Stands Out
This part can trip people up. You don’t want to spend hours brainstorming, but your blog name does matter. A few guidelines I recommend:
- Keep it short and memorable: Aim for under 15 characters. “TechCrunch” is easier to recall than “LatestTechnologyNewsHub.”
- Make it easy to spell: If you say it out loud, your friends should know how to type it without asking.
- Avoid hyphens and numbers: They look spammy and people forget them.
- Think long-term: Choose something broad enough to grow into. For example, instead of “5DayKetoDietTips.com,” go with something flexible like “EverydayWellness.com.”
I once had a friend who started with a super niche blog name (“BestLaptopDeals2021.com”) and regretted it within a year when he wanted to expand into general tech content. Learn from his pain—keep it future-proof.
Set Up Domain Privacy for Extra Protection
Here’s something many beginners overlook: Domain privacy protection. When you register a domain, your personal info (name, email, address) is stored in the public WHOIS database. Without privacy enabled, spammers and telemarketers can get that info.
Hostinger includes domain privacy on most TLDs (domain endings like .com, .net, etc.). During checkout, just make sure you toggle it on if it’s available for your domain.
I strongly advise paying the small extra fee if your chosen extension doesn’t include it. It saves you from a mountain of unwanted calls and emails later.
Set Up Your Hostinger Account in Minutes
Once you’ve secured hosting and your domain, it’s time to get inside Hostinger’s control panel. The beauty here is that Hostinger uses hPanel instead of cPanel, and in my opinion, it’s way less intimidating for beginners.
Walkthrough of the Hostinger hPanel Dashboard
When you log in for the first time, you’ll land on the hPanel dashboard. Everything you need to manage your website is organized into clean tiles, instead of buried in endless menus.
Here’s where you’ll probably spend most of your time:
- Websites tab: This is your command center. From here, you can manage WordPress, set up emails, and access the file manager.
- Domains tab: If you claimed a free domain, you’ll see it here. This is where you tweak DNS settings, though Hostinger auto-connects it for you.
- Emails tab: Create professional email addresses like yourname@yourblog.com. Even if you don’t set it up immediately, it’s nice to have.
- Hosting tab: Advanced settings like PHP versions, backups, and SSL live here. Don’t worry—you don’t need to touch most of this at first.
What I love is that Hostinger also puts a big “Auto Installer” tile right on the dashboard. Spoiler: that’s how you’ll install WordPress in just a few clicks.
Enable Two-Factor Authentication for Security
Before you dive deeper, take 60 seconds to lock down your account. I’ve seen too many beginners skip this, only to get hacked later.
Here’s how:
- From the top menu, click your profile picture.
- Select Account Security > Two-Factor Authentication.
- Choose the app method (Google Authenticator works great).
- Scan the QR code, and boom—you’ve doubled your protection.
Why bother? Because your Hostinger account holds your domain, hosting, and website files. Losing it is like losing the keys to your house. One quick setup here saves you from massive headaches later.
Connect Your Domain Before Installing WordPress
If you claimed your free domain during signup, Hostinger usually connects it automatically. Still, it’s worth checking:
- Go to Domains > My Domains.
- Click your domain name.
- Look under DNS / Nameservers. You should see it pointing to Hostinger by default.
If you bought your domain elsewhere (say, Namecheap), you’ll need to update the nameservers manually. Hostinger gives you the correct records under Hosting > Details > Nameservers. Copy them into your registrar’s DNS settings, and within a few hours, everything will sync up.
Install WordPress With Hostinger Auto Installer
This is the moment of truth—getting WordPress up and running. Hostinger has streamlined it so much that you can literally be writing your first post in under 10 minutes.
Step-By-Step Installation Using hPanel Tools
Here’s the exact process:
- From the hPanel dashboard, click Website > Auto Installer.
- Select WordPress from the list (you’ll see other apps like Joomla, but ignore those).
- Fill out the setup form:
- Website title: This can be your blog name—you can always change it later.
- Admin username & password: Pick something secure, not “admin123.”
- Email: Use one you check regularly.
- Language: Choose your default language.
- Click Install. Within a minute, you’ll see a success message.
At this point, your blog technically exists—you can visit yourdomain.com/wp-admin and log in with your credentials.
Configure Basic Settings During the Installation
Once you log into WordPress for the first time, don’t just start writing. A few quick settings now will save you from messy headaches later:
- Permalinks: Go to Settings > Permalinks and switch to Post name. This gives you clean URLs like yourdomain.com/my-first-post instead of yourdomain.com/?p=123.
- Timezone: Under Settings > General, set your timezone. It matters when scheduling posts.
- Site Title & Tagline: Update this under Settings > General. It’s what shows up in Google results.
I suggest doing this immediately. Skipping it means you’ll later have broken URLs or confusing post timestamps.
Avoid Common Mistakes New Bloggers Make
Here are the pitfalls I see over and over again with beginners:
- Using “admin” as the username: It’s the first thing hackers try. Always change it during setup.
- Skipping SSL activation: Even though Hostinger gives you free SSL, many forget to enable it. Without it, your visitors will see “Not Secure” warnings. (Tip: go to Hosting > SSL in hPanel and toggle it on.)
- Installing too many plugins: I’ve seen new bloggers add 20+ plugins on day one. Keep it lean—start with essentials like SEO and security, then expand as needed.
In practice, once WordPress is installed and SSL is active, your blog is technically ready for the world. The rest (themes, plugins, customization) is about making it your own.
Secure Your New WordPress Blog
Security might not sound exciting, but it’s the foundation that keeps your blog safe. The good news is Hostinger makes it simple to lock things down without needing to be “techy.”
How to Enable Free SSL on Hostinger
SSL is the green lock you see in your browser’s address bar. Without it, visitors will see scary “Not Secure” warnings. Hostinger gives you SSL for free, but you need to switch it on.
Here’s how:
- From the hPanel dashboard, click Websites > Manage > Security.
- Select SSL Certificates.
- Click Activate next to your domain.
Within minutes, your site will move from http:// to https://. If you’re curious, that extra “s” literally stands for “secure.” I strongly suggest doing this before you publish a single post, because switching later can create messy URL redirects.
Use Strong Passwords and Admin Security Settings
One of the most common ways blogs get hacked is through weak passwords. I know it’s tempting to go with something simple like “blog123,” but that’s basically an open door.
A few tips I recommend:
- Make your WordPress admin password at least 12 characters long with a mix of letters, numbers, and symbols.
- Avoid using “admin” as your username—change it during installation.
- In WordPress > Settings > Discussion, turn off “Anyone can register” unless you actually plan on running a community site.
I also advise using a password manager like Bitwarden. That way, you don’t have to remember every crazy string of characters yourself.
Keep Plugins and WordPress Core Updated
Here’s the reality: most hacks don’t happen because of WordPress itself—they happen because bloggers forget to update plugins. Updates patch security holes, and ignoring them leaves your site wide open.
From your WordPress dashboard, you’ll see a red circle whenever updates are available. Make it a habit to:
- Go to Dashboard > Updates once a week.
- Click Update All for plugins and themes.
- Update WordPress core when prompted (it takes 10 seconds).
I like to think of updates as brushing your teeth—it only takes a minute, but skipping it comes with painful consequences.
Pick and Install a WordPress Theme
Once your blog is safe, it’s time to make it look good. The theme controls your site’s design, layout, and overall vibe.
Where to Find Fast and Mobile-Friendly Themes
Your theme isn’t just about pretty colors—it directly affects your site speed and SEO rankings. A heavy, bloated theme slows everything down, which can cost you readers.
Here are a few places I suggest browsing:
- WordPress Theme Directory (built into your dashboard). Lots of free, lightweight options like Astra and GeneratePress.
- ThemeForest for premium themes. Great if you want something polished with extra customization.
- Kadence or Blocksy, which are known for speed and modern design.
I recommend testing any theme’s demo on your phone. If it looks clunky on mobile, skip it—over 60% of blog traffic now comes from mobile users.
How to Install and Activate a Theme in WordPress
Installing a theme takes less than a minute:
- From your WordPress dashboard, go to Appearance > Themes.
- Click Add New.
- Use the search bar to find a theme like “Astra.”
- Click Install, then Activate.
If you bought a premium theme, you’ll instead upload a .zip file under Upload Theme. Don’t worry—it’s just as simple.
Customize Basic Branding Without Coding
You don’t need to know a single line of code to make your theme feel like “yours.”
Here’s how to start:
- Go to Appearance > Customize.
- Change your site logo and favicon (the little icon in browser tabs).
- Adjust colors and fonts to match your style.
- Set up your homepage layout (blog feed or static homepage).
I suggest starting small—pick a logo, choose two main colors, and stick with one font style. Clean and simple often beats overdesigned. A friend of mine wasted weeks tweaking every little color, but readers don’t care nearly as much as you think. They care about your content.
Install Essential WordPress Plugins
Plugins are like apps for your blog. They add features WordPress doesn’t have out of the box. The key is not to overload your site—pick the essentials and build from there.
Recommended Plugins for Speed and Security
Speed and safety should come first. A few I recommend right away:
- LiteSpeed Cache (free): Boosts site speed by caching pages and optimizing images. Hostinger servers are LiteSpeed-based, so this plugin works beautifully.
- Wordfence (free & premium): Adds a firewall and malware scanner to block attacks.
- UpdraftPlus (free & premium): Automatic backups to Google Drive or Dropbox. If something breaks, you can restore your site in minutes.
With just these three, your site is already faster and more secure than most beginner blogs.
SEO Plugins That Help You Rank Faster
If you want your blog to show up in Google, you’ll want an SEO helper. My two go-to picks:
- Yoast SEO: Beginner-friendly, with traffic light indicators (green = good, red = needs work).
- Rank Math: A bit more advanced but offers more features for free than Yoast.
Both plugins help you set meta titles, descriptions, and optimize content for keywords—without having to mess with HTML code.
Social Sharing and Engagement Plugins to Start With
Getting readers is one thing, keeping them engaged is another. A few plugins worth adding:
- Social Snap: Adds sharing buttons so visitors can post your articles directly to Twitter, Facebook, or Pinterest.
- WPForms Lite: Drag-and-drop form builder for contact pages
- Disqus (optional): A better commenting system if you expect lots of discussions.
My advice: Start lean. You can always add more plugins later, but each one you install slightly slows down your site. Quality over quantity wins here.
Configure WordPress Settings for Blogging
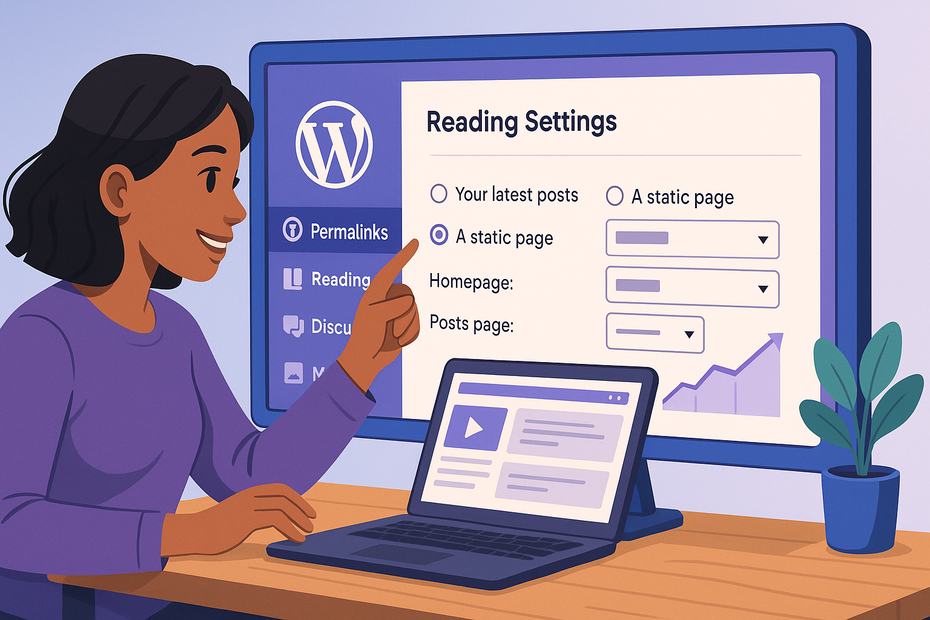
Before you start publishing, it’s worth taking a few minutes to configure WordPress properly. These small adjustments make your blog easier to use, more SEO-friendly, and cleaner in the long run.
Adjust Permalinks for SEO-Friendly URLs
By default, WordPress gives your posts messy URLs like yourblog.com/?p=123. That’s not good for readers or search engines. Luckily, it takes just one tweak:
- From your WordPress dashboard, go to Settings > Permalinks.
- Select Post name.
- Click Save Changes.
Now, your blog posts will look like this: yourblog.com/my-first-post. Clean, short, and keyword-friendly.
I suggest doing this before you publish anything. If you wait until later, changing permalinks can break old links and hurt SEO.
Set Up the Homepage and Blog Page Correctly
WordPress gives you two options for your homepage: a static page or a running list of blog posts. If your site is primarily a blog, showing your latest posts is fine. But if you want a more professional look with a homepage plus a separate blog section, here’s how:
- Go to Settings > Reading.
- Choose A static page.
- Set your Homepage (you can create a new “Home” page if one doesn’t exist yet).
- Set your Posts page to “Blog.”
This way, visitors land on a polished homepage while still being able to browse your posts on a dedicated blog page.
Configure Reading, Discussion, and Media Settings
A few other settings are worth fine-tuning:
- Reading: Set “Blog pages show at most” to around 10 posts for cleaner navigation.
- Discussion: Decide if you want comments on your blog. I recommend allowing comments but requiring moderation to keep spam out.
- Media: Adjust default image sizes under Settings > Media. This prevents WordPress from generating unnecessary image files that slow down your site.
These tweaks only take a few minutes, but they’ll save you from headaches later—like endless spam comments or bloated image folders.
Create Your First Blog Post and Page
This is the fun part: getting your words and ideas out into the world. WordPress uses the Block Editor (sometimes called Gutenberg), which is surprisingly beginner-friendly once you get the hang of it.
How to Use the WordPress Block Editor Effectively
When you click Posts > Add New, you’ll see the block editor. Think of it as building with Lego—each paragraph, image, or video is its own block.
- To add text: Just start typing.
- To add something else: Click the little + icon and choose from blocks like Image, Quote, List, or Heading.
- To rearrange: Drag and drop blocks where you want them.
I recommend playing around for 10 minutes—add an image, create a list, drop in a quote. It’s hard to break anything, and experimenting helps you get comfortable faster.
Write and Publish Your First Blog Post in Minutes
Here’s a simple process I advise for your first post:
- Go to Posts > Add New.
- Add a title (for example: “Welcome to My New Blog!”).
- Write a short introduction explaining who you are and what readers can expect.
- Insert a relevant image using the Image block.
- Click Publish in the top-right corner.
Congratulations—you just went live. It doesn’t need to be perfect. The first post is mostly about breaking the ice.
Build Key Pages Like About, Contact, and Privacy
Beyond posts, every blog should have a few key pages:
- About Page: Share your story. Why are you blogging? What can readers expect? Keep it personal and authentic.
- Contact Page: Use a plugin like WPForms Lite to add a simple form. This lets readers or brands reach you without exposing your email.
- Privacy Policy: WordPress can auto-generate one under Settings > Privacy. It’s important for legal compliance, especially if you’re collecting emails.
These pages make your site feel complete and trustworthy. Even if you’re just starting, they set a professional tone.
Launch and Promote Your Blog to the World
With your site configured, your theme customized, and your first post live, it’s time to launch. This is where you go from “setup mode” to actually building an audience.
Double-Check Settings Before Going Live
A quick checklist before you share your blog:
- Go to Settings > General and confirm your site title and tagline look right.
- Make sure SSL is active (your site should load as https://).
- Check your site on both desktop and mobile.
This mini check avoids embarrassing moments where you share your site and visitors see “Just Another WordPress Site” as your tagline.
Share Your Blog on Social Media Platforms
You don’t need a full-blown promotion plan yet. Just start small:
- Post your new blog link on your personal social media accounts.
- Add social share buttons (via a plugin) so readers can spread your posts.
- Join relevant groups or communities where your blog’s topic is discussed.
I believe promotion works best when you’re part of the conversation, not just dropping links and disappearing.
Use Free Tools to Monitor Traffic and Growth
It’s motivating to see real people reading your blog. Two free tools I recommend:
- Google Analytics: Shows where your visitors come from, what they read, and how long they stay.
- Google Search Console: Tracks how your site appears in Google searches and what keywords bring people in.
You don’t need to obsess over numbers, but checking once a week helps you learn what’s working.
Pro Tip to Speed Up Long-Term Blogging Success
The biggest difference between blogs that fizzle out and blogs that grow? Consistency.
Here are three practices I swear by:
- Use Hostinger’s built-in backups: In hPanel, go to Files > Backups. Make it a habit to download one every month. If something breaks, you’ll thank yourself.
- Leverage Hostinger’s performance tools: The LiteSpeed cache plugin combined with Hostinger’s servers can cut load times dramatically. Faster site = happier readers.
- Write regularly: Even one post per week builds momentum. Readers start to trust you, and search engines reward fresh content.
I advise setting a small, realistic goal at first—say, one post every 10 days. It’s better to publish consistently at a slower pace than to burn out by overcommitting.

