Table of Contents
How do I upgrade my Bluehost hosting plan? Upgrading your Bluehost hosting plan can be a smart move when your website starts to grow — more visitors, heavier traffic, or expanding content.
This guide will walk you through the process step-by-step with clear explanations, screenshots-style directions, and a few expert tips to help you avoid common pitfalls.
Understanding When To Upgrade Your Bluehost Hosting Plan
Before you jump into the “how,” it’s important to know when upgrading makes sense. Upgrading your hosting plan helps your website perform better under more demanding conditions — think faster loading times, stronger security, and more storage.
If you notice your site loading slowly, frequent downtime alerts, or limited storage warnings, that’s a clear sign it’s time to move up. Bluehost offers three main hosting types — Shared, VPS, and Dedicated — each suited for different growth stages.
Quick Overview:
- Shared Hosting: Best for small websites or blogs (1–2K visitors/day).
- VPS Hosting: Best for medium-sized businesses needing better speed and control.
- Dedicated Hosting: Best for high-traffic sites or eCommerce stores handling thousands of daily visits.
Pro Tip: I suggest checking your current resource usage first. From your Bluehost dashboard, go to Advanced > Resource Usage. If you’re frequently hitting 80–90% of CPU or memory limits, it’s definitely upgrade time.
How To Upgrade Your Bluehost Hosting Plan (Step-by-Step)
Upgrading through your Bluehost dashboard is straightforward. Here’s exactly how to do it, click-by-click.
Step 1: Log In to Your Bluehost Dashboard
Go to Bluehost.com and click Login in the top-right corner. Enter your credentials to access your cPanel dashboard.
Once logged in, you’ll land on your Home tab, where you can see your site’s current hosting plan and performance overview.
Step 2: Navigate to the “My Products” Page
From the left-hand menu, click Account > Products.
Here, you’ll find a list of all your active Bluehost services — hosting, domains, and email. Look for your current hosting plan under Web Hosting.
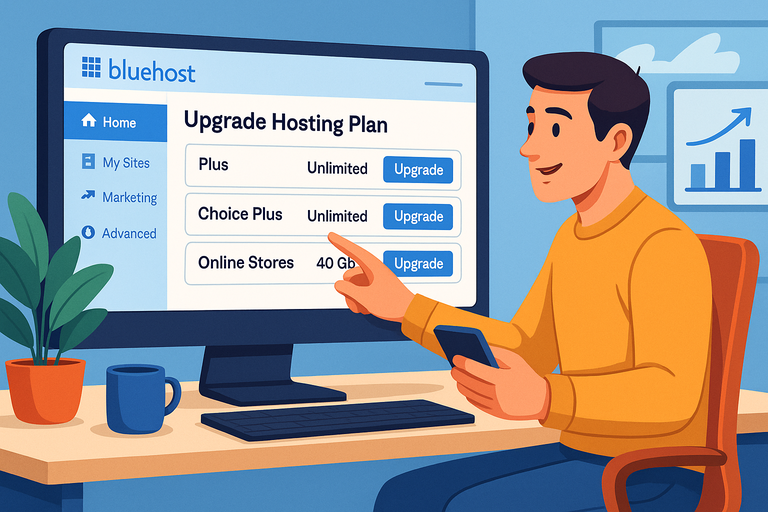
You’ll see your plan type (e.g., “Basic,” “Plus,” “Choice Plus”) and expiration date. Right next to it is an Upgrade button.
Step 3: Click “Upgrade” and Choose Your New Plan
Click Upgrade next to your current plan. Bluehost will show available upgrade options. Depending on your current hosting type, your options might include:
- Shared to VPS Hosting
- Shared to Dedicated Hosting
- Basic to Choice Plus (within Shared Hosting)
Each option includes a short summary of new features (CPU cores, memory, storage, and bandwidth).
Example UI Path: Dashboard > Account > Products > Web Hosting > Upgrade
Step 4: Review Features and Confirm Your Upgrade
Select your preferred plan and click Continue. Bluehost will show an order summary, including the cost difference and any prorated charges (if applicable).
Important: Bluehost applies remaining credit from your current plan toward the new one, so you only pay the difference.
Once you’ve reviewed everything, click Confirm Upgrade. You’ll receive a confirmation email immediately, and the upgrade usually applies within a few minutes.
Step 5: Verify the Upgrade Was Successful
After upgrading, head back to your Dashboard > Account > Products. Your new hosting plan should now appear under “Active Plans.”
You can also confirm the change under cPanel > Server Information — it should list your new hosting type (e.g., “VPS Hosting”).
Pro Tip: If you’ve upgraded to VPS or Dedicated Hosting, Bluehost may migrate your site automatically. Keep an eye on your email for migration updates or manual verification steps.
What Happens To Your Website After Upgrading
After you upgrade, Bluehost automatically transfers your site to a new server environment suited for your plan. Your website files, databases, and configurations remain intact. However, it’s always wise to create a manual backup beforehand.
To back up manually: From your Bluehost dashboard, go to Advanced > Files > Backups and click Download Full Account Backup. Save it locally before confirming the upgrade.
Performance Gains You Can Expect:
- Faster page load times (thanks to more server resources)
- Better uptime and reliability during traffic surges
- Improved security and isolation (especially on VPS/Dedicated plans)
- Room for future scalability — add domains, subdomains, and databases freely
I recommend monitoring your site’s performance post-upgrade with Bluehost’s Analytics > Performance Reports to measure improvement in load speed and uptime.
Common Issues When Upgrading Bluehost Hosting
Upgrading usually runs smoothly, but here are a few potential hiccups I’ve seen people run into — and how to handle them.
1. Pending Payment or Billing Errors: Sometimes an upgrade fails due to a billing issue. If you see an error message after clicking Confirm Upgrade, go to Account > Billing > Payment Methods and make sure your payment details are up-to-date.
2. Propagation Delay After Migration: If your site seems unavailable right after upgrading to VPS or Dedicated, don’t panic. It can take a few hours for DNS propagation. You can check progress on whatsmydns.net.
3. Missing Email Accounts: If you’re moving from Shared to VPS Hosting, you may need to reconfigure email accounts manually. Go to Email & Office > Manage, then recreate any custom email addresses linked to your domain.
Pro Tip: I always suggest clearing your browser and DNS cache after major hosting changes — it often resolves “site not found” errors.
Comparing Bluehost Upgrade Options: Shared vs VPS vs Dedicated
If you’re unsure which hosting plan to upgrade to, here’s a quick comparison of what each level offers.
| Feature | Shared Hosting | VPS Hosting | Dedicated Hosting |
| Performance | Basic speed | Faster with dedicated resources | Lightning-fast with full isolation |
| Control | Limited | Root access | Full control |
| Traffic Capacity | Up to ~10K visits/month | Up to ~100K visits/month | Millions of visits/month |
| Best For | Small sites, blogs | Growing businesses | High-traffic stores, large sites |
My Recommendation: If your site is growing beyond 20K visitors/month or uses dynamic content (like WooCommerce or membership systems), VPS Hosting hits the sweet spot between affordability and power.
How To Downgrade Or Modify Your Bluehost Plan Later
Yes — you can downgrade too, though it’s less common. Bluehost doesn’t allow downgrades directly from the dashboard, but you can contact Bluehost Support via Chat or Phone.
Here’s how: From your dashboard, click Help > Contact Us, then select Billing > Downgrade Request.
Support will review your plan and usually process the downgrade within 24 hours.
Expert Tip: Optimize Your New Plan Right After Upgrading
Once you’ve upgraded, don’t just stop there — make sure you’re getting your money’s worth. Here’s what I suggest:
- Enable Caching: Go to Performance > Caching in your dashboard to activate Bluehost’s caching feature for faster load times.
- Install an SSL Certificate: Under Security > SSL, ensure SSL is active to protect your site and boost SEO.
- Activate CDN: Bluehost integrates easily with Cloudflare. From your dashboard, click Performance > CDN to enable it in seconds.
These three tweaks often make a visible difference in speed and stability, especially on newly upgraded plans.
Final Thoughts
If you’ve been asking, “How do I upgrade my Bluehost hosting plan?” — the answer is: directly through your Bluehost dashboard, with just a few clicks. It’s quick, seamless, and almost always worth the small time investment.
Upgrading is more than just a technical step — it’s a signal that your website is growing. I believe in treating upgrades like milestones: A sign that your work is reaching more people and deserving of better performance.


