Table of Contents
Migrating your website to an InMotion server can feel intimidating, especially when you worry about potential downtime.
What if your site goes offline during the transfer and visitors can’t access it? The good news is that with the right steps, you can move your site smoothly without any interruptions.
This guide walks you through the exact process of how to migrate to an InMotion server without downtime, so you can keep your website live while making the switch.
Preparing Your Website for Migration
Before moving to your InMotion server, you want your website in top shape and safely backed up. This step ensures that nothing gets lost or broken in the shuffle.
Back Up All Website Files and Databases
I always recommend starting with backups before touching anything. Think of it as an insurance policy. If something goes sideways, you’ll have a full copy of your website to restore.
Here’s how I’d do it:
- Log in to your current hosting account.
- Open cPanel and head to File Manager. From there, compress your site’s root folder (often public_html) into a .zip file and download it.
- For databases, open phpMyAdmin, select your database, and click Export. Choose the SQL format—it’s lightweight and compatible with InMotion’s setup.
If you’re running WordPress, a plugin like UpdraftPlus can automate this entire process. But I still suggest doing a manual backup too, because plugins occasionally miss configuration files.
A quick tip: Store backups in at least two places—your computer and a cloud service like Google Drive. That way, even if your laptop crashes, your site’s lifeline is safe.
Audit Current Hosting Setup Before the Move
Auditing your setup helps you spot quirks that might cause issues on your InMotion server. You don’t want to discover surprises after migration.
Start by listing:
- PHP version, database type (MySQL or MariaDB), and extensions your site relies on.
- SSL certificates, caching tools, or special server rules (like .htaccess redirects).
- Custom cron jobs or scripts that keep your site running smoothly.
For example, I once moved a site that relied heavily on a custom PHP module. The migration would have broken everything if I hadn’t checked compatibility beforehand. That’s why I advise creating a simple “server checklist.” It saves you headaches later.
You can usually find this info inside cPanel > Server Information or by running phpinfo() from your site. Keep it handy when setting up your new environment.
Check Compatibility with InMotion Server Requirements
Now it’s time to cross-check your site’s needs with what InMotion offers. Most sites migrate smoothly, but some older applications or unique setups may need adjustments.
Here’s what to look for:
- PHP versions: InMotion supports multiple versions, from 7.4 up to 8.1+. You can select the version per domain inside their MultiPHP Manager.
- Databases: InMotion uses MySQL and MariaDB. If your old host uses PostgreSQL or something else, you’ll need a workaround.
- File size limits: InMotion allows fairly large uploads, but it’s smart to split files into chunks if you’re migrating something massive.
I suggest setting up a small test installation (like a clean WordPress site) on your InMotion server before the full migration. It’s a low-risk way to confirm compatibility and get comfortable with the dashboard.
Setting Up Your InMotion Server Account
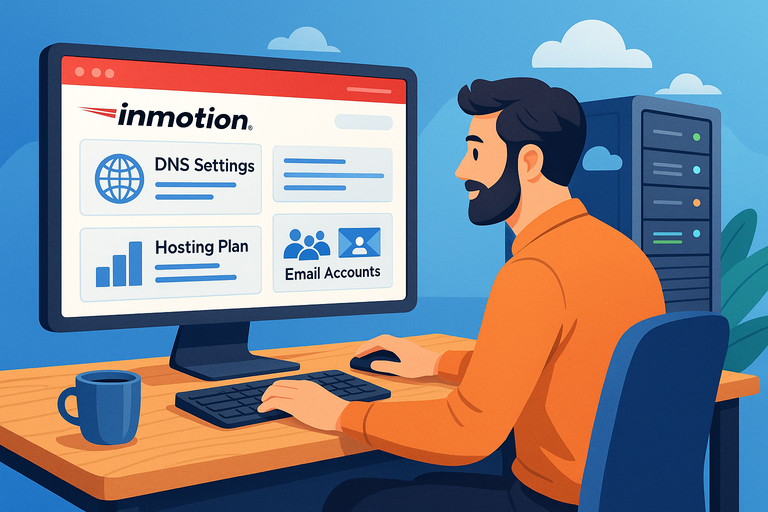
Once your site is ready, it’s time to prepare your InMotion server. Think of this step as setting the foundation before moving furniture into a new house.
Choose the Right InMotion Hosting Plan for Your Needs
Not all InMotion plans are created equal, and choosing the wrong one could bottleneck your site’s performance.
If you’re running:
- A small personal blog → Shared Hosting works fine.
- A growing business or eCommerce site → VPS Hosting gives you more resources and control.
- A large, high-traffic site → Dedicated Hosting is the safest bet.
I suggest considering your traffic trends for the next year, not just your current needs. If you’re expecting growth, it’s better to choose a VPS plan early rather than migrate again in six months.
Inside your InMotion account, you’ll see clear options to upgrade later, but starting with the right plan saves time and money.
Configure DNS Settings Inside Your InMotion Dashboard
This is where downtime risk is highest, but handled correctly, your visitors won’t notice a thing.
From your InMotion AMP (Account Management Panel):
- Go to Domains > Manage Domains.
- Note your new nameserver details (something like ns1.inmotionhosting.com).
- Keep these ready, but don’t update your domain registrar yet. You’ll do that only after testing your site on InMotion.
To prepare, I advise lowering your DNS TTL (Time to Live) setting at your registrar to 300 seconds (5 minutes) a day or two before migration. This makes the DNS switch almost instant instead of dragging out over 24–48 hours.
Create Email Accounts and Services Ahead of Migration
One step people often forget is email. If your current host manages your email, moving it incorrectly could mean missed messages.
Inside your InMotion cPanel:
- Go to Email Accounts.
- Create the same addresses you currently use (like info@yourdomain.com).
- Copy over filters, forwarders, or mailing lists you rely on.
If you use third-party services like Google Workspace or Microsoft 365, make sure to update MX records later during DNS changes. I usually take a screenshot of the current DNS zone so I can replicate settings exactly in InMotion.
Pro tip: Set up one of your accounts (like admin@yourdomain.com) to forward to a backup Gmail during the transition. That way, if anything goes wrong, you’ll still see messages coming in.
Transferring Website Files to InMotion Server
This is the moment where you actually move your site over to your InMotion server.
The trick is to do it cleanly, double-check everything, and avoid any file corruption or connection hiccups.
Use cPanel for Quick File and Database Transfers
If your old host uses cPanel and your InMotion server also has cPanel (which it does by default), you’re in luck. This is by far the easiest way to migrate.
From your old host:
- Log in to cPanel and go to Backup Wizard.
- Choose Full Backup if you want to package everything (files, databases, email accounts).
- Download the backup to your local computer.
Now, in your InMotion cPanel:
- Open Backup Wizard again.
- Select Restore and upload the backup file.
- InMotion’s system will automatically place your files and databases where they belong.
I like this method because it’s simple, and you don’t have to manually connect databases later. It’s almost like cloning your old server onto the new one.
The only downside: if your backup is really large, the upload can time out. That’s where FTP comes in.
Transfer Large Files Securely with FTP or SFTP
For bigger sites—say an eCommerce store with tons of product images—I prefer FTP (File Transfer Protocol) or better yet, SFTP (the secure version).
Here’s how I’d set it up:
- Open FileZilla (a free FTP client).
- In the Host field, enter your InMotion server IP (you’ll find this in your InMotion AMP dashboard).
- Use your cPanel username and password to connect.
- On the left, select the files from your old server. On the right, choose the /public_html/ folder on your InMotion server.
- Drag and drop.
SFTP is the safer option since it encrypts your data during transfer. This is especially important if you’re dealing with customer data or private information.
Pro tip: If you’re transferring a WordPress site, you only need to move the wp-content folder (themes, plugins, uploads) plus configuration files. That alone cuts transfer time by half.
Import Databases and Test Connections Properly
Databases are the brains behind your site—without them, your files are just a shell. After moving the files, you need to import the database.
In InMotion cPanel:
- Go to MySQL Databases and create a new database.
- Create a new database user and assign it to the database with all privileges.
- Open phpMyAdmin, select the new database, and click Import.
- Upload the .sql file you exported earlier.
Once it’s in place, you’ll need to edit your site’s configuration file so it points to the new database. For WordPress, that’s wp-config.php. Update these lines:
define('DB_NAME', 'your_new_dbname');

define('DB_USER', 'your_new_dbuser');

define('DB_PASSWORD', 'your_new_dbpassword');

define('DB_HOST', 'localhost');
I suggest testing the connection immediately using the temporary InMotion server URL (more on that in the next section). If something doesn’t connect, it’s usually a typo in the credentials.
Verifying Website Functionality Before DNS Switch
Before you tell the world that your domain now points to InMotion, you need to make sure the site actually works.
Think of this step as rehearsing before opening night.
Use Temporary InMotion Server URL to Test Site
InMotion gives you a temporary URL—basically your server’s IP address with a user directory—that lets you preview your site before flipping DNS. You’ll find it in your AMP dashboard under “Account Technical Details.”
Visit that URL, and you should see your site loading. It might not look perfect at first because of absolute URLs in your code, but it’s enough to confirm your site is functional.
I recommend clicking through several pages, especially ones with dynamic content like product listings or contact forms, to make sure everything loads.
Check Database-Driven Features Like Forms and Plugins
Static pages are easy to test, but the real challenge is making sure your database-driven elements work. Here’s my personal checklist:
- Submit a form and see if you get the email notification.
- Log into your admin dashboard (WordPress, Joomla, Drupal, etc.).
- Run a search query inside your site and confirm results display correctly.
- Check your shopping cart if you’re running eCommerce.
I once had a form plugin that looked fine on the surface but silently failed to send emails after migration. That’s why I suggest doing real test submissions instead of assuming it works.
Confirm SSL Certificates and Security Configurations
Security often gets overlooked during migration. If you had an SSL certificate (your HTTPS padlock) on your old host, you’ll need to confirm it’s active on InMotion.
Inside cPanel, open SSL/TLS Manager. InMotion offers free AutoSSL, which can be enabled with one click. If your certificate didn’t transfer over, you may need to reissue or reinstall it.
Also, check your .htaccess file for redirects. Sometimes migration resets these rules, and you don’t want visitors seeing “Not Secure” warnings.
A final tip: Test the site with an online SSL checker. That way, you know for sure your certificates are valid and covering the right domains.
Managing DNS Propagation Without Downtime
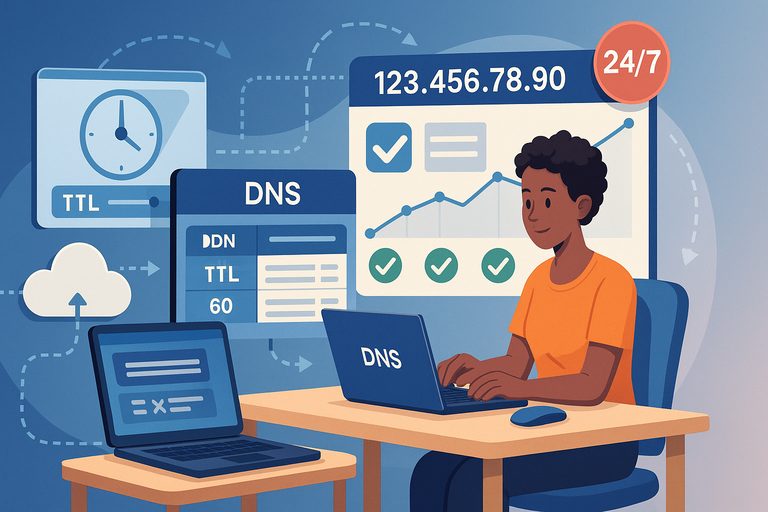
This is the step where the internet learns that your domain now lives on InMotion’s servers. If handled correctly, your visitors won’t even notice the switch.
Lower DNS TTL (Time to Live) Before Migration
DNS TTL (Time to Live) tells the internet how long to cache your DNS records. If it’s set too high, your site could point to your old host for up to 48 hours after the change.
Here’s what I recommend:
- Log in to your domain registrar (the place where you bought your domain).
- Find your DNS settings or “Zone File Editor.”
- Look for the TTL field next to your A records and MX records.
- Change it to 300 seconds (5 minutes) at least 24–48 hours before migration.
This way, when you update your domain to point to your InMotion server, the switch will happen quickly. I once forgot to lower TTL, and visitors were seeing two different versions of the site for two full days. It wasn’t fun. Lowering it in advance prevents that headache.
Update Domain Name Servers to Point to InMotion
Once you’re sure the site works on InMotion, it’s time to flip the switch.
From your InMotion AMP dashboard:
- Copy your InMotion nameservers (usually something like ns1.inmotionhosting.com and ns2.inmotionhosting.com).
- Go back to your domain registrar.
- Replace your current nameservers with the ones from InMotion.
- Save the changes.
That’s it. Your domain is now “on its way” to InMotion. The beauty of lowering TTL earlier is that most visitors will start hitting the new server within minutes.
Monitor DNS Propagation Using Online Tools
Propagation is the process of DNS changes spreading across the internet. Even with a low TTL, not every ISP updates instantly.
To keep track:
- Use tools like WhatsMyDNS.net or DNSChecker.org. Enter your domain, and they’ll show where in the world your domain points to the new server.
- Check every few hours until all regions show the InMotion IP address.
I suggest also testing on your phone’s mobile data and your home Wi-Fi. Sometimes local ISPs cache longer than expected, and this gives you peace of mind that everyone is seeing the new version.
Testing and Troubleshooting After Migration
Once DNS has switched, your site is officially live on InMotion. Now comes the detective work: making sure everything looks and runs exactly as it should.
Perform Load and Speed Tests on InMotion Server
Your new hosting should ideally feel faster than your old one. I like to run tests to confirm.
- Use GTmetrix or Pingdom Tools to measure page load speed.
- Check TTFB (Time to First Byte), which shows how quickly your server responds.
If performance seems slower, it might be caching settings. Inside cPanel, InMotion offers caching options under Cache Manager. Enabling these can dramatically speed up load times.
I also recommend stress testing by opening multiple tabs and refreshing them quickly. If your site handles that without slowing, you’re in good shape.
Check for Broken Links, Missing Files, or Errors
Broken links or missing images often pop up after a migration. This usually happens because file paths or URLs don’t match exactly.
To spot them:
- Use a crawler like Screaming Frog SEO Spider (free up to 500 URLs).
- Run a full crawl of your site to catch 404 errors or missing resources.
- Fix errors in your CMS (like WordPress) or update file paths in your theme.
For example, I once had a gallery where half the images disappeared because they pointed to absolute URLs from the old server. Updating the paths fixed it instantly.
Review Server Logs for Compatibility Warnings
InMotion provides error logs inside cPanel > Metrics > Errors. These logs are your best friend during troubleshooting.
Here’s what to look for:
- PHP errors that might indicate an outdated plugin or theme.
- Database connection errors if credentials were typed incorrectly.
- Permission errors where files or folders aren’t accessible.
I recommend checking logs daily for the first week after migration. Even small warnings can snowball into bigger issues if ignored.
Ensuring Email and Third-Party Services Work
Email and third-party tools are often overlooked during migrations, but missing customer messages or losing integrations can hurt your business.
Let’s lock this down.
Update MX Records for Email Deliverability
If you’re using InMotion’s email, you’ll need to update MX records so messages route correctly.
From your InMotion cPanel:
- Go to Email > Email Routing and confirm your domain is set to “Local Mail Exchanger.”
- In your domain registrar’s DNS settings, make sure MX records point to your InMotion server.
If you’re on Google Workspace or Microsoft 365, copy over the exact MX records from your old host. I like to take a screenshot of DNS records before migration so I can match them perfectly.
Reconnect APIs and External Tools After Migration
If your site talks to outside services (payment gateways, analytics, CRMs), test those connections right after migration.
- Log into PayPal or Stripe and run a test payment.
- Check Google Analytics to ensure tracking codes are firing.
- Reconnect any APIs that rely on your server’s IP address, since this has changed.
I once had a client whose shipping provider stopped working after migration because the provider had whitelisted the old server IP. Updating the new IP fixed it. Lesson learned: always confirm third-party integrations.
Confirm Mailing Lists, CRMs, and Integrations
Finally, check any tools that rely on email or customer data.
- If you use a CRM like HubSpot or Zoho, make sure forms on your site are still sending leads properly.
- Test mailing list signups (like Aweber or Mailerlite). Submit your own email and confirm it adds you to the list.
- If you use Zapier or similar automation, log into your dashboard and confirm workflows are still firing.
These small checks save you from the nightmare of lost leads or broken automation. I suggest running test scenarios as if you were a customer: sign up, buy something, fill a form, and track where that data goes.
Best Practices for a Smooth InMotion Migration

There’s a difference between “just getting it done” and doing it in a way that feels stress-free.
These best practices are the little things that make your migration to an InMotion server smooth and worry-free.
Schedule Migration During Low Traffic Hours
Timing matters more than people think. If you’re running a blog, moving in the middle of the night is smart. For an online store, weekends or early mornings when sales are lowest usually work best.
Here’s how I handle it:
- Open your analytics dashboard (Google Analytics, Matomo, or whatever you use).
- Look at the hourly traffic report for the past few weeks.
- Find the consistent dip — that’s your window.
By migrating during off-peak hours, even if something unexpected happens, only a handful of visitors will notice. I once moved a client’s store at noon on Black Friday — big mistake.
Lesson learned: Plan the migration like you’d plan an event, not an afterthought.
Keep Old Hosting Active Until Fully Verified
It’s tempting to shut down your old hosting the moment your site works on InMotion. I strongly suggest resisting that urge.
Keep your old hosting account active for at least a week after migration.
This overlap ensures:
- Emails still reach you while DNS finishes propagating.
- Visitors stuck on cached DNS records still see your site online.
- You have a backup safety net in case something’s missing.
Think of it like leaving the lights on in your old apartment while you move. You want to make sure nothing was left behind before you hand over the keys.
Use Staging Environments for Large or Complex Sites
If you’re running something more complicated than a simple blog — like an eCommerce store or a membership site — a staging environment is your best friend.
InMotion makes this easy with Softaculous Staging, found in cPanel. With just a few clicks, you can clone your site into a separate folder or subdomain.
Why I recommend it:
- You can test updates, plugins, and themes without breaking the live site.
- It gives you a safe sandbox to check database connections before migration.
- Once everything looks good, you “push” the staging site live.
This is like practicing a play before performing in front of a crowd. No surprises, no panic.
Common Mistakes to Avoid During InMotion Migration
Even experienced developers make migration mistakes. Knowing them upfront helps you sidestep unnecessary stress.
Skipping Backups Before the Transfer
This is the number one mistake — and the most painful one. Without a backup, a failed migration can mean lost files, missing customer data, or even a completely broken site.
Always:
- Download a full backup from your old cPanel.
- Export all databases manually through phpMyAdmin.
- Store backups both locally and in the cloud.
I’ve had people come to me after skipping backups, asking if I could “just recover their database.” Without a backup, there’s often no way back. Don’t gamble on this step.
Forgetting to Update DNS or MX Records Properly
Your website might migrate perfectly, but if you forget about DNS or email settings, visitors may still land on your old server — or worse, your emails could vanish into a void.
I suggest making a DNS “to-do list” before migration:
- Update A records for the new server IP.
- Double-check MX records for email delivery.
- Adjust CNAME records for third-party tools.
The best trick? Screenshot your old DNS zone before making changes. That way, if anything goes wrong, you can replicate the exact setup in InMotion.
Ignoring Post-Migration Performance Monitoring
Migration isn’t finished the second your site loads on InMotion. You need to watch it closely for at least a week.
Things I recommend monitoring:
- Page speed using GTmetrix or Pingdom.
- Error logs in cPanel for PHP or database warnings.
- Bounce rate in Google Analytics (a sudden spike can signal broken links).
I once ignored a client’s error logs after migration. Two weeks later, we found out half the site’s forms had been silently failing. Regular monitoring would have caught it in hours, not weeks.
Final Checks to Guarantee Zero Downtime
Before you close the chapter on your migration, it’s time for a final round of checks. Think of this as your safety inspection before locking the door.
Test Site from Multiple Devices and Locations
Don’t assume your site looks the same everywhere.
Test it like a visitor would.
- Open the site on a laptop, phone, and tablet.
- Switch between Wi-Fi and mobile data.
- Use a VPN or proxy to simulate different regions.
Sometimes stylesheets or scripts behave differently depending on the browser or location. Catching those quirks now saves you from frustrated users later.
Verify Email, Security, and Speed One Last Time
This is your triple-check moment.
- Send test emails from every address you created in InMotion.
- Run an SSL checker to confirm HTTPS is active across all pages.
- Perform another speed test to make sure caching is working properly.
I usually also ask a friend or colleague to test the site without telling them what to look for. Fresh eyes catch issues I might miss because I know the site too well.
Decommission Old Hosting Only After Confirmation
Once everything looks good and emails are flowing, then — and only then — should you cancel your old hosting.
Here’s the order I follow:
- Confirm all DNS records point to InMotion.
- Wait at least a week of stable operation.
- Back up the InMotion version of the site again (just in case).
- Cancel the old hosting plan.
This overlap may feel unnecessary, but trust me, it’s the safety net that ensures your migration is completely seamless.
Conclusion: Your InMotion Migration, Done Right
Migrating to an InMotion server doesn’t have to feel overwhelming or risky. With the right steps, you can move everything — files, databases, email, and services — without your site ever going offline.
The key is preparation: back up your site, double-check compatibility, test thoroughly before flipping DNS, and always give yourself a safety net with your old hosting.
I believe the biggest win in this process is peace of mind. When you know you’ve covered backups, tested staging, and monitored performance, you stop worrying about “what ifs” and can focus on what really matters: running your site and serving your visitors.
InMotion’s tools, like cPanel, AMP, and free AutoSSL, make the transition smoother than most other hosting environments I’ve worked with. Combine that with careful timing and smart testing, and you’ll be able to say you pulled off a zero-downtime migration.
Pro Tip: Build a Mini Migration Checklist
Every time I migrate a site, I keep a short, personal checklist on hand. It keeps me from skipping steps when things get busy.
Here’s a sample you can tweak for yourself:
- Lower DNS TTL to 300 seconds two days before migration.
- Download full site and database backups.
- Test the site using InMotion’s temporary URL.
- Verify SSL certificates and email accounts.
- Monitor DNS propagation and run a speed test.
- Keep old hosting active for at least 7 days.
Tape it to your monitor, keep it in a notes app, or print it out — whatever makes it easy. Having this in front of you takes the stress out of migration because you can literally check things off as you go.

