
Table of Contents
Some links on The Justifiable are affiliate links, meaning we may earn a small commission at no extra cost to you. Read full disclaimer.
Learning how to upload course content to Thinkific is easy; organizing it so students can actually learn from it is where most of the work happens. A rushed upload can leave you with oversized videos, confusing lesson names, broken downloads, and a course structure that becomes painful to update later.
Thinkific gives you several ways to add videos, PDFs, audio, text, quizzes, and external material, but choosing the right workflow matters.
This guide shows you how to prepare, upload, organize, test, troubleshoot, and maintain your course content properly from the beginning.
Understand How Thinkific Organizes Course Content
Before uploading a single file, understand the structure your students will move through. A clean curriculum makes uploading faster now and makes future updates far less disruptive.
Know The Difference Between Courses, Chapters, And Lessons
Think of your Thinkific course as the complete learning product. Inside that course, chapters organize related stages or topics, while lessons contain the material students actually work through.
For example, a photography course might have a chapter called “Camera Foundations.” Inside it, you could create lessons covering exposure, shutter speed, aperture, and ISO. That hierarchy is more useful than uploading 25 videos into one long list and trying to reorganize everything afterward.
There is also an important interface difference in 2026. Thinkific currently has both its Classic Course Builder and a beta New Course Builder. The new experience is available by default on sites created on or after January 28, 2026 and on some earlier sites. The New Course Builder allows multiple content types inside one lesson, while the Classic Course Builder generally organizes content around separate lesson types.
That distinction affects how you should plan your upload. In the new builder, one lesson might contain introductory text, a video, an image, a PDF, and a quiz. In the classic builder, you may create separate video, PDF, audio, quiz, or multimedia lessons.
The interface may differ, but the planning principle does not: organize material according to what the student needs to accomplish, not according to the files sitting on your computer.
Match Each Content Format To Its Learning Purpose
A common mistake is assuming every piece of information should become a video. Video can be excellent for demonstrations, explanations, walkthroughs, and concepts that benefit from seeing or hearing the instructor, but it is not automatically the best format for every lesson.
Use text when students need instructions they may want to scan repeatedly. Use PDFs for reference sheets, templates, checklists, worksheets, or material that benefits from printing. Audio works well when visual information is unnecessary. Quizzes can confirm understanding before students continue.
Downloads should generally support the lesson rather than replace it. If your lesson says only “Download this 20-page workbook and read pages 4–12,” students may have little guidance about what matters. A better lesson briefly explains the objective, provides the necessary teaching, and then positions the workbook as the activity or reference.
Before uploading, ask one question about every file: What does the student need to do with this?
The answer usually tells you where the file belongs and whether it deserves its own lesson. This prevents your curriculum from becoming a storage folder disguised as an online course.
Choose Between Individual Uploads, Bulk Uploads, And Embeds
You do not have to upload every course asset the same way. Your most efficient workflow depends on how much content already exists and which Thinkific builder you are using.
If you have an established course containing dozens of videos, audio files, and PDFs, Thinkific’s Content Uploader can be useful. It accepts batches of video, audio, and PDF content and can automatically create lessons from those files. Thinkific currently allows up to 50 files per Content Uploader batch.
Individual uploads make more sense when you are building lesson by lesson, especially in the New Course Builder. You can create a lesson first, then add the content blocks that belong inside it.
External embedding is another option. The New Course Builder can embed supported externally hosted content, including videos and other web-based material. A creator who already manages videos through Vimeo, YouTube, or Loom, for example, may decide that an external embed suits a particular lesson better than uploading another copy.
Do not choose based only on upload speed. Consider ownership, student experience, bandwidth, future maintenance, privacy, and how often that asset will change.
Prepare Your Course Files Before Uploading
A few minutes of preparation outside Thinkific can prevent hours of renaming, replacing, and troubleshooting later. Treat your original content folder as the source of truth for the course.
Create A Course File Map And Naming Convention
Before opening the Course Builder, create a simple map showing which file belongs to each chapter and lesson. Your filenames should mirror that structure closely enough that you can understand them without opening every asset.
Instead of filenames such as final.mp4, lesson-new-final2.mp4, and worksheet1.pdf, use something systematic:
- 01-01-course-welcome.mp4: Chapter 1, lesson 1 video.
- 01-02-setting-your-goal.mp4: Chapter 1, lesson 2 video.
- 01-02-goal-workbook.pdf: Supporting download for that lesson.
- 02-01-first-workflow.mp4: First lesson in chapter 2.
The exact naming convention matters less than consistency.
Avoid extremely long filenames and unnecessary special characters. Thinkific specifically recommends shorter filenames without special characters when using its Content Uploader. A structured name also helps when the uploader automatically uses your filename as the initial lesson title.
Keep a separate curriculum spreadsheet or document containing the public-facing lesson titles. Filenames are designed for administration; lesson titles are designed for students.
For example, 03-02-email-sequence.mp4 may become “Build Your First Five-Email Welcome Sequence.” That student-facing title communicates an outcome rather than exposing your internal file system.
Optimize Videos Before You Upload Them
Video is usually your heaviest content type, so poor preparation shows up quickly as long upload times and unnecessarily large files.
Thinkific currently allows directly uploaded video files up to 2 GB. For the New Course Builder, the listed direct-upload video formats include MP4, MOV, and M4V. Thinkific recommends MP4 for broad browser compatibility and commonly recommends 1080p for web video rather than assuming every lesson needs maximum resolution.
Your goal should not be to get as close as possible to the 2 GB limit. Compress the final export while maintaining enough quality for the material being taught. A talking-head lesson generally needs less visual detail than a lesson demonstrating fine text, design work, software controls, or detailed diagrams.
Thinkific-hosted videos are processed for online streaming through Wistia, but sending a reasonably optimized source file still reduces the amount of data you need to upload and manage.
Watch your exported video before uploading it. Check the beginning and end, audio synchronization, screen-text readability, and unexpected blank frames.
Uploading a faulty 1.5 GB video and discovering the error during final quality assurance wastes far more time than checking the local file first.
Prepare PDFs, Audio, Captions, And Downloads
Apply the same discipline to your supporting assets. Remove draft notes from PDFs, check worksheet fields, verify that hyperlinks work, and open downloaded files on another device if possible.
In the New Course Builder, Thinkific currently lists a 25 MB maximum for directly added PDFs and a 25 MB maximum for its audio content block. The supported audio formats listed there include MP3, MP4, OGG, WAV, WEBM, AAC, and OPUS. Limits can differ between content contexts and older builder experiences, so check the restriction displayed by your own builder when working with unusually large files.
Prepare captions alongside your video workflow rather than treating accessibility as something to add months later. Thinkific supports SRT caption files for hosted videos, and some plans also provide automatic caption-generation functionality.
Finally, keep original copies outside your course platform. Maintain a master folder containing source videos, final exports, captions, worksheets, images, and editable originals.
The uploaded course should be your delivery environment, not the only surviving copy of your intellectual property.
Build The Course Structure Before Adding Media
Once your files are ready, build the learning path. Creating the structure first keeps uploading focused because every file already has a destination.
Create Chapters Around Meaningful Milestones
A chapter should represent a recognizable stage in the student’s progression. Avoid creating chapters simply because you have accumulated a certain number of videos.
Suppose you are creating a beginner bookkeeping course. A useful sequence might be “Set Up Your Records,” “Record Daily Transactions,” “Reconcile Your Accounts,” and “Prepare Monthly Reports.” Each chapter communicates where the student is and what they are working toward.
Compare that with “Module One,” “Module Two,” and “Module Three.” Those labels organize files for the creator but tell the student almost nothing.
Keep closely related lessons together and avoid making chapters unnecessarily large. If a chapter contains 18 lessons covering several separate outcomes, it may be doing too much. Dividing it into clearer milestones can make course progress feel more manageable.
At the same time, do not turn every small concept into a chapter. A three-minute clarification does not usually need its own major curriculum stage.
Think of chapters as signposts. When a student opens the curriculum after being away for a week, the chapter names should help them understand where they are and what comes next without having to remember your internal logic.
Design Lessons Around One Clear Outcome
Each lesson should move the student one meaningful step forward. That does not mean every lesson must be short, but it should have a recognizable purpose.
A useful lesson-title test is to complete the sentence: “After this lesson, the student can…”
If you cannot answer it clearly, the lesson may contain too many ideas or may not need to exist independently.
For instance, “Email Marketing Part 4” says little. “Write A Welcome Email That Sets Expectations” provides a much clearer learning destination.
In the New Course Builder, a lesson can currently contain up to 25 pieces of content, and you can combine formats such as text, video, images, PDFs, quizzes, downloads, audio, and external content. That flexibility is useful, but it can also tempt you to create oversized lessons.
Do not interpret the technical limit as a design target.
A strong lesson might contain a two-paragraph introduction, one instructional video, three key takeaway bullets, a worksheet, and a short knowledge check. That is one coherent learning unit.
Twenty unrelated assets in one lesson may technically fit while still producing a poor learning experience.
Keep New Content In Draft Until It Is Ready
Draft status gives you room to build without exposing unfinished material prematurely. Thinkific’s classic content workflow sets newly created chapters and lessons to draft by default.
Use that state intentionally.
Upload the asset, rename the lesson, add supporting text, verify the downloadable file, check captions, and preview the student experience before considering the lesson ready. This is especially important when several people are working on one course.
You can also create a lightweight production status system outside Thinkific:
- Prepared: Final file exists but has not been uploaded.
- Uploaded: Asset is inside the course.
- Formatted: Lesson title, text, downloads, and settings are complete.
- QA complete: Someone has tested the lesson as a learner.
- Published: Content is intentionally available.
This prevents “uploaded” from being mistaken for “finished.”
For a large course, I recommend approving one complete chapter before importing everything else. That first chapter becomes your template. You can establish naming, lesson length, text formatting, download placement, captions, and quiz style before repeating an imperfect structure 40 times.
The fastest course-building workflow is usually not uploading everything at once. It is perfecting one repeatable lesson pattern before you scale it across the curriculum.
How To Upload Course Content To Thinkific Step By Step
With your curriculum and files prepared, you can begin the actual upload. The most efficient route depends on whether you are bulk-importing existing assets or assembling lessons inside the New Course Builder.
Upload Existing Videos, Audio, And PDFs In Bulk
If your Thinkific site provides the Content Uploader for the course you are editing, use it when you already have a substantial library of finished video, audio, or PDF files.
The classic workflow is straightforward:
- Open Products: Select Courses from your Thinkific admin area.
- Choose Your Course: Open the course you are building.
- Open The Content Area: Access the course’s Content Uploader.
- Create Or Choose A Chapter: Give the incoming lessons the correct destination.
- Select Upload Content: Drag files into the uploader or browse your computer.
- Allow Uploads To Finish: Do not close the uploader while active files are still transferring.
- Rename And Reorder: Update automatically generated lesson names and place lessons in the right sequence.
Thinkific currently accepts a maximum of 50 files in one Content Uploader batch. Each uploaded file creates a corresponding lesson, using the filename as its initial lesson name.
That behavior is why earlier file preparation matters.
Upload chapter by chapter instead of dumping your entire course into one batch. You reduce sorting work and make failures easier to identify.
If one chapter contains eight assets, upload those eight, confirm their placement, then continue. A controlled migration is usually faster than cleaning up a giant unsorted import afterward.
Add Content In The New Course Builder
The New Course Builder uses a more flexible block-based workflow. Instead of deciding that an entire lesson must be a “video lesson” or “PDF lesson,” you create the lesson and add the components it needs.
Open your course, select or create the appropriate chapter, and add a lesson. From the lesson’s content menu, choose the content type you want to insert.
For example, you might build a lesson in this order:
- Text: Explain what the student will accomplish.
- Video: Add the main teaching or demonstration.
- Text: Summarize the important decisions or steps.
- PDF: Add a reference guide or worksheet.
- Downloads: Attach any files students need to edit locally.
- Quiz: Check whether the critical concept was understood.
The current New Course Builder supports direct video uploads, images, PDFs, audio, quizzes, downloads, text, and various forms of embedded external content. Changes are automatically saved, and the builder provides a learner-style preview while you work.
Do not add every available block simply because you can. Use the minimum combination needed to teach the lesson clearly.
A short text lesson may need nothing else. A technical demonstration may need video, supporting instructions, and a template.
Add Individual Content In The Classic Course Builder
If you are working in the Classic Course Builder, create or select a chapter and use Add Lesson to choose the lesson type you need.
A video lesson contains a hosted video and can include additional supporting material. A PDF lesson displays a PDF. Audio lessons handle audio content, while quiz, presentation, downloads, survey, assignment, and multimedia options address other use cases available within the classic environment.
The practical advantage of individual creation is control. You can finish each lesson before moving to the next instead of importing first and editing later.
That approach is especially useful when your course does not already exist as finished files.
For example, you might create the chapter, add the first video lesson, upload the recording, write two paragraphs beneath it, attach the worksheet, save it, preview it, and then begin lesson two.
Bulk uploading is usually faster for migration. Individual lesson creation is usually cleaner for a new course that is still being assembled.
Do not feel obligated to choose one method for the entire course. You can bulk-upload an existing video library and create quizzes, assignments, text, and supporting lessons individually afterward.
Turn Uploaded Files Into Better Learning Experiences
Getting files onto the platform completes only the technical part. The next stage is turning those assets into lessons students can understand, navigate, and complete.
Add Context Before And After Your Main Content
Students should not have to press play and guess why a video matters.
Before your primary lesson content, provide a short introduction explaining what the student will learn, what they need before starting, and what they should pay particular attention to.
After the teaching, reinforce the next action.
A practical lesson structure might look like this:
- Objective: Explain the result the learner is working toward.
- Instruction: Provide the video, text, audio, or demonstration.
- Key Takeaway: Reinforce the decision or concept that matters most.
- Action: Ask the student to complete a worksheet, task, exercise, or implementation step.
- Check: Use a quiz or self-review where understanding needs verification.
This structure is particularly useful for dense technical training because students know what to do rather than simply consuming content.
Avoid reproducing an entire video transcript beneath every lesson unless the transcript serves an accessibility or reference purpose. Supporting text should improve the lesson, not create unnecessary duplication.
If a 12-minute video explains the complete workflow, the text below it might contain the five-step checklist students need while implementing it.
That gives the lesson a second layer of usefulness rather than repeating what they just watched.
Use Downloads And Quizzes With A Clear Purpose
Downloads should help students apply what they have learned. Good examples include templates, spreadsheets, checklists, swipe files, planning documents, sample data, reference guides, or printable worksheets.
Give downloadable files descriptive names. budget-planning-template.xlsx is far more useful than document7.xlsx, particularly after the student has downloaded several resources.
Explain what to do with the file as well. “Download the template” is technically correct but incomplete. A better instruction might be: “Download the planning template, enter your three priority offers, and bring the completed version into the next lesson.”
Use quizzes selectively.
A quiz is valuable when incorrect understanding would create problems later, when students need reinforcement, or when you want them to recall an important distinction. You do not need five quiz questions after every three-minute lesson.
When a course is practical, application can be more useful than recall. Asking a learner to build something may demonstrate competence better than asking them to identify a definition.
Your course content should support progress, not simply maximize the number of interactive elements.
Use External Content Without Making The Course Fragile
External content can extend what your course can do. Thinkific’s newer builder can embed supported externally hosted media, documents, forms, presentations, web content, and certain interactive packages.
Use external embeds when they provide a genuine advantage, but remember that they create another dependency.
If a lesson relies on an externally hosted document and someone later changes its sharing permissions, your students can lose access even though nothing changed inside Thinkific. The same problem can occur when an external video is deleted, made private, or moved.
Create a simple external-content register for large courses. Record the lesson name, embedded resource, owner, and reason it is being embedded.
Periodically test those resources.
For essential learning material, I generally prefer content you control directly wherever practical. External services are useful for specialized interactivity, frequently changing resources, or material already managed elsewhere, but the core course should not become a chain of fragile embeds.
Treat every external embed as a dependency. If losing access to that service would make the lesson unusable, have a backup or replacement plan.
Test Every Lesson Before You Publish
Your administrator view cannot tell you everything about the student experience. Quality assurance should happen before enrollment begins, not after the first support email arrives.
Preview The Course From A Learner’s Perspective
Thinkific provides course-preview functionality so you can inspect your curriculum from the learner side. The New Course Builder is designed to make the building view closely reflect the learner experience, while Thinkific’s course tools also provide preview options for checking the course as a student.
Work through the course in order.
Do not merely open every lesson and confirm that something appears on the screen. Read the instructions, play the videos, use the navigation, open the PDFs, click the links, download the resources, and submit sample quiz answers.
Then repeat key checks on a smaller screen.
A lesson that looks comfortable on a desktop monitor can become awkward on mobile if it contains huge images, dense text blocks, embedded content that does not scale well, or instructions that assume two windows are visible simultaneously.
Pay attention to transitions between lessons as well.
Does lesson five mention a worksheet that actually appears in lesson six? Does the instructor say “click the link below,” even though the link was removed? Does the video call the next chapter by an old name?
These continuity errors are easy to miss when content was produced over several weeks.
Check Accessibility, Links, And Downloads
Accessibility should be part of your publishing checklist rather than an optional upgrade.
For video, confirm that captions exist where needed and that they accurately represent names, technical terminology, numbers, and specialized language. Automatically created captions can save time, but they still deserve review.
Thinkific supports uploaded SRT captions for hosted videos, including multiple caption files where different languages are required.
For text, use meaningful headings and readable paragraph lengths. Avoid relying entirely on color to communicate important distinctions. If an image contains essential instructional information, provide the same information in an accessible form where necessary.
Open every downloadable file after downloading it from the actual lesson. This catches corrupted uploads, wrong versions, and permission problems.
Test outbound links in a private browser window where you are not logged into the services you use as an administrator. A resource that opens perfectly for you may fail for students because your personal account has permission.
The same rule applies to embedded documents.
Testing without your normal authenticated session gives you a much more realistic view of what a new student will encounter.
Test Course Progression And Access Rules
Content can work individually while the course experience still fails because of progression settings.
If you use prerequisites, confirm that they block and release later material as intended. Thinkific’s New Course Builder currently allows lessons to be designated as prerequisites, restricting access to later chapters until the required material has been completed. It also supports free-preview lesson settings for exposing selected content before purchase.
If you use drip scheduling, verify the release logic against the actual student experience. If a launch email promises that chapter three becomes available on Friday, the course configuration should agree.
Test graded quizzes using both passing and failing attempts where they control progression.
Also check what happens at the end of the course. Students should understand that they have finished, what action to take next, and where any promised completion resources appear.
A useful final test is to create a small learner checklist and complete it exactly as a real customer would.
Administrators naturally know how the course is supposed to work. Students do not. Your testing should assume no hidden knowledge.
Fix Common Upload And Course-Player Problems
Even well-prepared courses occasionally encounter upload or playback problems. The key is diagnosing the right layer rather than repeatedly uploading the same file and hoping it works.
Fix Videos That Upload Slowly Or Keep Processing
Large video files naturally take longer to transfer, particularly on slower or unstable connections. Start by checking the source file rather than assuming Thinkific is malfunctioning.
Confirm that the export is comfortably below the current 2 GB direct-upload limit. If it is unnecessarily large, compress or re-export it using web-appropriate settings before trying again. Thinkific itself recommends reducing video file size to improve upload performance.
During a Content Uploader batch, do not close the active uploader page before unfinished files complete. Thinkific warns that leaving the uploader during an active transfer can cancel the upload. You can open a second browser tab if you want to work elsewhere in the course while the transfer continues.
Remember that upload completion and processing completion are different stages.
A successfully transferred video may still need encoding before it becomes ready for playback. If a video appears unavailable immediately after upload, give the processing stage a chance to finish and check its status before replacing the file.
If one particular video repeatedly fails while others work, create a fresh export of that file. A corrupted or unusual source encoding can cause problems even when the filename and extension look normal.
Resolve Unsupported Or Oversized Files
When an upload fails immediately, check file type and size first.
For the New Course Builder, directly uploaded videos currently support MP4, MOV, and M4V with a 2 GB maximum. PDFs are limited to 25 MB, while the builder lists specific supported formats and limits for other asset types.
If your file exceeds the limit, you usually have three sensible options: compress it, divide it into smaller learning units, or use another supported delivery method.
Splitting a huge file can actually improve the course.
A 90-minute video may be technically compressible enough to fit, but separating it into six focused lessons often creates a better learning experience and makes future updates easier. If only the fourth concept becomes outdated, you replace one segment instead of re-editing the entire recording.
For PDFs, remove unnecessary high-resolution images and export a web-optimized copy while retaining the editable original separately.
Do not simply rename a file extension. Changing video.xyz to video.mp4 does not convert the underlying format.
Use proper export or conversion software so the actual media encoding matches the format Thinkific expects.
Diagnose Content That Looks Wrong After Uploading
If the file uploaded successfully but the lesson looks wrong, isolate the problem.
First, determine whether the issue occurs in the source file or only inside the course. Open the original PDF, image, video, or audio file locally. If the problem already exists there, replace the source.
Next, preview the lesson in another browser or device. Browser extensions, cached files, or local settings can occasionally make an isolated problem appear platform-wide.
For external embeds, check sharing permissions and the original service. If a document requires your personal login, students will probably encounter the same access restriction.
Also inspect lesson order and content placement. In the New Course Builder, content blocks can be rearranged, so an instructional paragraph may simply have ended up below the wrong asset.
When troubleshooting, change one variable at a time.
Replacing the video, renaming the lesson, changing permissions, editing the embed, and rearranging content simultaneously may fix the problem, but you will not know what caused it.
A methodical diagnosis becomes especially valuable once you manage several courses and need a repeatable support process.
Optimize And Scale Your Course Content Workflow
Once the first course works properly, your goal changes from getting content online to maintaining a system that can support future updates, additional courses, and more students.
Build A Reusable Asset And Backup System
Reusable content can save considerable production time, but only when it remains organized.
Thinkific’s newer asset-library workflow is designed to provide centralized storage for media and documents that can be reused across course content. Thinkific also notes that sites created on or after January 28, 2026 use the asset library in place of the older video-library workflow.
Use reusable assets intentionally.
A company introduction, standard disclaimer, software setup guide, or orientation resource may belong in several courses. Instead of uploading slightly different copies everywhere, maintain an approved master version where the platform permits reuse.
Outside Thinkific, preserve an equally disciplined archive.
A practical folder structure might contain:
01-source-files02-final-video03-audio04-pdfs-and-downloads05-captions06-images07-archived-versions
Include version numbers or dates only when they genuinely help you identify revisions.
Your backup system becomes increasingly important as the business grows. If a contractor edits a worksheet or a team member replaces a video, you should be able to recover the previous version without trying to extract your entire production history from the live course.
Measure Where Content Needs Improvement
Do not treat publishing as the end of course development. Once real students begin using the content, their behavior can reveal problems that were invisible during production.
Look for patterns such as students repeatedly asking the same question, abandoning the same chapter, misunderstanding one instruction, or skipping a resource you considered essential.
Thinkific provides video analytics in its hosted-video management experience, while course progress and learner data can provide additional signals depending on the features and builder you use. Some newer-builder analytics capabilities are still evolving, so work with the reporting available on your current site rather than designing your entire measurement strategy around one specific screen.
Numbers also need context.
A low video completion rate does not automatically mean the video is bad. Students may obtain the answer they need in the first six minutes of a 25-minute recording. Conversely, a 100% completion indicator does not guarantee understanding.
Combine platform data with support questions, quiz performance, assignment quality, surveys, and direct learner feedback.
Your aim is not to optimize for superficial engagement. It is to identify where the learning path prevents students from achieving the promised outcome.
Update Published Content Without Creating Chaos
Courses inevitably change. Software interfaces evolve, regulations change, examples become outdated, and instructors discover better ways to explain difficult ideas.
Designing for updates from day one makes those changes much safer.
Prefer modular lessons over giant pieces of content. Keep original editable files. Record which lessons depend on external resources. Maintain consistent filenames. Document significant curriculum changes so team members understand what was replaced and why.
Be particularly careful when changing the structure of a course that already has active learners. Thinkific notes that when content is added to a published course, student progress may need to be recalculated so progress data remains current.
Before making a large structural change, think through the learner consequence.
If someone is 80% through the original curriculum, what happens when you add five required lessons near the beginning? Would a supplementary chapter be less disruptive? Could the new material be optional for existing learners?
Technical flexibility does not automatically make every change educationally sensible.
Build your first version as though you will need to update it next year. Organized files, modular lessons, and documented dependencies turn future maintenance into an editing task instead of a reconstruction project.
Start With A Course System You Can Maintain
Knowing how to upload course content to Thinkific is only the first layer of building a reliable online course. The better approach is to create the curriculum first, prepare and name your files consistently, optimize heavy media, choose the right upload method, and test every lesson before students receive access.
Start with one chapter and make it your quality standard. Confirm the lesson structure, video settings, downloads, captions, quizzes, and student flow before repeating that pattern throughout the course.
Once everything works, use Thinkific as the delivery layer within a broader content-management system rather than the only place your course exists.
That approach takes slightly more preparation at the beginning, but it gives you a course that is easier to publish, easier for students to navigate, and considerably easier to update as your content and business grow.

I’m Juxhin, the voice behind The Justifiable.
I’ve spent 6+ years building blogs, managing affiliate campaigns, and testing the messy world of online business. Here, I cut the fluff and share the strategies that actually move the needle — so you can build income that’s sustainable, not speculative.
Related posts:
 Best Elearning Platform: Top 10 Solutions for Online Education Success
 Sell Online Courses: Effective Marketing Strategies for Maximum Revenue
 How Does Udemy Work? Your Ultimate Guide to the Online Learning Platform
 Free Invoice Software: Top 10 Solutions for Small Businesses and Freelancers
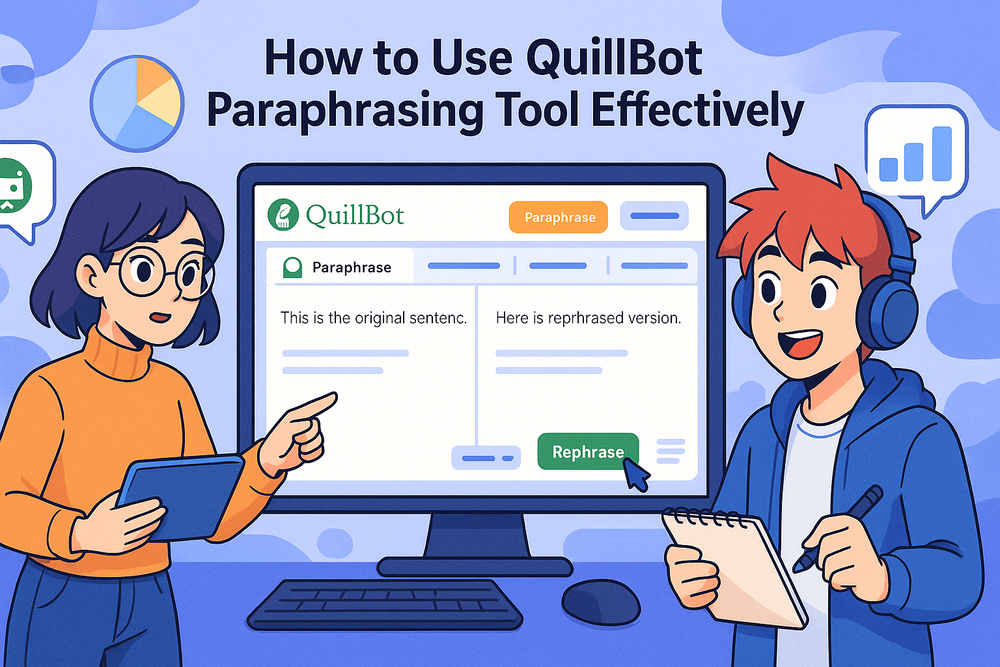 How to Use QuillBot Paraphrasing Tool Effectively
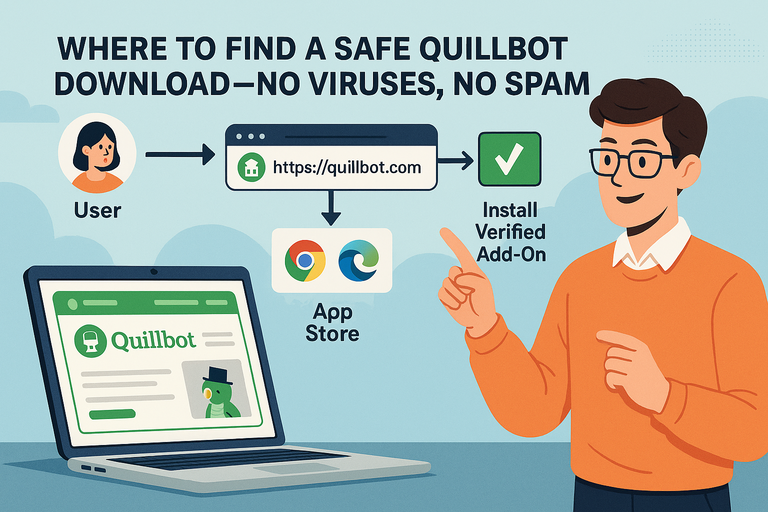 Where to Find a Safe Quillbot Download—No Viruses, No Spam