Table of Contents
Hosting WordPress can feel overwhelming when you’re just starting out, but it doesn’t have to be.
What if you could launch your very first site in just 10 minutes without getting lost in confusing settings or tech jargon? How do you pick the right hosting plan, set up WordPress quickly, and get your site live without stress?
In this guide, I’ll walk you through every step so you can go from zero to a working WordPress site faster than you thought possible.
Choose The Right Hosting Plan For WordPress
Finding the right hosting plan is the first big step to getting WordPress up and running. The type of hosting you pick will decide how fast your site feels, how secure it is, and how much you’ll end up paying every month.
Let’s break it down in plain English.
Shared Hosting Explained In Simple Terms
Shared hosting is the entry-level option most beginners go for. Imagine renting a room in a big apartment building. You have your own space, but you’re sharing electricity, water, and Wi-Fi with everyone else.
That’s how shared hosting works: your website sits on the same server as hundreds of others, all splitting the same resources.
The upside is cost. Shared hosting plans often start as low as $2–$5 a month. Providers like Bluehost, Hostinger, or HostGator market these as “starter” packages because they’re cheap and easy to set up. The downside is performance—if a “neighbor” site on your server gets a big traffic spike, your site might slow down.
For a personal blog, small portfolio, or test project, shared hosting works just fine. I suggest it if you want the cheapest way to dip your toes into hosting WordPress without overthinking things. But if you’re already serious about building a brand or business, it’s worth considering the next step up.
Why Managed WordPress Hosting Saves Time For Beginners
Managed WordPress hosting is like hiring a housekeeper for your apartment. Instead of handling all the cleaning, repairs, and chores yourself, someone else does it for you. In hosting terms, that means updates, backups, caching, and security are automatically taken care of by the host.
This can save you hours of headaches. For example, companies like WP Engine, Kinsta, and Flywheel are built specifically for WordPress. Their dashboards are beginner-friendly, with one-click staging (to test changes before going live) and automatic speed optimization.
If you’ve never set up a website before, I believe managed hosting is worth the higher price because it lets you focus on learning WordPress itself, not fixing broken plugins or worrying about site security. The tradeoff? It usually costs $20–$30 a month, which is a noticeable jump compared to shared hosting.
Still, if time matters more than budget, I’d say this is the fastest, smoothest way for a beginner to launch WordPress without stress.
Comparing Monthly Costs And What To Expect In Features
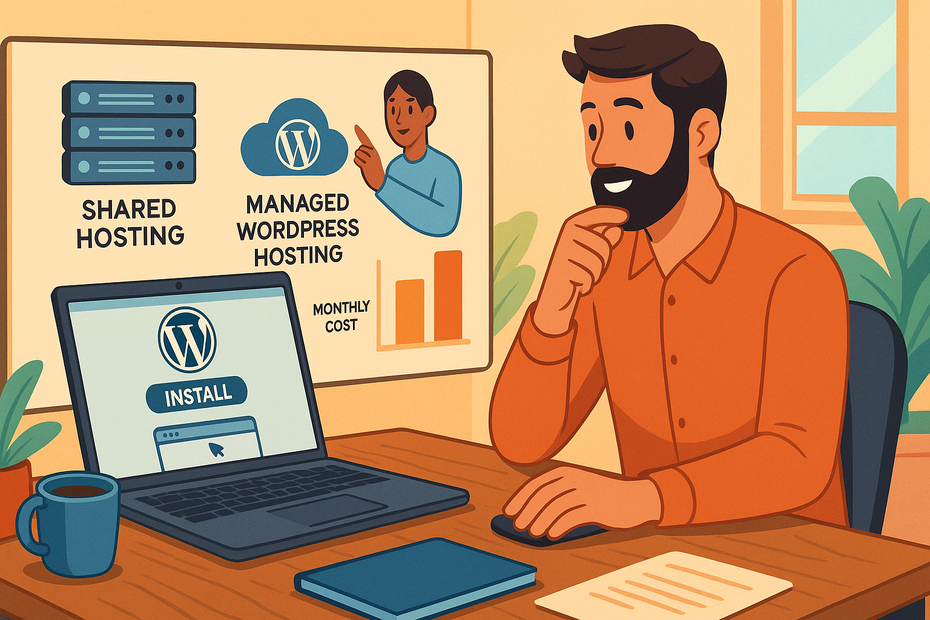
Here’s where people get stuck—price tags. Shared hosting is budget-friendly, but you’ll need to handle more of the technical side. Managed hosting costs more, but saves you from the technical grind. To make it clearer, here’s a quick side-by-side comparison:
| Feature | Shared Hosting | Managed WordPress Hosting |
| Average Monthly Cost | $2 – $5 | $20 – $30+ |
| Speed & Performance | Basic, can slow down | Optimized for WordPress |
| Security | Basic, add-ons needed | Built-in and monitored |
| Backups | Often manual or paid | Automatic daily backups |
| Updates | Do-it-yourself | Auto-updates included |
| Best For | Hobby sites, blogs | Business sites, beginners who want “done for you” setup |
From what I’ve seen, most beginners start cheap with shared hosting and later upgrade to managed once they outgrow it. That’s perfectly fine—you don’t need to get it right forever, just right for right now.
Register A Domain Name In Minutes
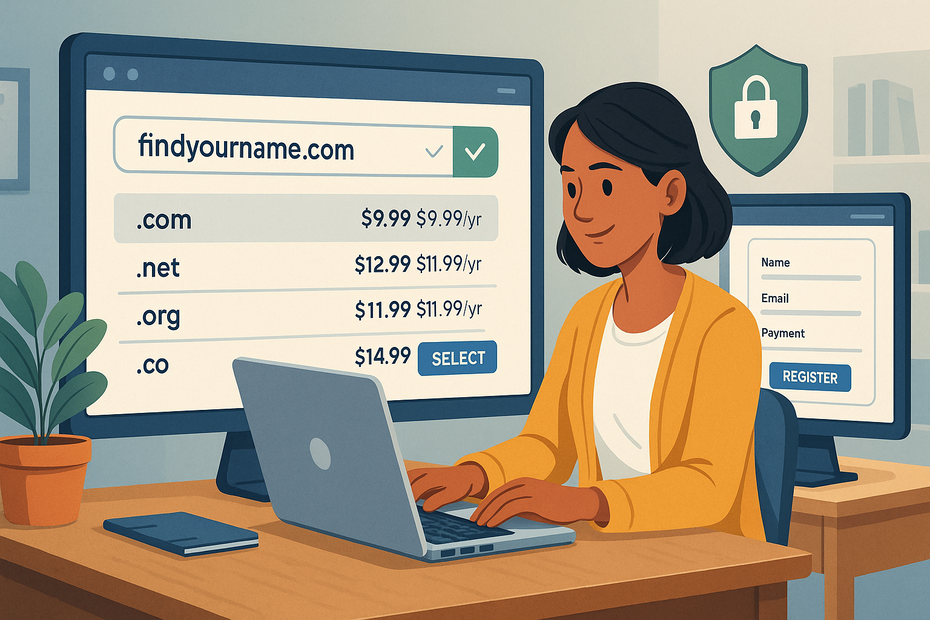
Once you’ve chosen hosting, you need a domain name—the web address people type to find you. Think of it as your home’s street address on the internet.
Registering a domain takes just a few minutes, but picking the right one matters more than most people realize.
Tips For Picking A Memorable Domain That Fits Your Brand
Your domain is your first impression. I suggest keeping it short, clear, and easy to spell. For example, “alexphotography.com” is better than “alex-captures-the-moment-photography.com.” Avoid hyphens, numbers, or confusing spellings that people will mistype.
If your ideal name is already taken, try small variations. Instead of “brightdesign.com,” you could try “brightdesignstudio.com” or “brightdesigns.co.” For businesses, sticking with a .com is still best, but .co, .io, or .net can also work.
Here’s a quick trick I use: Say the domain name out loud. If you have to explain how to spell it, it’s too complicated.
How To Register A Domain Through Your Hosting Provider
Most hosting companies let you register a domain as part of signing up. On the checkout page, you’ll see a box that says something like “Enter your desired domain.” You type in your idea, and it will tell you if it’s available. If it is, you can claim it right away.
For example, if you’re using Inmotion Hosting:
- Go to the signup page.
- Choose a hosting plan.
- Under “Domain Name,” type in your idea.
- If available, add it to your plan for free (some hosts give the first year free).
That’s it—your domain and hosting get bundled together. The hosting company automatically configures the DNS (domain name system) so your domain points to your server. This saves you from having to mess with extra settings.
Connecting Your Domain To Your WordPress Hosting Account
If you bought your domain from a different registrar (like Namecheap), you’ll need to point it to your hosting provider. That sounds scarier than it is.
Here’s how it usually works:
- Log into your domain registrar (e.g., Namecheap).
- Find the “DNS” or “Nameservers” settings.
- Replace the current nameservers with the ones your hosting company gave you (usually something like ns1.host.com and ns2.host.com).
- Save your changes.
Once you do this, it can take a few hours for the internet to update (called “propagation”). After that, typing your domain into a browser will lead people straight to your WordPress site.
I always recommend keeping both domain and hosting with the same provider if you’re just starting out. It cuts down on setup complexity and avoids those “Why isn’t my site showing up?” headaches that often frustrate beginners.
Set Up Your Hosting Account Without Confusion
Setting up your hosting account is usually the first real “tech step” in hosting WordPress. It’s where most people get nervous, but I promise it’s much easier than it looks.
The key is to go slow and pay attention to the small details, like your login information and where things are in your dashboard.
Creating Your Hosting Account And Adding Login Details
When you sign up for a hosting plan, you’ll be guided through a simple checkout process. Here’s what usually happens:
- Pick your hosting plan – Shared, managed, or whichever you decided on.
- Enter your personal info – Just like any online purchase.
- Choose your domain – If you’re registering a new one, type it in here.
- Set up your account login – This part is important. You’ll create a username and password that you’ll use to access your hosting account.
I suggest writing these credentials down somewhere safe, or better yet, using a password manager like Bitwarden. Too many beginners lose access because they rely on browser autofill and forget their actual details.
Some hosts (like SiteGround or Bluehost) send you a “Welcome Email” with direct login links. Always keep that email bookmarked because it’s the fastest way back to your dashboard if you forget the URL.
Navigating The Hosting Dashboard For The First Time
Once you log in, you’ll land on your hosting dashboard. Think of it as the control panel for your website—it’s where you manage domains, email accounts, backups, and most importantly, WordPress itself.
The design varies depending on your provider, but here’s a quick breakdown of what you’ll usually see:
- My Sites / Websites Tab – Shows any websites you’ve added. This is where you’ll install or access WordPress.
- Domains Tab – Lets you manage domain names, point them to hosting, or buy extras.
- Email Tab – If your hosting includes email, this is where you set it up (e.g., you@yourdomain.com).
- Advanced / cPanel – This section holds tools like Softaculous, file managers, and databases. Don’t worry, you won’t need most of this as a beginner.
I always suggest clicking around your dashboard for 5–10 minutes just to get familiar. Don’t worry about breaking anything—nothing saves unless you confirm changes. Think of it like walking through a new house before moving your furniture in.
Linking Domain And Hosting So They Work Together
Your domain is the name, and your hosting is the house. Now we need to connect the two. If you bought your domain from the same company as your hosting, this usually happens automatically. But if you purchased the domain somewhere else, you’ll need to connect it manually.
Here’s how to do it:
- Log into your domain registrar (for example, GoDaddy).
- Find “DNS Settings” or “Nameservers.”
- Replace the existing nameservers with the ones your hosting provider gave you (you’ll find these in your hosting dashboard or welcome email).
- Save changes.
It can take a few hours for the internet to update these changes. This is called propagation. While waiting, don’t panic if your site doesn’t load right away—that’s normal.
Pro tip: Keep your domain and hosting under the same provider if possible. It just makes life easier for beginners and avoids the common “site not showing up” stress.
Install WordPress In One Click
Here’s the fun part—you’re about to actually install WordPress. Most modern hosting companies make this ridiculously easy with auto-installers. You don’t need coding skills or any deep technical know-how to do this in under five minutes.
Using Auto-Installer Tools Like Softaculous Or cPanel
If your hosting uses cPanel (a standard control panel), you’ll usually see a section called Softaculous Apps Installer or simply WordPress Installer.
Here’s the usual process:
- Go to your hosting dashboard.
- Click WordPress Installer or Softaculous > WordPress.
- Click Install Now.
- Choose your domain from the dropdown (the one you registered earlier).
- Fill in basic site details like your site title and tagline (don’t overthink this—you can change it later).
- Set your admin username, password, and email. Write these down somewhere safe.
- Click Install and wait a few seconds.
That’s it. Once complete, you’ll see a success screen with a link to your WordPress login page, usually something like:
yourdomain.com/wp-admin
Bookmark that URL—it’s where you’ll log in to manage your site from now on.
Manual Installation Steps If Auto-Install Isn’t Available
Sometimes, especially with smaller or more advanced hosting providers, you might not see a one-click installer. In that case, you’ll need to install WordPress manually. Don’t worry—it sounds scarier than it is.
Here’s the short version:
- Download WordPress from wordpress.org.
- Upload the files to your hosting account using the File Manager or FTP.
- Create a MySQL database inside your hosting dashboard and assign a user to it.
- Visit your domain in a browser, and the WordPress setup wizard will guide you the rest of the way (it will ask for your database name, username, and password).
Manual installs take longer, but they give you more control. Still, if your host offers an installer, I’d always suggest using it as a beginner.
Setting Up Your WordPress Admin Login Securely
Your WordPress admin login is the master key to your site. It’s tempting to pick something easy like “admin” and “password123,” but please don’t. Hackers know those tricks.
Here’s how to keep your login secure without making your life harder:
- Use a unique username – Avoid “admin.” Pick something like your first name plus a number.
- Choose a strong password – At least 12 characters with a mix of letters, numbers, and symbols.
- Add a recovery email – So you can reset your password if you get locked out.
- Enable two-factor authentication (2FA) – Many plugins like Wordfence or Sucuri make this easy.
From now on, you’ll log into your site at yourdomain.com/wp-admin with the credentials you just created. That’s your new workspace—your WordPress dashboard—where the real fun begins.
Configure WordPress Settings Quickly
Once WordPress is installed, it’s tempting to jump straight into themes and design. But before you do, it’s smart to adjust a few basic settings. These tweaks only take a few minutes, but they’ll save you from headaches later.
Adjusting General Settings Like Site Title And Tagline
The first stop is the Settings > General tab in your WordPress dashboard. Here’s where you define the identity of your site.
- Site Title – This shows up in search results and browser tabs. For example, if your brand is “Bright Coffee Roasters,” make that your title.
- Tagline – A short phrase under your title. By default, WordPress says “Just another WordPress site.” Replace it with something simple and descriptive like “Small-batch coffee, roasted daily.”
- Timezone, Date, and Time Format – Set this correctly so scheduled posts and analytics align with your local time.
I always recommend filling these in right away. A half-forgotten tagline or wrong time zone may not seem important now, but it can make your site look unpolished later.
Setting Up A Static Homepage Or Blog Layout
WordPress lets you decide what visitors see when they first land on your site. You’ll find this under Settings > Reading.
- Static Homepage – Great if you’re building a business site or portfolio. For example, your homepage can feature a welcome message, services, or a call-to-action.
- Latest Posts – Ideal if you’re running a blog and want visitors to see your newest content front and center.
Here’s how I like to do it: create a new blank page titled “Home,” then another titled “Blog.” In the Reading settings, set “Home” as the static page and “Blog” as the posts page. This gives you a clean homepage while keeping your blog organized separately.
Managing Permalinks For Cleaner URLs
By default, WordPress gives posts URLs like:
yourdomain.com/?p=123
Not exactly user-friendly. To fix this, go to Settings > Permalinks and choose the “Post Name” option. This makes your URLs look like:
yourdomain.com/sample-post/
It’s cleaner, better for SEO, and easier to share.
If you’re planning a content-heavy site, you can also structure URLs to include categories, like:
yourdomain.com/category/post-name/
But for most beginners, sticking with “Post Name” is the simplest and best choice.
Pick And Install A Beginner-Friendly WordPress Theme
Now comes the fun part—making your site look like, well, your site. Themes control the design, and WordPress gives you thousands to choose from. The trick is not to get overwhelmed.
Finding Free Themes In The WordPress Repository
Inside your dashboard, head to Appearance > Themes > Add New. You’ll see the official WordPress theme repository with thousands of free options.
Use the Feature Filter to narrow by layout, subject, or features. For example:
- A minimalist blog? Try “Astra” or “GeneratePress.”
- A photography portfolio? Look at “OceanWP” or “Neve.”
- A small business? “Hestia” is a solid starter.
Free themes are great for beginners because they’re easy to install, usually lightweight, and won’t cost a dime.
Installing Premium Themes For More Design Options
If you want more control, premium themes are worth considering. Marketplaces like ThemeForest or providers like StudioPress offer professional designs starting at around $50.
Here’s how to install one:
- Purchase and download the theme (it usually comes as a .zip file).
- In your dashboard, go to Appearance > Themes > Add New > Upload Theme.
- Upload the .zip file, install, and activate.
I suggest premium themes if you need specific layouts or want built-in customization tools without coding. For example, Divi and Avada come with visual builders that let you drag and drop page elements.
Activating And Customizing Your Chosen Theme
Once activated, head to Appearance > Customize. This opens the WordPress Customizer, where you can adjust colors, fonts, menus, and widgets in real time.
I recommend starting simple:
- Upload your logo.
- Adjust your brand colors.
- Set a readable font.
Don’t get stuck on perfection. The beauty of WordPress is you can tweak later. I often advise beginners to get the basics up and running, then refine as they grow more comfortable.
Add Essential Plugins For A Functional Site
Plugins are like apps for WordPress—they add features without requiring you to code. But here’s the catch: too many plugins slow your site down. I recommend starting with just a few essentials.
Installing A Security Plugin To Protect Your Site
Security matters, even for small sites. Hackers often target WordPress because it’s so popular. Luckily, you can add protection in minutes.
Popular options include Wordfence and Sucuri. Both offer firewalls, login protection, and malware scanning.
To install:
- Go to Plugins > Add New.
- Search “Wordfence Security.”
- Click Install Now > Activate.
Once active, follow the setup wizard. For example, Wordfence will prompt you to add your email for security alerts—definitely do this.
Adding A Backup Plugin For Safety
Imagine building your site for weeks, then losing everything to a server crash or mistake. That’s where backups save the day.
I like UpdraftPlus because it’s free and lets you back up directly to Google Drive or Dropbox. That way, you’re not relying solely on your host.
After installing, go to Settings > UpdraftPlus Backups > Settings and connect it to your cloud storage. Set automatic backups daily or weekly depending on how often you update content.
Using A Caching Plugin To Improve Speed
Nobody likes a slow website. In fact, studies show visitors bounce if a page takes more than 3 seconds to load. Caching plugins help by storing a “ready-to-go” version of your site, reducing server strain.
A beginner-friendly option is Litespeed Cache. Install it, activate it, and enable caching with one click.
Here’s a tip: Test your site speed before and after caching using a tool like GTmetrix. It’s always satisfying to see your load time drop.
Create Your First Pages And Posts
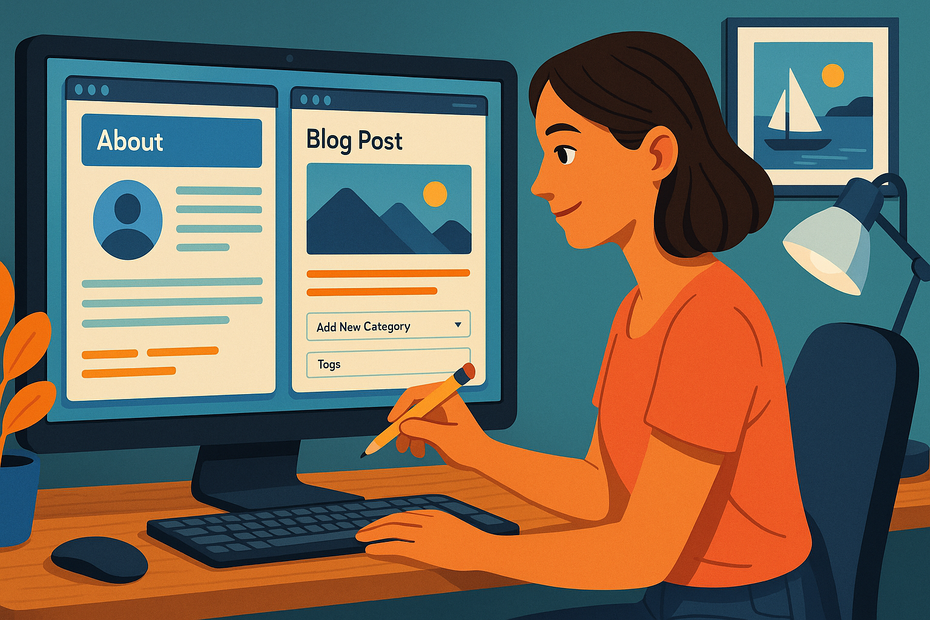
Now that your WordPress site is set up, it’s time to add content. Think of pages as the “permanent” parts of your site, like an About or Contact page, while posts are for blog entries or updates. Getting these right early helps your site look polished and professional.
Setting Up An About Page To Introduce Yourself
The About page is often one of the most-visited sections of a website. People want to know who’s behind the site and why it exists.
Here’s how to create one:
- In your dashboard, go to Pages > Add New.
- Title it “About” (keep it simple—this is what visitors expect).
- In the editor, write a short introduction about yourself, your story, or your brand.
- Add a photo of yourself or your team—it makes the page feel more personal.
- Hit Publish.
I recommend keeping it conversational. Instead of a stiff bio, imagine explaining to a friend what your site is about and why it matters. That tone creates trust.
Writing A Blog Post And Adding Images
Posts live under Posts > Add New. The block editor makes writing feel like working in a Word document.
Here’s a quick flow:
- Add a title like “My First Blog Post.”
- Write your content in short, clear paragraphs.
- Use Heading blocks (H2, H3) to break up sections.
- Drag and drop images into the editor, or click the + block > Image to upload.
Pro tip: compress images before uploading with a tool like TinyPNG. Large files slow your site down, and speed matters both for readers and for SEO.
Organizing Content With Categories And Tags
Without organization, your blog can quickly become messy. That’s where Categories and Tags come in.
- Categories are broad topics. For example, if your site is about cooking, categories might be “Recipes,” “Tips,” and “Reviews.”
- Tags are more specific. For a pasta recipe, tags could be “Italian,” “dinner,” or “vegetarian.”
You can add these from the right-hand panel when editing a post. I suggest starting with 3–5 broad categories and using tags sparingly for context. This not only helps readers navigate but also improves SEO by giving structure to your content.
Test Your Site Before Launching It Live
Before announcing your site to the world, it’s worth doing a quick test run. Think of it as checking your outfit in the mirror before stepping into a big meeting.
Checking Responsiveness On Mobile And Tablets
Over half of web traffic comes from mobile devices. If your site only looks good on a laptop, you’ll lose visitors.
Here’s how to check:
- In your dashboard, go to Appearance > Customize. Most themes let you preview desktop, tablet, and mobile views.
- Alternatively, open your site on your phone and scroll through every page.
If things look cramped, try adjusting font sizes, images, or menus in the Customizer. Most modern themes are mobile-friendly by default, but it’s worth double-checking.
Testing Links And Contact Forms For Functionality
Click every button, every menu item, and every link. A broken link is like a dead-end street—it frustrates visitors and hurts SEO.
If you’ve installed a contact form plugin (like WPForms or Optinmonster), submit a test message. Make sure it actually delivers to your email. I’ve seen beginners lose clients because their form didn’t work, and they never realized it.
Reviewing Page Speed And Fixing Common Issues
Speed is a ranking factor for Google and a patience factor for visitors. To test yours, go to a free tool like GTmetrix or PageSpeed Insights and run your domain.
Common quick fixes:
- Compress images before uploading.
- Use a caching plugin (like WP Super Cache).
- Limit the number of plugins—stick to essentials.
I like to think of speed as hospitality. A fast site is like greeting visitors at the door instead of making them wait in the cold.
Launch Your WordPress Site And Share It
Now comes the big moment: going live. This is where your work pays off, and your site finally becomes visible to the world.
Publishing Your Site For The World To See
By now, your site is technically live—but if you left it in “Coming Soon” mode or private during setup, it’s time to turn that off.
In some hosting dashboards (like Bluehost), there’s a Launch Site button. If you used a “Coming Soon” plugin, just deactivate it.
Take a deep breath—congratulations, you’re live!
Submitting Your Site To Google Search Console
To help Google find your site faster, submit it through Google Search Console. Here’s the quick path:
- Visit Search Console and sign in with your Google account.
- Add your domain as a new property.
- Verify ownership (your host often has a one-click integration, or you can upload a small file).
- Submit your sitemap, which WordPress generates at: yourdomain.com/sitemap.xml
This tells Google exactly what pages exist, speeding up indexing.
Sharing Your Website On Social Media To Drive Visitors
Don’t just wait for people to stumble on your site—share it. Post your launch on Facebook, Twitter, LinkedIn, or wherever your audience hangs out.
A simple message like: “Excited to share my new website! Check it out at [yourdomain.com]” is often enough to start driving visitors.
If you want a quick traffic boost, share individual posts rather than just your homepage. A blog post about “5 Easy Pasta Recipes” will draw more clicks than just “Check out my new site.”
I also suggest adding your website link to your email signature and social media profiles. These small touches add up and start building steady traffic over time.

