Table of Contents
MailerLite automation can completely transform how you connect with customers, nurture leads, and scale your business without working around the clock.
Have you ever wondered how top-performing brands keep their email marketing running smoothly while focusing on other parts of their business?
In this guide, we’ll walk through how to use MailerLite automation step-by-step to build relationships, boost conversions, and grow your business effortlessly.
Understanding the Power of MailerLite Automation
MailerLite automation is like your business’s quiet assistant — working behind the scenes to connect, nurture, and convert leads while you focus on bigger things.
Whether you’re welcoming new subscribers, sending follow-ups, or nudging customers to complete a purchase, automation helps you deliver the right message at exactly the right time.
How MailerLite Automation Works Behind the Scenes
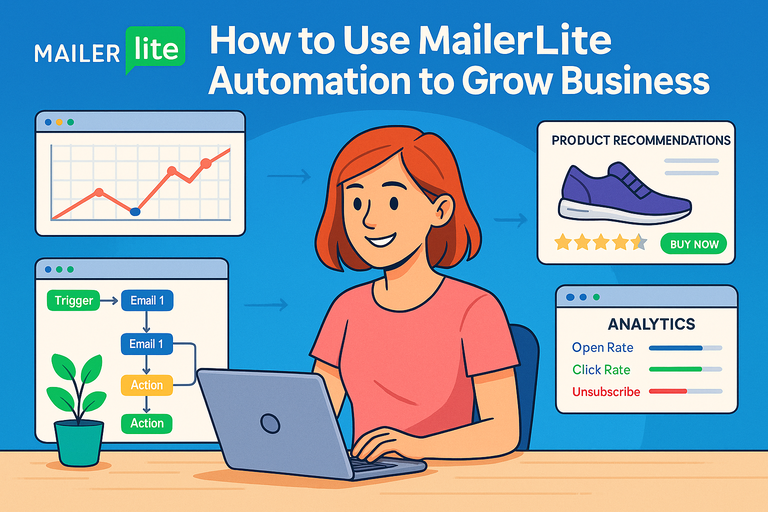
Think of MailerLite automation as a flowchart of “if this, then that” actions. You create a workflow, which is a sequence of automated steps triggered by subscriber behavior.
Here’s how it works in simple terms:
- Triggers: A subscriber performs an action — like signing up for your newsletter or buying a product.
- Actions: MailerLite automatically sends a relevant email, waits for a few days, or applies a custom tag.
- Conditions: These help personalize the flow. For example, “If subscriber clicked link X, send Email A. If not, send Email B.”
Example: From your MailerLite dashboard, go to Automation → Create Workflow → Choose Trigger. You might select “When subscriber joins group” as your trigger, then add a sequence of emails.
I like to think of it as programming your own marketing autopilot — except you don’t need to code anything. Once it’s running, MailerLite does the heavy lifting, ensuring your subscribers get timely, personalized messages every time.
Why Automation Beats Manual Email Campaigns Every Time
Manual campaigns have their place, but they rely on constant attention.
Automation, on the other hand, gives you:
- Consistency: Every subscriber gets the same great experience, no matter when they sign up.
- Scalability: One workflow can handle 10 or 10,000 subscribers with zero extra effort.
- Better Engagement: Timed emails sent at the right moment naturally get higher open and click rates.
- Saved Time: Once a workflow is built, it runs automatically. You can focus on strategy instead of scheduling.
I’ve seen businesses grow their engagement rates by up to 30% just by setting up a single automated welcome series. It’s not magic — it’s simply giving people what they need when they’re most receptive.
Common Mistakes Beginners Make With MailerLite Automation
Even simple systems can go wrong if rushed. Here are the most common beginner missteps — and how to avoid them:
- Starting Without a Plan: Before you open MailerLite, map out your customer journey. Know what you want subscribers to do at each step.
- Sending Too Many Emails Too Quickly: Pace matters. If your subscribers feel bombarded, they’ll unsubscribe.
- Ignoring Testing: Always preview and test every workflow. Send test emails to yourself first to check links, personalization, and timing.
- Forgetting to Segment: Don’t treat all subscribers the same. Use MailerLite’s Groups and Segments to tailor content to user behavior or interest.
A good workflow feels invisible — it just works. The bad ones, unfortunately, announce themselves loudly through high unsubscribe rates and low engagement.
Setting Up Your First Automation Workflow
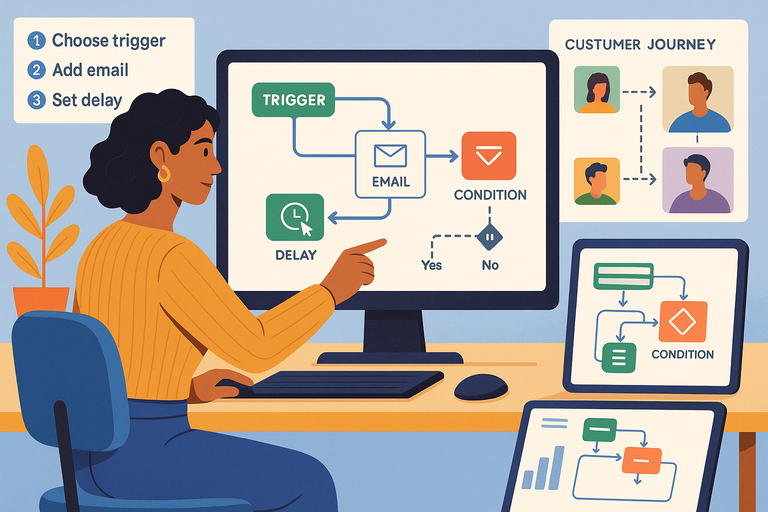
Before you dive in, remember: your first workflow doesn’t need to be fancy. A simple welcome sequence or lead nurture flow is often the best starting point.
Choosing the Right Trigger to Start Your Automation
Triggers are the “starting pistol” for your workflow — they decide when an automation begins.
In MailerLite, you can choose triggers such as:
- When subscriber joins a group (e.g., “New Newsletter Subscribers”)
- When a specific form is completed
- When a subscriber clicks a link
- When a date arrives (useful for renewals or birthdays)
Example UI path: From the dashboard, click Automation → Create Workflow → Choose Trigger.
Pro tip: Start with “When subscriber joins a group.” It’s simple, reliable, and flexible enough for most beginners. You can always layer on complexity later.
Mapping the Customer Journey Before Creating a Workflow
I always recommend sketching out your subscriber journey first — either on paper or a tool like Miro.
Ask yourself:
- What’s the first email a subscriber should receive?
- What do you want them to do next?
- What happens if they don’t engage?
Mapping helps you see the logical flow before building.
Example: If a new lead signs up for a free guide, your flow might look like this:
- Send welcome email with the guide.
- Wait 2 days → Send follow-up email with more value.
- Wait 3 days → Send offer or invitation to join your product demo.
By visualizing the sequence, you’ll avoid confusion once you move to MailerLite’s builder.
How to Use the Visual Builder in MailerLite Effectively
MailerLite’s Visual Builder is one of its most intuitive tools — a drag-and-drop canvas for your automation.
UI walkthrough:
- Go to Automation → Create Workflow.
- Pick your trigger.
- Use the + icon to add actions like “Send Email,” “Delay,” or “Condition.”
- Name each step clearly (e.g., “Send Welcome Email,” “Wait 2 Days,” “Send Offer”).
Best practices:
- Preview each email directly inside the builder.
- Use “Notes” blocks to document why each step exists — future-you will thank you.
- Test often: Run a test by adding your own email to the trigger group.
I suggest starting simple — maybe 3–5 steps — and watching the results before expanding.
Automating Welcome Emails to Build Trust Quickly
A well-crafted welcome automation is like a warm handshake. It’s your first chance to build trust, showcase value, and invite your subscriber into your world.
Creating Personalized Welcome Sequences That Convert
A good welcome sequence should feel conversational, not corporate.
I usually structure mine like this:
- Email 1: Thank them for joining and deliver the promised resource.
- Email 2: Share your story or mission — why you do what you do.
- Email 3: Offer a small win or tip to build credibility.
- Email 4: Invite them to take the next step (e.g., join a webinar or explore your product).
In MailerLite, you can build this by setting up a trigger (“joins group: new subscribers”) and adding a series of Send Email and Delay actions.
Pro tip: Keep your first email short and friendly. Subscribers are most engaged right after signup — don’t waste that moment with fluff.
Using Dynamic Fields for a More Human Touch
Dynamic fields personalize each message automatically — for example, inserting the subscriber’s first name.
Example: “Hi [First Name], welcome to our community!”
In MailerLite, you can add these fields easily: While editing an email → click { } icon → choose a field (like Name, Company, or City).
For extra impact, go beyond names. Mention how they signed up (“Thanks for downloading our eBook!”) or reference their interests.
I’ve found that emails using just one or two well-placed personalization fields can increase click-through rates by 10–15%.
Testing and Optimizing Welcome Emails for Engagement
Automation doesn’t mean “set and forget.” I recommend revisiting your welcome sequence every month to see how it performs.
Track these metrics inside MailerLite:
- Open Rate: Tells you if your subject lines are working.
- Click Rate: Measures engagement with your content.
- Unsubscribes: Warns you if something feels off.
Quick optimization tips:
- A/B test your subject lines (Mailerlite lets you do this easily from the Campaign editor).
- Reorder your emails if engagement drops midway through the sequence.
- Shorten your delays if you notice subscribers losing interest.
Once your automation feels right, it runs like clockwork — a small system continuously welcoming, connecting, and converting.
Pro Tip: Start with one automation — your welcome sequence — and treat it as your laboratory. Watch the data, tweak it weekly, and let real results guide your next workflow.
Nurturing Leads With Automated Email Sequences
Once you’ve welcomed new subscribers, the next step is nurturing them — guiding potential customers from curiosity to confidence.
MailerLite automation makes this process smooth and scalable, letting you build meaningful relationships with minimal effort.
Segmenting Subscribers Based on Behavior and Interests
One-size-fits-all emails don’t work anymore. Segmentation is how you make automation personal. In MailerLite, segments let you group people based on shared traits or actions — so every email feels relevant.
Here’s how to do it step-by-step:
- Go to Subscribers → Segments → Create Segment.
- Choose your filter conditions. For example:
- “Clicked link” → Interested in a topic.
- “Opened campaign” → Engaged subscriber.
- “Did not open last 3 emails” → Needs re-engagement.
Example: If you’re running an online fitness brand, you might have one segment for “Yoga Enthusiasts” and another for “Weight Training Beginners.” Each group can receive customized content — workout plans, tips, or product recommendations — based on their interests.
I believe segmentation is where your automation really starts to feel human. When you send people what they actually care about, engagement rates can jump by as much as 25–40%.
Crafting Content That Guides Leads Through the Funnel
Your automated email sequences should gently move subscribers through the classic funnel: awareness → consideration → decision.
Here’s a simple 3-step sequence you can build in MailerLite:
- Awareness (Day 1–3): Share educational content or quick wins. Example: “5 Ways to Simplify Your Email Marketing.”
- Consideration (Day 4–6): Introduce your product or service subtly — maybe a behind-the-scenes story or case study.
- Decision (Day 7+): Send a direct call-to-action — like “Try MailerLite free for 14 days” or “Book a quick call.”
Pro tip: Inside your MailerLite automation, use Delays to space out your emails and Conditions to personalize based on engagement.
When I design sequences, I picture a real person reading on their phone over coffee. They don’t want hard sells — they want clarity, empathy, and proof that I understand their problem. That mindset makes automation authentic.
When and How to Add Manual Touchpoints for Higher Conversions
Automation doesn’t mean removing the human touch. In fact, strategic manual follow-ups can double conversion rates in some industries.
Here’s what I suggest:
- Add manual check-ins when a lead reaches a critical decision point (like downloading a pricing guide).
- Use MailerLite’s “Notification Email” feature to alert your team when a lead meets a key condition (e.g., “Clicked pricing page link”).
- Send a one-line email like “Hey [Name], noticed you were exploring [Product]. Want help finding the right plan?”
This mix of automation + manual outreach feels both efficient and personal — exactly the balance modern email marketing needs.
Increasing Sales With Product Recommendation Automations

Sales-focused automations are where MailerLite shines.
Once your lead nurturing is running smoothly, you can use purchase data to send perfectly-timed product suggestions and recover lost sales opportunities.
Setting Up Abandoned Cart Sequences That Recover Revenue
The average cart abandonment rate hovers around 70%, but a good automation can rescue a third of those lost sales.
Here’s how to set it up:
- Go to Automation → Create Workflow.
- Choose Trigger: “Abandoned cart” (if using MailerLite e-commerce integration).
- Add your sequence:
- Email 1 (1 hour after abandonment): Gentle reminder, “Hey [Name], did something catch your eye?”
- Email 2 (24 hours later): Highlight product benefits or reviews.
- Email 3 (48 hours later): Offer an incentive like free shipping or a limited-time discount.
Example scenario: A boutique skincare brand used this exact setup in MailerLite and saw a 22% recovery rate within two weeks.
My advice? Keep your first cart email short and visually focused — include a product image and a clear “Return to cart” button.
Using Purchase History To Send Smart Product Recommendations
MailerLite can track past purchases (via e-commerce integrations like Shopify or WooCommerce) and use that data for future targeting.
How to do it:
- Sync your store with MailerLite.
- Create segments such as “Purchased Product X” or “Spent over $100.”
- Build an automation:
- Trigger: “When subscriber joins group Purchased Product X.”
- Action: Send recommendation email — “Pair your new [Product X] with [Product Y].”
This approach works wonders for upsells and cross-sells. I’ve seen clients increase repeat purchase rates by 15–25% using personalized product follow-ups.
Pro tip: Avoid overdoing it — two to three well-spaced product emails work better than constant promotions.
Measuring ROI From Sales-Based Automations
To know if your automations are truly profitable, you’ll need to track performance metrics regularly.
In MailerLite, go to Automation → Reports to view:
- Revenue per email (if e-commerce is connected)
- Conversion rate per workflow
- Click and open rates
What I do: I export the data every month and track metrics in a simple spreadsheet. Over time, you’ll see which emails drive the most sales and where people drop off.
You can even A/B test automation emails directly in MailerLite to refine your tone, visuals, and timing.
Retaining Customers Through Post-Purchase Automation
Customer retention often gets less attention than acquisition, but it’s where profit multiplies.
MailerLite automation helps you keep customers engaged long after their first purchase — building loyalty, trust, and advocacy.
Sending Follow-Up Emails That Strengthen Brand Loyalty
Follow-ups shouldn’t feel robotic. They’re your opportunity to check in, say thank you, and make customers feel valued.
Example sequence:
- Email 1 (Immediately after purchase): “Thank you for your order!” Include next steps or tracking details.
- Email 2 (3–5 days later): Share tips on getting the most from the product.
- Email 3 (2 weeks later): Ask if they’re satisfied or need support.
In MailerLite, this is as simple as: Automation → Create Workflow → Trigger: “Product Purchased” → Add timed actions.
I’ve found that friendly, service-focused post-purchase emails reduce refund rates and boost customer lifetime value by as much as 20%.
Encouraging Reviews and Referrals With Timed Sequences
Social proof drives future sales — and automation makes it easy to collect.
How to do it in MailerLite:
- Trigger your workflow: “After purchase → Wait 10 days.”
- Send an email asking for a review or referral.
- Include a direct link to your review page or referral form.
Pro tip: Offer a small reward — like loyalty points or a discount on the next purchase.
In one of my client campaigns, automated review requests increased response rates from 4% to nearly 18% simply because the timing aligned with when users had already tried the product.
Using Re-Engagement Campaigns To Win Back Inactive Customers
No matter how good your product is, some customers go silent. Instead of letting them drift away, use a re-engagement automation.
Example workflow:
- Trigger: Subscriber hasn’t opened an email in 60 days.
- Email 1: “We miss you — here’s what’s new.”
- Email 2 (after 3 days): Offer something valuable (like a resource or discount).
- Email 3: “Still want to stay subscribed?” — a gentle opt-out reminder that keeps your list clean.
MailerLite makes this easy: Subscribers → Segments → “Inactive 60 days” → Create Automation.
This simple automation can help recover up to 10–15% of dormant users and improve your overall deliverability rate.
Pro Tip: Every automation — from lead nurturing to re-engagement — should feel like an ongoing conversation, not a sales pitch. Keep your tone genuine, your timing smart, and your subscribers will reward you with loyalty that lasts.
Tracking and Optimizing Automation Performance
Once your MailerLite automation workflows are running smoothly, it’s time to dig into the numbers. Tracking performance helps you see what’s working — and what’s quietly leaking conversions.
MailerLite gives you powerful analytics tools to measure, test, and fine-tune every step.
Key Metrics To Monitor in MailerLite Analytics
When you open your MailerLite dashboard, head to Automation → Reports. Here you’ll find the heartbeat of your campaigns — all the data that tells you how your automation is performing.
Here are the metrics I pay the most attention to:
- Open Rate: Shows how many people are opening your emails. Low open rates usually mean your subject lines or send times need tweaking.
- Click Rate: Reflects engagement. If clicks are low, your call-to-action (CTA) might be buried or unclear.
- Unsubscribe Rate: A healthy list loses less than 0.5% per email. Higher than that, and you’re either sending too often or missing relevance.
- Conversion Rate: This is your money metric — how many people take the action you want (purchase, signup, booking, etc.).
- Revenue Tracking (if e-commerce is integrated): MailerLite can show sales generated directly from automations, helping you see real ROI.
Example: From Dashboard → Automation → Reports → Workflow Name, you’ll see a breakdown of each email’s performance. If your first welcome email gets 60% opens but your third drops to 20%, it’s time to revisit the sequence pacing or subject lines.
I suggest setting aside time every two weeks to check your data. Regular review keeps small issues from becoming big leaks.
A/B Testing Automation Elements for Better Results
A/B testing (also called split testing) lets you compare two versions of an email to see which performs better. MailerLite makes this easy — and it’s one of the smartest ways to improve engagement.
To run an A/B test:
- Go to Campaigns → Create Campaign → A/B Split Campaign.
- Choose what to test — subject line, email content, or sender name.
- MailerLite will send both versions to a sample of your audience. The winner (based on opens or clicks) gets sent to the rest.
If you want to test automation emails, simply duplicate your email step in the workflow and tweak one element — then track results manually.
Pro tip: Don’t test too many things at once. I always start with subject lines because they have the biggest immediate impact.
Example:
- Subject A: “Your free guide is ready!”
- Subject B: “Don’t miss your free guide — grab it here.”
That small difference can lift open rates by 10–20%. Over time, consistent A/B testing gives you clear insights into what your audience loves most.
Using Data To Refine Future Automation Strategies
Data is storytelling in numbers. Once you gather enough, you’ll start seeing clear behavioral patterns.
Here’s how I use it to improve automation:
- Low open rates? Rework subject lines and sending times.
- Low click rates? Simplify design and move CTAs higher.
- High unsubscribes? Revisit your audience segments — maybe you’re sending the wrong content to the wrong group.
In MailerLite, you can also export analytics reports (CSV format) and use tools like Google Sheets or Notion to visualize trends.
The goal is iterative growth — small, data-backed improvements that make your automation smarter each month.
Advanced MailerLite Automation Techniques
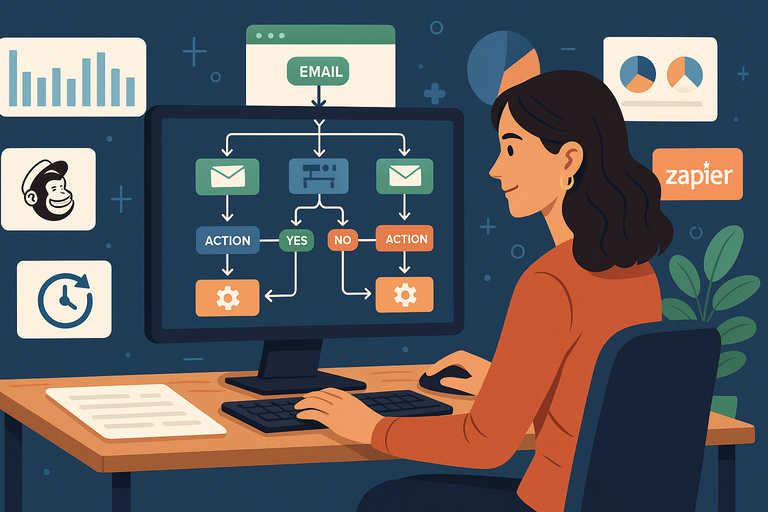
Once you’ve mastered the basics, you can start layering advanced automation techniques. These give your workflows more flexibility, depth, and personalization — helping your brand feel intelligent and responsive.
Combining Multiple Workflows for Complex Journeys
Sometimes one workflow isn’t enough. For example, you might want a lead nurturing flow that hands off to a sales sequence when a user shows buying intent.
Example setup:
- Workflow A (Welcome Sequence) ends with a condition: “If clicked link = Pricing Page → Add to group ‘Interested Leads.’”
- Workflow B (Sales Sequence) starts when a subscriber joins “Interested Leads.”
How to build this: Go to Automation → Create Workflow → Choose Trigger: “When subscriber joins group.” Then, design Workflow B for sales nurturing.
By connecting workflows like puzzle pieces, you create a seamless customer journey from signup to purchase — without micromanaging every step.
Integrating MailerLite With Other Business Tools
Integration is where MailerLite becomes part of your business ecosystem. Connecting tools automates data flow and expands what your automations can do.
Top integrations to consider:
- Shopify/WooCommerce: Sync purchase data for smarter recommendations.
- Zapier or Make (Integromat): Automate tasks like adding webinar attendees to MailerLite groups.
- Stripe: Trigger automations when payments are completed.
- Google Sheets: Automatically log new subscribers or campaign performance data.
Example: I use Zapier to connect Typeform → MailerLite. When someone fills out a quiz, they’re instantly added to a group that triggers a tailored automation. No manual imports, no delay.
Integrations keep your ecosystem flowing, ensuring no lead slips through the cracks.
Using Conditional Logic To Personalize Every Step
Conditional logic in MailerLite is a hidden gem. It lets you branch your workflow based on subscriber behavior — creating highly personalized experiences.
Example: You can add a condition like:
- If subscriber clicked link A → send Email B.
- Else → send Email C.
To set this up: In your workflow, click + → Add Condition → Choose Condition Type (e.g., “Clicked link”).
Pro tip: Keep conditions simple at first — two or three branches maximum. Complexity is powerful, but it’s easy to lose clarity if you go overboard.
Conditional logic transforms automation from static to dynamic, making every subscriber journey feel unique.
Common Automation Challenges and How To Solve Them
Even well-built automations occasionally stumble. The key is knowing what to look for and how to fix it fast.
Fixing Delays and Trigger Errors in Workflows
If your emails aren’t sending as expected, it’s often due to trigger issues or timing delays.
Quick troubleshooting checklist:
- Check if the trigger group or form is active.
- Make sure new subscribers are actually entering the workflow.
- Review “Delay” settings — long gaps might make it seem like nothing’s happening.
- Run a test by adding your own email to the trigger group.
If that doesn’t fix it, go to Automation → Workflow Settings → Activity Log. This shows who entered, when, and where the flow stopped.
I always test with a dummy subscriber first — it saves a ton of time later.
Avoiding Over-Automation That Annoys Subscribers
Too much automation can make your brand feel robotic. The goal isn’t to flood inboxes; it’s to send the right message at the right time.
Here’s how to stay balanced:
- Don’t stack multiple workflows with overlapping audiences.
- Space emails by at least 2–3 days unless context demands otherwise.
- Periodically review workflows to remove outdated or redundant ones.
Example: A fitness brand once had subscribers in both a “New Leads” and “Newsletter” automation, receiving six emails in a week. Engagement tanked. After merging them into a single, well-paced flow, click rates doubled.
Quality beats quantity — every time.
Maintaining Deliverability and Clean Email Lists
Your automation is only as good as your deliverability. If emails end up in spam, all your work goes unnoticed.
Best practices to maintain high deliverability:
- Use double opt-in forms to ensure valid subscribers.
- Regularly clean inactive users (MailerLite lets you filter “Unengaged” contacts).
- Avoid spammy words like “free $$$” or “urgent deal.”
- Authenticate your domain using DKIM and SPF in MailerLite’s settings.
Example path: Go to Account Settings → Domains → Authenticate.
A clean list means better inbox placement, higher open rates, and stronger sender reputation.
Expert Tips To Maximize Growth With MailerLite Automation
Once your automations are optimized and stable, it’s time to think about scaling — building a self-sustaining system that continuously grows your business.
Creating Evergreen Campaigns That Run Themselves
Evergreen automations are timeless — they work year-round without needing updates.
Examples:
- Welcome sequences that introduce your brand.
- Onboarding flows for new customers.
- Educational mini-courses that deliver value over weeks.
Pro tip: Review each evergreen workflow every 6–12 months to refresh links, visuals, and tone — just to keep it current.
It’s like setting up a reliable marketing machine that never sleeps.
Scheduling Regular Automation Audits for Long-Term Success
I recommend doing a full automation audit every quarter. It’s a fancy term for reviewing what’s still performing and what’s outdated.
Here’s my audit checklist:
- Are all links and CTAs working?
- Have new products or offers been added since?
- Are metrics (open, click, conversion rates) holding steady?
- Is the messaging still relevant to your audience?
You can export performance reports in MailerLite and sort by “Last Updated” to catch old workflows.
Small updates regularly are easier — and more effective — than total overhauls once a year.
Leveraging Data-Driven Insights To Scale Your Business
Data is your map for scaling automation. Once you’ve tested and tracked enough, you can confidently invest in what’s proven to work.
How to scale smartly:
- Expand winning workflows to new segments.
- Increase budget on campaigns that show strong ROI.
- Clone top-performing sequences and localize them for new markets.
Example: If your welcome series converts 12% of leads into customers, replicate its structure for new lead magnets or audiences.
MailerLite’s combination of simplicity and analytics power makes scaling a joy rather than a headache.
Pro Tip: Automation is never “done.” It’s a living system that learns, adapts, and grows with your business. Treat your MailerLite workflows as relationships, not machines — keep them updated, personal, and relevant. That’s how automation stops being a tool and becomes your quiet, unstoppable growth engine.

