Table of Contents
Aweber Sign Up is often the very first step to building an audience that actually listens. But how do you get started without wasting time on confusing setup screens?
What’s included in the free plan, and how quickly can you go from creating an account to sending your very first email?
If you’ve been wondering how to launch your list without feeling overwhelmed, this walkthrough will show you exactly what to do.
By the end, you’ll not only have your account ready but also your first list, signup form, and email campaign up and running.
This guide is about getting you moving fast, while keeping things simple and free.
Create Your Free Aweber Account In Minutes
Getting through the Aweber sign up process is quick if you know exactly where to click and what to expect. The goal here is to get you into the dashboard fast, without second-guessing steps.
Choose The Right Plan To Start For Free
When you first land on the Aweber homepage, you’ll notice two options: the free plan and the pro plan. The free plan is surprisingly generous, letting you store up to 500 subscribers and send up to 3,000 emails per month.
For someone just starting out, that’s more than enough. I recommend beginning here unless you already have a large list ready to migrate.
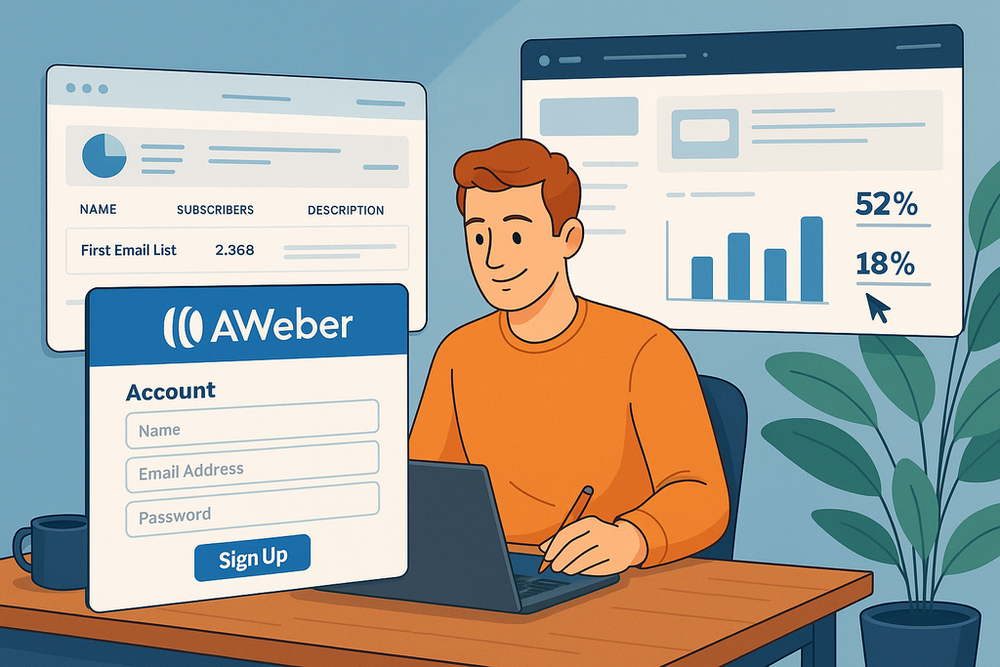
Once you hit the green “Sign Up Free” button, the system will guide you into account creation. The free plan doesn’t require a credit card upfront, which means you can test everything before committing.
This makes it easy to experiment with email templates, automation, and sign up forms without financial pressure. Think of it as a test drive—you can try every button and feature until you’re comfortable.
Here’s where people often overthink: Worrying about missing features. In practice, the free plan gives you access to almost everything you’ll need to launch, including landing pages and email automation.
The paid plan becomes necessary only when you scale beyond that first 500-subscriber mark or want advanced analytics. So unless you’re already building a sizable list, don’t rush the upgrade.
Enter Basic Details To Unlock Your Account
After selecting the plan, Aweber asks for the basics: your name, email address, and a password. This may feel like the obvious step, but I suggest choosing a work email instead of a personal Gmail or Yahoo. Using a professional address here sets the tone for credibility and makes later verification easier.
A small but important note: when creating your password, make it strong but memorable. You’ll be accessing Aweber regularly, and resetting passwords can interrupt momentum. I advise using a password manager like Bitwarden or 1Password so you don’t have to juggle logins.
The form is short, so you’ll be inside in less than two minutes. This simplicity is part of Aweber’s appeal—you don’t get bogged down with unnecessary questions at the start. Instead, the platform guides you straight into the setup process.
Confirm Your Email To Access The Dashboard
Before you can play with templates or lists, Aweber sends a confirmation link to the email address you registered with. Don’t skip this—until you click it, your account remains in limbo.
I always suggest checking both your inbox and spam folder. Sometimes verification emails land in odd places, especially with free email providers. Once you confirm, Aweber immediately unlocks your dashboard, where you’ll see tabs like “Messages,” “Subscribers,” and “Lists.”
This step does two things: it proves you’re a real human, and it ensures the email address you plan to use later is working properly.
From experience, I know this prevents headaches when your first broadcast email goes out. You want to be sure that subscribers see your messages, not bounce-backs.
Set Up Your Aweber Profile And Sender Details
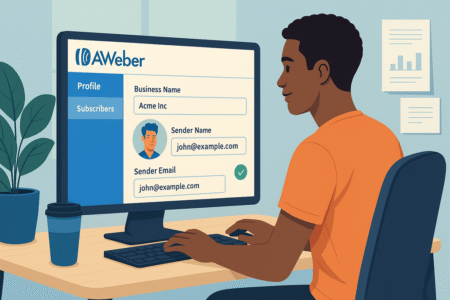
Once your account is unlocked, the next critical step is setting up your profile. This part often gets skipped, but it directly affects how your emails appear to subscribers and whether they even reach inboxes.
Add Business Name And Contact Information
From the dashboard, head to “List Options” and then “List Settings.” Aweber requires a business name and physical mailing address for compliance with anti-spam laws like CAN-SPAM.
Don’t panic—if you’re a solo creator working from home, you can use a P.O. box or a virtual office address instead of your personal address.
This information shows up at the bottom of every email you send, so accuracy is key.
I suggest matching it to your brand’s official identity, whether that’s your business name or personal brand name. Consistency builds trust, and subscribers will recognize your emails as legitimate.
Skipping this step makes your campaigns look unprofessional, and worse, it can get you flagged as spam. Think of it as adding your business card inside every email—transparent, clear, and trustworthy.
Configure Sender Email For Professional Delivery
Now, the sender email. This is one of the most overlooked details in the entire Aweber sign up process. Using a free Gmail or Yahoo address as your sender will hurt deliverability and credibility. Your emails might end up in spam folders, even for people who want to hear from you.
Instead, configure a custom email tied to your domain, like “hello@yourdomain.com.” Inside Aweber, you’ll be prompted to enter this sender email under “List Settings.” Once you save it, Aweber will send a quick verification link to that address. Click it, and you’re set.
I recommend setting up a domain-based email through your hosting provider or a service like Google Workspace. It may feel like an extra step, but it dramatically increases your chances of landing in inboxes instead of spam folders.
In my experience, this one adjustment can boost open rates significantly.
Verify Domain Or Email To Improve Deliverability
Aweber goes a step further by allowing domain verification, which is crucial if you want the best deliverability. This involves adding a DNS record to your domain settings (something your hosting provider can help with). Doing so proves that Aweber has permission to send emails on your behalf.
Why does this matter? Email services like Gmail and Outlook use authentication to decide whether to trust your messages. Without verification, your emails risk being filtered out. With verification, your emails have a much higher chance of landing directly in inboxes.
This isn’t a glamorous step, but it’s one of the most important. I advise treating it as a one-time investment in better performance. Once set up, you don’t need to touch it again, and the payoff is steady, reliable deliverability.
Build Your First Email List With Aweber
Inside Aweber, your email list is the heart of everything. It’s where your subscribers live, where campaigns begin, and how you keep things organized.
Setting up your first list takes just a few steps, but it’s worth doing carefully because this foundation affects all future emails.
Name Your List To Keep Campaigns Organized
When you go to the dashboard, click on “Manage Lists” and then “Create a List.” The very first field asks for a list name. This may seem small, but naming your list clearly can save a lot of headaches later.
For example, if you plan on having one list for your blog subscribers and another for customers who’ve bought a product, labeling them as “Blog Newsletter” and “Course Buyers” makes everything clear at a glance.
I learned the hard way that vague names like “Main List” can get confusing once you’re running multiple campaigns.
A good rule of thumb: use a name that describes both the audience and the purpose. Think of it like labeling a folder on your desktop—you want to find it instantly without guessing.
Define The From Name And Email Subscribers See
Next, Aweber asks you to define your “From Name” and “From Email.” This is what shows up in your subscriber’s inbox. If it looks confusing or spammy, most people won’t even open the email.
Here’s my suggestion: always use a real name (yours or your business name) instead of something generic like “Admin.” For example, “Sarah from BrightMarketing” feels far warmer and more trustworthy than “BrightMarketing LLC.”
For the email, stick to a professional, domain-based address (like contact@yourdomain.com). Aweber allows you to test it immediately by sending a confirmation email. Once you’ve verified it, that address will become the one people recognize when your messages arrive.
In my experience, this alone can lift open rates because subscribers feel like they’re hearing from a real person.
Write A Short Description To Build Subscriber Trust
Finally, Aweber asks for a list description. This appears when someone subscribes or looks up your details, so it’s worth writing something meaningful. Think of it as a mini promise statement.
For example:
“We send one weekly email packed with practical tips on growing your business, along with updates on tools and resources you can use today.”
This isn’t about being fancy—it’s about clarity. People want to know what they’re signing up for, and clear expectations build trust. If you overpromise or stay vague, you risk higher unsubscribe rates later.
I’ve found that being upfront about frequency (like “one email per week”) works wonders because subscribers know what to expect from the start.
Customize Your Aweber Sign Up Form
Your list is only as strong as the people on it, and that’s where the sign up form comes in.
Aweber makes this part straightforward with templates and a drag-and-drop editor, but small tweaks can make the difference between getting a subscriber or losing them.
Pick A Template That Matches Your Brand Style
From the dashboard, go to “Sign Up Forms” > “Create a Sign Up Form.” Aweber presents you with a library of templates. Instead of overthinking, choose one that aligns with your brand’s personality.
If you’re a minimalist brand, go with clean, simple lines. If your brand is fun and colorful, pick something brighter. The template is just the starting point—you can always customize fonts, colors, and layouts later.
Here’s what I suggest: look at your website or logo colors and try to match them. That consistency makes the form feel like a natural extension of your brand rather than a random popup. In my own projects, even small color alignment increased conversions because people trusted the experience more.
Edit Form Fields To Collect The Right Information
By default, Aweber sign up forms ask for a name and email. That’s often enough. The temptation is to add more fields—phone number, company, birthday—but the truth is, extra fields usually lower sign-up rates.
I recommend keeping it simple: email only, or name and email at most. This reduces friction and gets more people on your list. If you really need more info later, you can always segment or send a survey.
Inside the editor, you’ll see the option to drag in new fields. Use this sparingly. A good example is adding a “First Name” field so you can personalize subject lines like “John, here’s your free guide.” That kind of personal touch can increase open rates significantly.
Add Sign Up Form To Your Website Or Landing Page
Once your form looks the way you want, click “Save” and “Publish.” Aweber gives you two choices: copy the HTML code and paste it into your website, or use a direct link to a hosted form on Aweber’s servers.
If you’re using WordPress, Aweber even provides a plugin that makes embedding the form effortless. For ecommerce platforms like Shopify, you can drop the form code directly into your store’s theme.
My tip? Place the form in multiple places—sidebar, footer, and even as a popup if it fits your style. More visibility equals more sign ups.
I once doubled subscriber growth simply by moving a form from the footer to the top of a blog post. Placement really matters.
Design And Send Your First Aweber Email
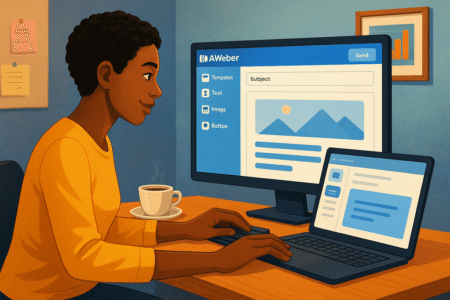
Once your list and sign up form are ready, the fun part begins: creating your first email. Aweber makes this simple with its drag-and-drop editor, but the details matter if you want people to actually open, read, and click.
Select A Template From The Drag-And-Drop Builder
From your dashboard, click Messages > Create a Message > Drag & Drop Email Builder. Aweber will show you a selection of templates. Don’t overthink this—start with one that feels close to your brand and then tweak it.
The builder works like Lego blocks. You drag elements—text, images, buttons—into your email. Want a call-to-action button under a product image? Just drag it in. Need a divider to break up sections? Drop it between paragraphs.
Here’s my tip: keep your first email simple. Choose a clean design, add your logo at the top, write a friendly introduction, and include one main call-to-action (like “Read More” or “Shop Now”). Emails with too many competing elements usually get fewer clicks.
If you’re not a design person, don’t stress. Aweber’s default templates are already optimized for mobile. I usually adjust fonts and colors to match my site, but I avoid over-customizing. What matters most is clarity, not flash.
Personalize Subject Lines To Boost Open Rates
The subject line is the gatekeeper—it determines whether your email gets opened or ignored. Aweber lets you personalize subject lines using subscriber data. For example, adding the first name makes it read: “Sarah, here’s your free guide.”
In my experience, personalized subject lines can lift open rates by 20–30%. But don’t force it. If you don’t collect names, stick with curiosity or value-driven lines like “3 Tips To Save Time This Week.”
Aweber also offers A/B testing, where you can send two subject lines to a small portion of your list and let the winner go out to the rest. I recommend experimenting early. Sometimes the subject line you think is clever falls flat, while a straightforward one gets the clicks.
One more tip: keep subject lines under 50 characters. Mobile inboxes cut off anything longer, and more than half of emails are opened on phones.
Schedule Or Send Broadcast Emails Immediately
Once your message is ready, click Schedule at the top right. Aweber gives you two options: send immediately or schedule for later.
For regular newsletters, I suggest scheduling so your emails go out at consistent times each week. Consistency builds habits—subscribers start to expect you. If you’re promoting a flash sale or urgent update, hitting “Send Now” is perfectly fine.
Inside the scheduler, you can also choose specific time zones or segment your list (for example, sending only to people who clicked a previous link). These small tweaks help you get better engagement.
In practice, I like to send tests to myself before blasting the whole list. Aweber makes this easy with a “Preview & Test” button. Seeing your email on your own phone screen can save you from embarrassing formatting errors.
Automate Follow-Up Emails With Aweber
One of the best parts of Aweber is automation. Instead of sending every email manually, you can set up sequences that run while you sleep. Think of it as putting your email marketing on autopilot.
Create A Welcome Email To Greet New Subscribers
From your dashboard, go to Campaigns > Create a Campaign > Welcome New Subscribers. This template is ready-made for that first message after someone joins your list.
Your welcome email sets the tone for the relationship. Keep it personal and warm. Thank them for signing up, tell them what to expect, and deliver any promised freebie or lead magnet right away.
I advise avoiding sales-heavy messages here. Imagine walking into a store, and before you even look around, the cashier shouts, “Buy this now!” That’s how a hard sell feels in a welcome email. Instead, focus on trust-building.
Build A Simple Email Sequence To Nurture Leads
Once your welcome email is ready, you can chain additional emails into a sequence. Aweber uses a simple “drag to connect” system inside Campaigns.
For example, a three-email sequence could look like this:
- Day 1: Welcome email + free resource
- Day 3: Share a personal story or lesson
- Day 5: Introduce your product or service
Spacing emails 2–3 days apart keeps you top of mind without overwhelming subscribers. Aweber even lets you add tags—so if someone clicks a link in Email #2, you can automatically move them into a “hot leads” segment.
I find short sequences work better than marathon ones. Three to five emails are enough to build trust and invite action.
Track Automation Performance Inside Analytics
Automation is powerful, but you’ll only know if it’s working by looking at the numbers. Inside Aweber, click Reports > Campaigns to see how each email in your sequence is performing.
Key metrics include:
- Open Rate: Did the subject line grab attention?
- Click Rate: Did the email content drive action?
- Unsubscribes: Did you lose people, and if so, why?
I recommend making small adjustments based on these numbers. For instance, if email #2 has a low open rate, test a new subject line. If email #3 gets clicks but no sales, maybe the offer isn’t clear enough.
Think of it like fine-tuning a recipe—you don’t throw away the whole dish, you just adjust the seasoning.
Integrate Aweber With Your Website And Tools
Aweber doesn’t live in isolation. To really maximize it, you’ll want to connect it to your website and other tools you use. This makes your email marketing seamless and saves you time.
Connect Aweber To WordPress For Seamless Sign Ups
If your website runs on WordPress, Aweber offers a free plugin. Once installed, you can drag-and-drop sign up forms into posts, sidebars, or footers without touching code.
I suggest placing forms strategically:
- Top of blog posts for visibility
- Sidebar for ongoing exposure
- Exit-intent popups to capture leaving visitors
In my experience, moving a form from the footer to the sidebar tripled sign ups almost overnight. Placement is everything.
Sync With Ecommerce Platforms Like Shopify
If you’re running an online store, Aweber integrates directly with Shopify, WooCommerce, and other platforms. This allows you to automatically add buyers to your email list, send abandoned cart reminders, and cross-sell products.
For example, a Shopify integration means that when someone buys a product, Aweber can trigger an automated sequence:
- Email 1: Thank you + order confirmation
- Email 2: Related product suggestions
- Email 3: Follow-up asking for a review
This kind of automation not only saves you time but can increase revenue significantly. Studies show that cart abandonment emails alone recover around 10–15% of lost sales.
Use Zapier To Link Aweber To Hundreds Of Apps
If Aweber doesn’t have a direct integration with your tool of choice, Zapier is the bridge. Zapier connects Aweber to over 5,000 apps, from Google Sheets to Trello.
Here are some creative ways I’ve used it:
- Add new Typeform survey responses directly into an Aweber list
- Sync Eventbrite attendees into a campaign for event follow-up
- Push new PayPal customers into a nurturing sequence
It may sound technical, but Zapier works with “if this, then that” logic.
Example: “If someone fills out this Google Form, then add them to Aweber.” It’s like wiring different parts of your business together without needing to code.
Monitor Analytics And Optimize Your Campaigns
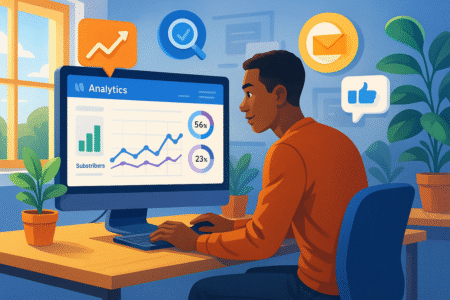
Once you’ve sent a few emails, the next step is learning from the numbers. Aweber’s built-in analytics give you a clear picture of how your campaigns are performing so you can improve over time.
Track Subscriber Growth In Real Time
From the dashboard, click Reports > Subscribers to see how your list is growing. Aweber shows you daily, weekly, and monthly trends. If you’re adding new subscribers consistently, that’s a sign your forms and content are working.
I suggest keeping an eye on three things:
- New Subscribers – are your sign up forms converting?
- Unsubscribes – are people leaving faster than they’re joining?
- Bounce Rates – are emails getting rejected due to invalid addresses?
In my experience, even small changes—like moving a form higher on your site—can shift these numbers significantly. Watching growth in real time helps you know quickly whether an adjustment is paying off.
Measure Open And Click-Through Rates Accurately
The two biggest metrics in email marketing are open rate and click-through rate (CTR). Aweber displays these under Reports > Broadcasts or inside each campaign.
- Open Rate tells you if your subject line caught attention.
- CTR tells you if the content motivated action.
For context, average email open rates hover around 20%, while CTR is usually between 2–5%. If you’re below those numbers, it’s not a failure—it’s a signal to test and improve.
I advise looking at each email in isolation instead of obsessing over averages. Sometimes one email will tank, but the next one will overperform. The real insight comes from spotting patterns, not perfection.
Adjust Subject Lines And Content For Higher ROI
If your metrics aren’t where you want them, tweak instead of starting from scratch. Aweber makes it easy to resend a broadcast with a new subject line to people who didn’t open the first one. That alone can squeeze out another 5–10% in opens.
When content underperforms, shorten it. In my own campaigns, trimming emails down to one key message boosted CTR because subscribers weren’t distracted. Adding clear, bold call-to-action buttons also makes a huge difference.
Think of optimization like tuning an instrument—it’s about fine adjustments that bring harmony, not reinventing the music.
Unlock Advanced Features To Scale With Aweber
Once you’re comfortable with the basics, Aweber has advanced features that help you grow smarter instead of just bigger.
Segment Subscribers For Highly Targeted Campaigns
Segmentation is splitting your list into smaller groups based on behavior or interests. Inside Aweber, you can create segments by filtering subscribers who:
- Opened a specific email
- Clicked a particular link
- Signed up through a specific form
For example, if you run a fitness blog, you could segment people who clicked on a “Weight Loss Tips” link versus “Strength Training Routines.” Then, you can send more tailored content that speaks directly to their interests.
I’ve seen segmentation double conversion rates because people respond better when emails feel personally relevant.
Use A/B Testing To Refine Emails And Forms
Aweber lets you test two versions of an email or sign up form to see which performs better. You can test subject lines, layouts, images, or even call-to-action text.
Here’s a quick process I use:
- Test only one element at a time (like subject line).
- Send both versions to 10% of your list.
- Let Aweber pick the winner and send it to the remaining 90%.
I once discovered that simply changing a subject line from “Weekly Marketing Tips” to “Your Weekly Tip to Grow Faster” boosted opens by 28%. Small shifts can lead to big improvements.
Explore Aweber Landing Pages To Expand Reach
Aweber now offers built-in landing page templates. From the dashboard, click Landing Pages > Create a Landing Page. These are standalone pages designed to capture sign ups without needing a separate website.
You can drag in text blocks, images, and forms, just like with emails. This is perfect if you’re promoting a lead magnet, running ads, or testing new offers quickly.
I recommend linking your landing page directly to a new email sequence so every sign up instantly gets a tailored experience. It’s like setting up a mini funnel inside Aweber.
Pro Tips For Maximizing Your Aweber Free Plan
The free plan is generous, but it has limits. With a few smart strategies, you can stretch it further and make the most of it before considering an upgrade.
Stay Within Free Tier Limits Without Missing Value
The free plan covers up to 500 subscribers and 3,000 emails per month. That’s more than enough for a new list. To maximize this, avoid sending unnecessary broadcasts and focus on high-value emails that matter.
I suggest creating one weekly newsletter instead of daily emails. That keeps you under the cap while building consistency. It also helps prevent subscriber fatigue.
Clean Your List Regularly To Keep Engagement High
Inactive subscribers count toward your 500-subscriber limit, even if they never open your emails. Aweber allows you to filter subscribers who haven’t opened in 90 days.
Here’s what I do: send a re-engagement email with a subject line like, “Still Want To Hear From Me?” If they don’t respond, remove them. It feels counterintuitive, but a smaller, engaged list beats a large, silent one every time.
Upgrade Smartly When You Outgrow The Free Plan
Eventually, if your list grows beyond 500, it’s time to upgrade. Instead of dreading it, see it as a milestone—your email list is growing, and that’s worth celebrating.
Before upgrading, review which advanced features you’ll actually use. For example, if you’re ready to use advanced segmentation or need unlimited subscribers, the Pro plan makes sense. But if you’re just testing ideas, stay free as long as possible.
In my own journey, I waited until I had consistent engagement and revenue from my list before upgrading. That way, the cost was justified and sustainable.

