Table of Contents
Aweber Autoresponder is one of the most powerful tools you can use to build stronger relationships with your audience while saving time on repetitive email tasks. But how do you actually set it up the right way?
What does it take to create email sequences that feel personal, drive engagement, and generate real results for your business? And how can automation help you nurture leads, convert subscribers into customers, and grow your revenue without constant manual effort?
In this guide, we’ll walk step by step through everything from setup to advanced automation strategies, showing you how to make the most of Aweber. Whether you’re just getting started or looking to refine an existing system, you’ll find practical tips here to create a smooth and effective email marketing engine.
Understanding Aweber Autoresponder Essentials
Before you dive into the setup, it helps to understand what an autoresponder actually does and why Aweber is worth your time. Think of this section as your foundation — once you get the basics, the rest becomes much easier.
What An Autoresponder Does For Your Business
An autoresponder is like your always-on assistant. Instead of writing individual emails every time someone subscribes, makes a purchase, or clicks a link, you set up automated emails that trigger based on their actions.
For example:
- A new subscriber joins your list → they get a warm welcome email immediately.
- Someone downloads your lead magnet → they’re guided into a short educational sequence that introduces your brand.
- A customer abandons their cart → they get a gentle reminder with an incentive to come back.
I like to think of autoresponders as “relationship builders on autopilot.” They let you nurture trust at scale without sacrificing personalization.
And here’s the kicker: businesses that automate emails see, on average, 119% higher click rates compared to manual sends. That’s not just convenient — it’s profitable.
Why Aweber Stands Out Among Email Tools
Now, there are dozens of email marketing platforms, but Aweber’s autoresponder shines for a few reasons.
- Ease of use: Even if you’re not tech-savvy, Aweber’s drag-and-drop editor makes setting up sequences straightforward.
- Pre-built templates: Instead of starting from scratch, you can use proven layouts for welcome sequences, newsletters, or product promotions.
- Reliability: Aweber has a long track record (founded in 1998!) and strong deliverability rates, which means your emails actually land in inboxes, not spam folders.
In my experience, the biggest edge is the balance of simplicity and power. Aweber gives you advanced features like tagging and behavioral triggers, but it doesn’t bury you under confusing menus. You can grow into the platform instead of feeling overwhelmed on day one.
Key Features Every Beginner Must Know
When you’re starting out, it’s easy to get lost in bells and whistles. Let me break down the handful of features that matter most at the beginning:
- Email Sequences (Campaigns): This is where you build your autoresponder series — think of it as a chain reaction of emails.
- Subscriber Segmentation: Aweber lets you group people by tags, sign-up form, or behavior so your emails stay relevant.
- Drag-and-Drop Editor: No coding needed. You can create polished, professional emails with blocks for text, images, buttons, and more.
- Sign-Up Forms & Landing Pages: Built-in tools to capture leads without needing an external app.
- Analytics Dashboard: Tracks opens, clicks, and engagement so you know what’s working and what’s not.
Once you understand these basics, you’ll see why Aweber is trusted by small business owners, creators, and ecommerce brands alike.
Setting Up Your Aweber Autoresponder From Scratch
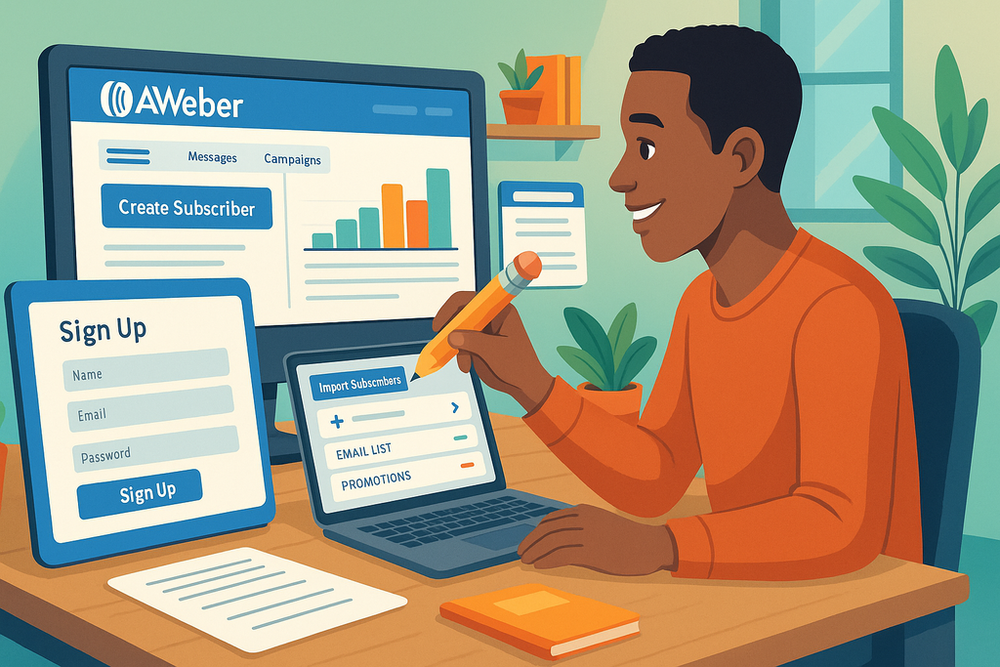
This is where theory turns into practice. Setting things up correctly in the beginning saves you from headaches later. Let’s go step by step.
Creating Your First Aweber Account The Right Way
Head to Aweber’s website and sign up. They offer a free plan if you’re just starting, which gives you up to 500 subscribers and basic automation. I suggest beginning with the free plan to test the waters, then upgrading once your list grows.
Once inside your dashboard, do these three things right away:
- Set up your sender email address. Use a branded email (like yourname@yourbusiness.com) instead of Gmail or Yahoo. It boosts credibility and helps with deliverability.
- Customize your account settings. Add your business name, address, and logo — this keeps you compliant with email regulations and builds trust with subscribers.
- Verify your domain if possible. It’s a small technical step, but it dramatically improves inbox placement.
Think of this stage as laying the foundation. If you skip it, you risk emails landing in spam or looking unprofessional.
Importing And Organizing Your Email Subscribers
If you already have an email list from another tool, Aweber makes importing straightforward. From the dashboard, click Subscribers > Add Subscribers > Import Multiple. You can upload a CSV file with names and emails, or copy and paste them directly.
Here’s what I recommend:
- Clean your list first. Remove invalid or inactive addresses — they hurt your deliverability.
- Segment as you import. Don’t just dump everyone into one bucket. Use tags like “previous customers,” “newsletter signups,” or “leads from Facebook ad.”
- Get consent right. Aweber may require proof that these contacts opted in, so be ready with screenshots or records if needed.
Once imported, you’ll see your subscribers neatly organized. The tagging system is where the magic happens — and it sets you up for smarter automation later.
Building A Strong Email List With Tags And Segments
This is where many beginners go wrong: treating their email list as one giant blob. Not everyone on your list wants the same thing, and Aweber’s tagging system helps you personalize without extra work.
For example:
- Tag subscribers who click on a “product demo” link as interested in product.
- Tag those who buy as customers.
- Create a segment just for people who haven’t opened emails in 90 days — then send them a re-engagement campaign.
I suggest setting up tags right away, even if your list is small. Think of them like folders in a filing cabinet — it’s much easier to organize as you go instead of cleaning up a mess later.
With tags and segments, you can deliver the right message at the right time. A subscriber who downloaded your free ebook shouldn’t get the same emails as someone who has already purchased from you.
Aweber makes this level of targeting possible, and it’s where you’ll see higher open rates, better engagement, and more sales.
Crafting High-Converting Email Sequences
Once your Aweber autoresponder is set up, the next big question is: what do you actually write? A sequence is more than a string of emails — it’s a guided journey.
Done right, it can take someone from casual subscriber to loyal customer without ever feeling pushy.
Writing Emails That Capture Attention And Drive Clicks
The very first battle in email marketing is getting people to open your message. Your subject line is the headline — and it has to spark curiosity or highlight a clear benefit.
In Aweber, you’ll see the subject line box right above the email editor when creating a new message. I recommend writing 3–5 variations and previewing how they look on mobile (you can toggle this in Aweber’s editor).
A few real-world tricks:
- Ask a short, curiosity-driven question: “Did you see this yet?”
- Use personalization tokens: “John, your free checklist is inside.”
- Keep it under 45 characters so it doesn’t get cut off on phones.
Inside the email, break up text into short paragraphs and use buttons instead of burying links in long sentences. Aweber’s button block makes this super easy. From my experience, emails with clear CTA buttons see up to 30% more clicks compared to text-only links.
Balancing Value And Promotion In Your Messages
If every email feels like a sales pitch, subscribers tune out fast. But if you only send free tips and never guide people toward your offers, your email list doesn’t pay off. The sweet spot is a value-first sequence that naturally leads to your products or services.
Here’s a structure I often suggest:
- Email 1: Welcome + what to expect.
- Email 2: Deliver value (guide, tips, or resource).
- Email 3: Story-driven email that connects to a product benefit.
- Email 4: Gentle product introduction with clear value.
- Email 5: Direct sales pitch or special offer.
You can map this out inside Aweber by going to Campaigns > Create a Campaign and using the “Welcome Series” template as a starting point.
Think of it like a dinner party: you welcome your guest, have a friendly chat, share something helpful, and then, when the timing feels right, you bring up what you’re offering.
Timing And Frequency Rules That Boost Engagement
Email frequency is a balancing act. Too few emails and people forget about you. Too many and they hit unsubscribe.
From what I’ve seen, one email every 2–3 days is a safe rhythm for most sequences. You can adjust later based on your audience’s response.
Inside Aweber’s campaign builder, you’ll see a “Wait” action — that’s where you control timing. For example:
- Day 0: Welcome email.
- Wait 2 days → Email #2.
- Wait 3 days → Email #3.
- Wait 2 days → Email #4.
I also recommend testing. If you notice open rates dropping after the third email, that’s a signal to adjust timing or subject matter. Aweber’s reporting dashboard gives you a clear view of opens and clicks for each step in your sequence.
Automating Workflows With Aweber Campaigns
Now let’s move beyond simple sequences. Aweber’s campaign builder lets you automate workflows based on triggers and subscriber behavior, which makes your emails feel smarter and more personal.
Designing Automation Paths With Triggers And Actions
Think of triggers as the “if” in an if/then statement. For example:
- Trigger: A subscriber joins your list.
- Action: Send them a welcome sequence.
In Aweber, triggers include events like a new signup, a tag being applied, or a purchase (if you integrate with ecommerce). Actions are what happens next — sending an email, applying another tag, or waiting a certain number of days.
A practical example:
- Trigger: Subscriber downloads a free PDF.
- Action: Tag them as “lead magnet download.”
- Action: Start a 5-day educational email series.
- Action: Apply “ready for offer” tag after day 5.
You can build this visually inside Campaigns > Create a Campaign > Blank Campaign, dragging and dropping “Send Message,” “Wait,” and “Apply Tag” blocks.
Using Behavior-Based Targeting To Personalize Emails
The real power of Aweber autoresponder lies in behavior tracking. Instead of sending everyone the same emails, you can change the flow based on what subscribers do.
For instance:
- If someone clicks a link about Product A → Tag them as “Product A interest.”
- If they don’t click anything in 30 days → Move them into a re-engagement campaign.
- If they purchase → Stop promo emails and start a “customer onboarding” sequence.
This makes your emails feel personal without extra effort. In practice, I’ve seen behavior-based targeting increase conversions by up to 50% compared to static sequences. People appreciate when messages feel relevant to them.
Setting Up Evergreen Campaigns For Passive Growth
An evergreen campaign is one that keeps running automatically — it’s always ready for new subscribers, no matter when they join. This is where email automation starts working like a true engine for your business.
The easiest way to set one up in Aweber is with a welcome funnel:
- Trigger: New subscriber joins your main list.
- Action: Deliver lead magnet instantly.
- Action: Send 4–6 educational and trust-building emails over 2 weeks.
- Action: Introduce your product or service with an offer.
Once this is in place, every new subscriber experiences the same proven sequence. You don’t have to manually send emails — Aweber does the heavy lifting.
Here’s the beauty: you can layer multiple evergreen campaigns. Maybe one sequence is focused on a free course, another on a paid product, and another on upselling existing customers. Tags and triggers decide who sees what, and you stay in control without daily micromanagement.
Integrating Aweber With Other Platforms
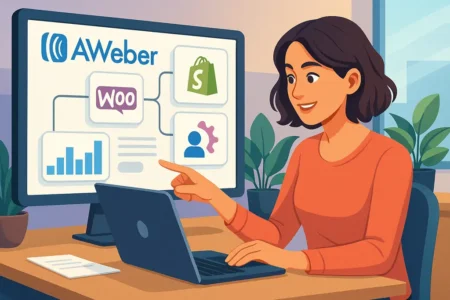
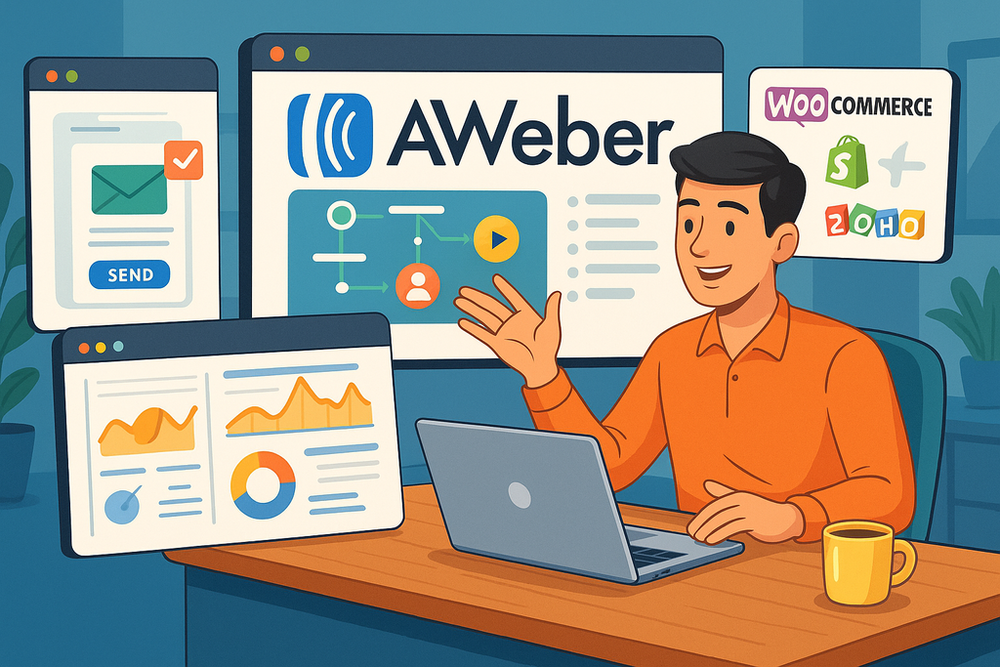
Aweber autoresponder gets even more powerful when you connect it to the other tools you already use. Integration is what turns a simple email list into a full business engine.
Connecting Aweber To Your Website Or Landing Pages
Your email list is only as strong as your signup process. Aweber makes it simple to embed forms directly on your website or landing pages.
Inside your Aweber dashboard, go to Landing Pages > Create a Landing Page. You can pick from templates (like lead magnets, event signups, or product previews) and customize them with drag-and-drop blocks. If you already have a website, you can also embed Aweber forms by going to Sign Up Forms > Create a Sign Up Form. After customizing, copy the embed code and paste it into your site’s HTML.
Here’s how I often advise clients:
- Place your form above the fold on your homepage — don’t make people scroll to find it.
- Add a strong incentive: “Download our free guide” converts much better than “Join our newsletter.”
- Use a thank-you page to confirm the signup and guide them to the next step (Aweber lets you set this up in the form settings).
The smoother the signup flow, the more leads you capture without extra effort.
Using Aweber With Ecommerce Tools Like Shopify And WooCommerce
If you’re running an online store, integration is non-negotiable. Aweber connects directly with Shopify and WooCommerce, allowing you to:
- Automatically add customers to your email list after purchase.
- Trigger autoresponders for abandoned carts.
- Segment buyers based on the products they purchase.
For Shopify, head to the Shopify App Store, search for Aweber, and install the app. Once connected, you’ll see Shopify events (like “purchase” or “abandoned cart”) as automation triggers inside Aweber campaigns.
For WooCommerce, you can install the Aweber plugin directly from WordPress. After setup, you’ll have the option to add opt-in checkboxes at checkout, and Aweber will sync purchase data automatically.
In real practice, this lets you do things like:
- Send a thank-you sequence after someone’s first order.
- Offer upsells based on purchase history.
- Re-engage cart abandoners with a discount.
That’s where email moves from being a newsletter to being an actual sales driver.
Leveraging Aweber With CRM And Webinar Platforms
If you run webinars, coaching sessions, or manage client relationships, this integration is gold. Aweber works with platforms like Zoom, GoToWebinar, and CRMs such as Zoho CRM and HubSpot.
For webinars, the typical flow looks like this:
- Someone registers for your webinar → They’re automatically tagged in Aweber.
- Aweber triggers a reminder sequence leading up to the event.
- After the webinar, attendees get a replay link, while non-attendees get a follow-up email encouraging them to watch.
For CRMs, Aweber syncs contact info and behaviors, making sure you don’t double-manage your data. If a lead is marked as “qualified” in your CRM, you can instantly tag them in Aweber to receive a targeted offer sequence.
I suggest mapping these flows out on paper first. Once you see the journey visually, setting it up in Aweber’s automation builder feels much less overwhelming.
Tracking Performance And Optimizing Results
Great email marketing isn’t “set it and forget it.” You’ll want to monitor results and make small tweaks that compound over time. Aweber gives you plenty of tools for this.
Setting Up Aweber Analytics And Key Metrics To Monitor
Inside your Aweber dashboard, click Reports. Here you’ll see key stats like open rates, click-through rates, unsubscribes, and bounce rates.
I suggest paying attention to three main numbers:
Pro tip: track trends, not just snapshots. For example, if your open rates drop over a month, that’s a sign you might need fresher subject lines or cleaner list segmentation.
- Open rate (how many people open your emails). Healthy range: 20–30%.
- Click-through rate (how many click a link inside). Healthy range: 2–5%.
- Unsubscribes (if more than 1% per email, something’s off).
A/B Testing Subject Lines And Content For Maximum Impact
Aweber lets you run split tests directly in the Messages > Split Tests section. Here’s how I use it:
- Test subject lines first — they’re the easiest win. Try curiosity-driven vs. benefit-driven phrasing.
- Once you’ve nailed subject lines, test email length. Short 3-paragraph emails sometimes outperform long-form ones, depending on the audience.
- Test CTAs. For example, “Get your free guide” vs. “Download now.”
Run each test for at least 1,000 subscribers before deciding. Anything less and you risk false positives. Over time, these small improvements add up to a huge difference in conversions.
Improving Deliverability And Open Rates Over Time
Even the best emails fail if they don’t reach the inbox. Deliverability is about making sure your messages avoid spam folders.
Here’s what I’ve found works best:
- Use a custom domain email address instead of Gmail/Yahoo.
- Authenticate your domain (Aweber guides you through DKIM and SPF setup under “Domain Authentication”).
- Clean your list regularly — unsubscribe contacts who haven’t opened in 90 days.
- Avoid spammy phrases like “FREE $$$” in subject lines.
I once cleaned a client’s list of 20,000 subscribers, removing inactive contacts. Their open rate jumped from 12% to 28% overnight. Sometimes trimming the fat does more good than endlessly adding new signups.
Deliverability is one of those behind-the-scenes things most beginners ignore, but it has a massive impact on whether your Aweber autoresponder pays off long-term.
Advanced Aweber Autoresponder Strategies
Once you’ve mastered the basics, it’s time to take your Aweber autoresponder beyond simple welcome emails. Advanced strategies help you nurture deeper relationships, scale personalization, and turn your list into a long-term profit center.
Creating Lead Nurture Funnels With Dynamic Content
Not every subscriber is ready to buy right away — that’s where nurturing comes in. Aweber lets you add dynamic content blocks that change based on tags or subscriber data.
For example:
- Someone tagged as “beginner” can see a step-by-step tutorial.
- Someone tagged as “advanced” sees a quick tip with a direct product offer.
Inside Aweber’s drag-and-drop editor, use the “Dynamic Content” block to display different text, images, or offers depending on subscriber tags. I suggest starting with one funnel mapped like this:
- Lead magnet delivery → Educational sequence (value-heavy).
- Dynamic email offering different recommendations based on behavior.
- Transition into a product pitch once they’ve engaged at least twice.
I’ve seen this approach double engagement rates because subscribers feel like emails were written for them.
Combining Autoresponders With Live Broadcasts
Autoresponders handle the evergreen work, but live broadcasts (one-off campaigns) keep your list fresh and connected to the moment. Aweber allows you to send broadcasts anytime under Messages > Broadcasts.
Here’s the mix I recommend:
- Autoresponder: Always running in the background (welcome sequences, onboarding, evergreen offers).
- Broadcasts: Seasonal promotions, announcements, or news relevant right now.
For example, imagine someone finishes your evergreen nurture funnel. A week later, you send a live broadcast about a flash sale. The timing feels natural, not forced. The autoresponder built the trust, and the broadcast cashes in on that relationship.
Scaling With Advanced Tagging And Subscriber Scoring
As your list grows, managing thousands of people manually becomes impossible. That’s when tagging and scoring matter most.
- Tagging: Apply tags automatically when subscribers click, purchase, or attend events.
- Scoring: Track engagement by assigning points (opens, clicks, purchases). High scorers = warm leads, low scorers = at risk of churning.
You can build these systems in Aweber campaigns:
- Trigger: Subscriber clicks “pricing” link → Tag as “interested buyer.”
- Trigger: Subscriber hasn’t opened in 60 days → Tag as “inactive.”
From there, you can send tailored sequences. Warm leads get product pitches, while inactive contacts get re-engagement emails. Scaling becomes less about sending more emails and more about sending the right ones.
Common Mistakes To Avoid With Aweber Autoresponders
Even with powerful tools like Aweber, it’s easy to slip into bad habits that damage your results. Avoiding these mistakes saves you frustration and keeps your list healthy.
Overloading Subscribers With Too Many Emails
I’ve seen businesses send daily emails without realizing their list was burning out. Just because Aweber makes it easy to schedule doesn’t mean you should hit send every day.
A safer rule of thumb:
- 2–3 emails per week in active campaigns.
- 1–2 broadcasts per month for updates or promotions.
If unsubscribe rates spike above 1% on multiple emails, that’s a red flag. Dial back your frequency before your list stops listening altogether.
Ignoring List Hygiene And Unengaged Contacts
An email list is like a garden — if you never prune it, weeds take over. In email terms, that means inactive subscribers hurt your deliverability.
Inside Aweber, you can segment people who haven’t opened in 90 days using Subscribers > Manage Subscribers > No Opens Filter. From there, send them a re-engagement campaign with a subject like, “Still want to hear from me?” If they don’t respond, it’s better to remove them than let them drag your metrics down.
I’ve personally seen open rates jump from 15% to 28% just by cleaning out 20% of dead weight subscribers. Sometimes smaller, healthier lists outperform big bloated ones.
Failing To Comply With Email Marketing Regulations
It’s tempting to ignore legal details, but compliance keeps you out of trouble and builds trust. Aweber is already built with compliance in mind, requiring you to include your business address and unsubscribe link in every email.
Don’t skip these basics:
- Use confirmed opt-in (Aweber offers this by default).
- Always include a visible unsubscribe option.
- Be clear about what people are signing up for (no sneaky tactics).
Besides legal protection, compliance also protects your reputation. Subscribers trust brands that respect their inboxes.
Expert Tips For Long-Term Aweber Success
Success with Aweber autoresponders isn’t about one flashy campaign — it’s about consistency, testing, and keeping your emails worth opening year after year.
Building A Consistent Brand Voice Across Campaigns
Subscribers should feel like they know who’s talking to them, no matter what type of email they get. This comes down to tone, formatting, and design.
I suggest creating a simple style guide for yourself:
- Greeting style (Hi [Name] vs. Hey vs. Dear).
- Typical email length (short and snappy vs. longer stories).
- Visuals (plain text vs. branded templates).
Aweber lets you save custom templates, so once you nail your style, you don’t have to reinvent it every time. Consistency builds familiarity — and familiarity builds trust.
Repurposing Content To Keep Emails Fresh
Running out of ideas is a common fear. My advice? Repurpose. If you already have blog posts, videos, or social media content, recycle the best ones into emails.
For example:
- Turn a blog post into a 3-part educational email series.
- Pull highlights from a YouTube video and link to the full version.
- Repackage customer testimonials as social-proof emails.
Inside Aweber, you can even use the Blog Broadcast feature to automatically send emails whenever you publish a new post. It saves time while keeping your list engaged.
Tracking ROI And Refining Your Email Marketing Strategy
At the end of the day, email marketing isn’t about opens or clicks alone — it’s about return on investment. Aweber’s analytics lets you track sales if you integrate it with Shopify, WooCommerce, or PayPal.
I suggest setting a simple ROI formula:
- Revenue generated from email ÷ Cost of Aweber = ROI.
Check this quarterly. If ROI is slipping, look at where the funnel breaks down — low opens (subject lines), low clicks (content), or low conversions (offer mismatch).
Get started with Aweber today — free for up to 500 subscribers
Long-term success is about treating your Aweber autoresponder as a living system. Keep testing, keep cleaning your list, and keep tweaking. The small improvements stack up over time.

