Table of Contents
LearnWorlds Zoom integration makes it incredibly easy to host engaging live classes directly from your online academy. Imagine running interactive lessons, Q&A sessions, or coaching calls—all without switching between multiple apps.
Have you ever wondered how to seamlessly connect Zoom with LearnWorlds to create a smooth learning experience for your students?
This guide breaks down the process step by step and shows how you can use this integration to make your online classes more dynamic and personal.
Understanding The LearnWorlds Zoom Integration
Integrating Zoom with LearnWorlds creates a seamless bridge between your live sessions and your online courses.
Instead of juggling multiple apps, you can manage everything—from scheduling to recording—directly inside your LearnWorlds dashboard.
How LearnWorlds And Zoom Work Together
LearnWorlds and Zoom work hand in hand to help you run real-time, interactive classes inside your digital academy. When you connect your Zoom account, LearnWorlds automatically pulls your meeting data and syncs it with your courses.
That means you can:
- Schedule and start a Zoom class right from your LearnWorlds admin panel.
- Allow students to join sessions securely through their course interface.
- Automatically record sessions and store them for later viewing.
This setup transforms LearnWorlds from a static course platform into a dynamic, two-way learning space—perfect for coaching programs, boot camps, or live workshops.
Why Integrating Zoom Elevates The Learning Experience
Adding Zoom to LearnWorlds enhances both teaching efficiency and learner engagement. Live video fosters connection, accountability, and deeper understanding—things pre-recorded videos can’t fully replicate.
For instructors, the integration means fewer manual tasks. You can manage sessions, track attendance, and send replays all in one place. For learners, it’s about convenience: they can access everything from one platform without worrying about links or passwords.
Real Example: If you teach fitness or language classes, you can run live practice sessions on Zoom and automatically attach recordings to the lesson for review later. This hybrid structure—live + recorded—boosts retention and engagement rates.
Key Features Of LearnWorlds Zoom Integration
LearnWorlds’ Zoom integration isn’t just a connection—it’s an automation powerhouse. Here’s what it can do:
- Automatic Session Syncing: Meetings created in LearnWorlds sync with your Zoom account instantly.
- One-Click Join Links: Students can join directly from their course dashboard—no emails or extra steps.
- Recording & Replay: Zoom sessions are recorded and linked back into the course for on-demand access.
- Custom Access Control: Limit who joins your sessions (e.g., only enrolled students).
- Analytics Integration: See who attended, how long they stayed, and where engagement dropped.
I believe this integration is a game-changer because it simplifies your entire teaching workflow, making “live learning” as effortless as uploading a video.
Setting Up The LearnWorlds Zoom Integration
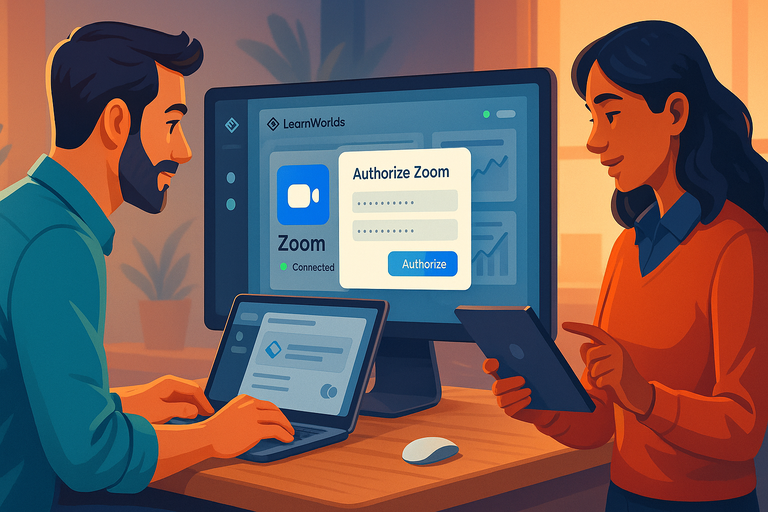
Before you host your first live class, you’ll need to connect your Zoom account. Don’t worry—it’s straightforward. You’ll be done in minutes, even if you’re not a tech person.
Step-By-Step Process To Connect Zoom With LearnWorlds
Here’s how to set it up:
- Log In To LearnWorlds: Head to your admin dashboard.
- Open Integrations: Go to Settings > Integrations > Zoom.
- Click “Connect Zoom Account”: This opens a Zoom authorization window.
- Sign In To Zoom: Use your Zoom credentials (use a Pro or Business account if you plan to record sessions).
- Authorize Connection: Zoom will request permission for LearnWorlds to access your account.
- Confirm Integration: You’ll be redirected back to LearnWorlds with your Zoom account now linked.
Once connected, you’ll see your Zoom account appear in the integration panel, and you can start scheduling sessions within courses.
Pro Tip: Use a dedicated Zoom account for your school to keep class recordings and meeting settings organized.
Configuring API Keys And Permissions For Secure Setup
If your LearnWorlds plan requires manual API configuration, here’s how:
- Go to your Zoom App Marketplace > Develop > Build App.
- Choose JWT (JSON Web Token) or OAuth—OAuth is recommended for security.
- Copy your API Key and API Secret into LearnWorlds under Settings > Integrations > Zoom.
Make sure the Zoom account used has the right permissions to host webinars or meetings. If you use multiple instructors, each one should connect their own Zoom account for smooth scheduling.
Why This Matters: Incorrect API keys or limited permissions are the number one cause of failed integrations. Double-check that your account has “Meeting” enabled under Zoom Settings > Account Management.
Troubleshooting Common Connection Errors
Sometimes things don’t connect perfectly the first time. Here’s how to fix common issues:
- Error: Invalid API Key → Recheck your copied key; ensure no spaces or extra characters.
- Sessions Not Syncing → Refresh your LearnWorlds page or reauthorize your Zoom connection.
- Students Can’t Join → Verify meeting visibility settings. Make sure the course session is “Published.”
If you ever get stuck, LearnWorlds’ help center has detailed troubleshooting guides. I suggest bookmarking it—you’ll thank yourself later.
Hosting Live Classes Seamlessly Within LearnWorlds
Once your Zoom account is integrated, you can run classes directly from LearnWorlds without switching tabs. It feels like teaching inside a virtual classroom built into your academy.
Scheduling Live Sessions Directly From Your Dashboard
To create a live session, open your course and:
- Click Add Activity > Live Session.
- Choose Zoom Meeting or Zoom Webinar (depending on your license).
- Set your date, time, and duration.
- Toggle Record Session if you want it saved automatically.
- Click Save & Publish.
Students will see the session appear in their course timeline with a “Join Session” button.
Bonus Tip: Add a short pre-class checklist (camera on, mic test, etc.) in your course description so students come prepared.
Managing Attendance And Student Access Effortlessly
LearnWorlds tracks who joins each Zoom session and how long they stay. You can view this under Reports > Live Session Analytics.
Some quick management features:
- Attendance Reports: Automatically log participant names and times.
- Access Control: Restrict sessions to paid members or specific cohorts.
- Auto Notifications: Send reminders via email before each class.
This not only saves you time but also helps you measure engagement—crucial for refining your teaching strategy.
Recording And Replaying Live Sessions For On-Demand Learning
Every live class can be automatically recorded through Zoom and uploaded to your LearnWorlds library.
You can attach the recording to the same course module or use it later as bonus material. From your LearnWorlds admin:
- Go to Courses > Select Course > Activities.
- Choose the relevant Zoom session.
- Under Recording Options, toggle “Enable Replay.”
Students who missed the live session can replay it at their convenience. I recommend editing the recording slightly (remove breaks or tech hiccups) before publishing—it creates a smoother learning experience.
Pro Tip: Use session recordings to build an evergreen version of your course. Over time, your library of replays becomes a powerful, passive asset for future students.
Enhancing Engagement During Live Classes
Running a live class isn’t just about sharing your screen—it’s about creating an experience that feels alive, interactive, and personal.
With the LearnWorlds Zoom integration, you can turn your online classroom into a true learning community where students collaborate and participate actively.
Using Breakout Rooms To Encourage Group Collaboration
One of Zoom’s most underrated tools is Breakout Rooms, and LearnWorlds makes it easy to use them inside your live sessions.
Breakout Rooms allow you to divide your students into smaller groups for discussions, brainstorming, or practical exercises—just like splitting a classroom into teams.
Here’s how you can do it:
- During your Zoom session, click Breakout Rooms > Create Rooms.
- Choose the number of rooms and how you want participants assigned (automatically or manually).
- Click Open All Rooms to start group collaboration instantly.
Pro Tip: I suggest setting clear tasks before opening the rooms—for example, “Discuss one takeaway from today’s lesson and share your group’s conclusion when we regroup.” This keeps everyone focused and ensures the session remains productive.
Why it works: Smaller groups increase participation and confidence, especially for students who might hesitate to speak up in a full class. According to Zoom’s internal data, breakout sessions can increase learner engagement by up to 60% compared to standard lecture-style delivery.
Screen Sharing And Whiteboard Tools For Better Interaction
Visual tools make explanations clearer—and in Zoom, screen sharing and whiteboards are your best allies.
To share your screen inside LearnWorlds Zoom integration:
- Click Share Screen on the Zoom toolbar.
- Choose a specific window (like PowerPoint or your browser) or your entire desktop.
- Check “Share Sound” if you’re playing a video or audio clip.
Meanwhile, the Zoom Whiteboard lets you sketch, annotate, and brainstorm with your class in real time. You can find it under Share Screen > Whiteboard.
Teaching Tip: Use the Whiteboard to map out ideas, draw flowcharts, or visually explain problem-solving steps. For instance, if you’re teaching coding, draw a quick function structure live while discussing it—it makes abstract ideas tangible.
I’ve found that visual explanations drastically reduce confusion. Students can “see” your thinking, not just hear it.
Integrating Chat, Polls, And Q&A Features To Boost Participation
A lively chat window can make a class feel truly interactive. Zoom’s built-in chat, polls, and Q&A features work perfectly with LearnWorlds live sessions to keep your audience involved.
Here’s how to make the most of them:
- Chat: Encourage students to post questions as you teach. Assign a teaching assistant (if available) to monitor and respond in real time.
- Polls: Launch quick polls to gauge understanding. For example, “How confident do you feel about this concept?” This helps you adjust your pacing.
- Q&A: Perfect for structured sessions like webinars or workshops. Students can upvote questions so the most important topics get answered first.
Example: If you’re running a live marketing class, create a poll asking, “Which channel do you find most challenging to manage—email, social media, or SEO?” It’s simple, but it opens up engagement and helps tailor your examples.
Using these tools helps learners feel heard and included, transforming passive listening into active learning.
Automating Class Management With LearnWorlds And Zoom
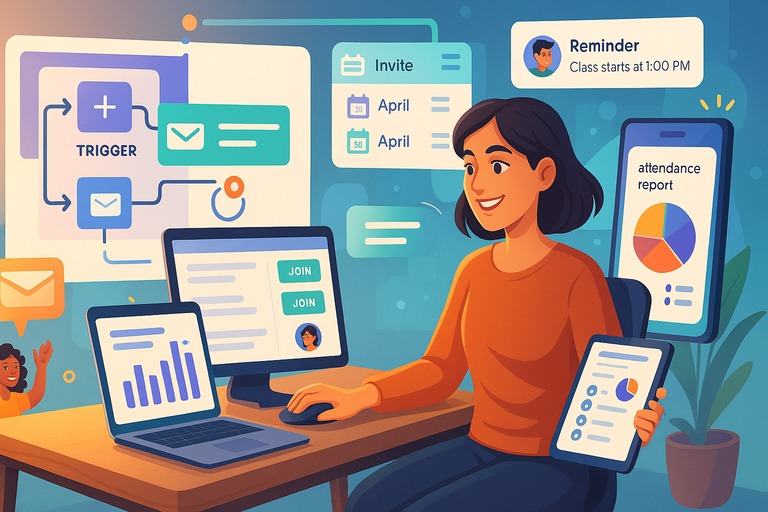
Teaching live is rewarding—but managing all the logistics can drain your time. That’s where LearnWorlds’ automation features shine.
By connecting Zoom and LearnWorlds intelligently, you can automate repetitive tasks like reminders, attendance, and data syncing.
Automating Invitations, Reminders, And Follow-Ups
When you schedule a Zoom session inside LearnWorlds, the platform automatically sends calendar invites and reminders to your enrolled students.
Here’s how it works:
- Go to Courses > Add Activity > Live Session (Zoom).
- Once published, LearnWorlds automatically triggers email notifications 24 hours and 1 hour before the session.
You can customize these messages under Settings > Notifications > Live Sessions.
After the class, LearnWorlds can also send follow-up emails with session replays or next steps. I recommend including a quick survey link in your follow-up—it’s an easy way to gather feedback and improve future sessions.
Time-saving insight: Automating reminders reduces no-shows by up to 40%, based on LearnWorlds’ user data. That’s time well saved for both you and your students.
Syncing Student Data And Class Records Automatically
Every Zoom session you host through LearnWorlds captures key data points: attendance, participation duration, and engagement metrics. These are synced directly to your LearnWorlds analytics dashboard.
You’ll find this under: Reports > Live Session Analytics > Attendance Data.
This automatic syncing ensures your records are always accurate—no need to export attendance lists from Zoom manually. You can even integrate LearnWorlds with Zapier or Google Sheets if you want to pull data into external dashboards.
Why it matters: Having all your student data in one place allows you to identify trends—like which sessions have the highest engagement or where drop-off occurs. That insight is gold for improving your courses.
Saving Time With Smart Workflows And Integrations
The LearnWorlds-Zoom connection also supports smart automation workflows through tools like Zapier or Make (formerly Integromat). You can:
- Auto-create Zoom meetings when you publish a new live session in LearnWorlds.
- Add new registrants to your CRM or mailing list.
- Trigger a “thank you” email once the live session ends.
Example Workflow: When a student registers → LearnWorlds adds them to the live session → Zoom automatically creates the meeting link → LearnWorlds emails it instantly.
I believe these automations free you from tedious admin work so you can focus on teaching and student engagement.
Improving The Student Learning Experience
At its core, the LearnWorlds Zoom integration is about one thing: creating meaningful, human learning experiences in a digital space.
It’s not just about delivering content—it’s about connection, community, and adaptability.
Providing Real-Time Feedback Through Live Sessions
Feedback is one of the most powerful teaching tools. With live sessions, you can gauge understanding instantly and correct misconceptions before they take root.
How to make it work:
- Use Zoom’s Reactions to check comprehension (thumbs up/down).
- Offer short live quizzes using LearnWorlds’ Assessments right after your session.
- Share personalized comments verbally or in chat to encourage growth.
In my experience, students appreciate instant feedback far more than delayed written notes—it feels personal and motivating.
Building A Sense Of Community With Interactive Learning
When students feel connected to each other, their motivation skyrockets. Use Zoom’s live video tools to nurture community:
- Begin each class with a 2-minute icebreaker or student check-in.
- Encourage peer discussion via Breakout Rooms.
- Celebrate milestones publicly—“Maria just completed her 5th class!”
LearnWorlds helps reinforce this sense of community through discussion boards and social learning features, where students can continue conversations after the live session ends.
Example: After a live business strategy class, create a “Post-Session Discussion” in LearnWorlds for students to share insights and takeaways. This bridges live learning with ongoing collaboration.
Offering Flexibility Through Hybrid Learning Options
Today’s learners crave flexibility. The combination of LearnWorlds and Zoom supports hybrid learning—a mix of live and on-demand content that fits any schedule.
How to structure it effectively:
- Host live sessions weekly for real-time interaction.
- Record them automatically in Zoom.
- Upload the recordings to LearnWorlds as a replay module.
- Pair each replay with a short quiz or summary activity.
This model allows students to engage live when possible—or catch up later without missing key insights.
Pro Tip: Label replays clearly with “Recorded Live Class – Week 3” to help students navigate easily.
Hybrid teaching balances flexibility with accountability, and I’ve seen it improve completion rates by as much as 25–30% in online programs.
Measuring Success Of Your Live Classes
Running live classes through LearnWorlds and Zoom is one thing—knowing whether they’re actually working is another.
Measuring your success isn’t about vanity metrics; it’s about understanding what’s resonating with students and what needs refinement.
Tracking Attendance, Engagement, And Completion Rates
Once your live class ends, LearnWorlds automatically captures key performance metrics so you don’t have to chase them manually. These include:
- Attendance rate: Who joined, when they joined, and how long they stayed.
- Engagement level: How actively students interacted through polls, chat, or reactions.
- Completion rate: How many students completed your post-class activities or assessments.
To view this, head to Reports > Live Sessions > Attendance Analytics inside LearnWorlds. You can filter by course, instructor, or date range.
Example Insight: If you notice most students drop off after 40 minutes, that’s a signal to shorten future sessions or add an interactive break. I’ve found that keeping live classes under 60 minutes with one activity midway tends to sustain engagement better.
By tracking these metrics consistently, you’re not guessing—you’re making data-backed decisions to improve learning outcomes.
Analyzing Data To Improve Future Sessions
Data without action is just noise. LearnWorlds’ analytics make it easy to identify what worked and what didn’t in your last Zoom session.
- Compare attendance trends: Are numbers increasing or declining week over week?
- Check engagement peaks: When did students participate most—during polls, breakout rooms, or discussions?
- Evaluate completion scores: How many attendees completed follow-up modules or quizzes?
From your LearnWorlds Dashboard > Analytics > Engagement, you can download these reports to spot performance patterns.
Pro Tip: I recommend exporting reports monthly and comparing across courses. Over time, you’ll notice what teaching methods drive higher engagement—whether that’s shorter sessions, more Q&As, or visual demonstrations.
Using Insights To Enhance Course Design And Delivery
The data you collect from your Zoom sessions should directly influence your course design. For example:
- Low attendance? Simplify your scheduling or send automated reminders via LearnWorlds.
- Low engagement? Integrate interactive polls or breakout rooms more often.
- High dropout rate? Consider adding recap videos or session summaries.
You can also use LearnWorlds’ “Surveys” feature to gather direct student feedback after a live class. Ask what they liked, what confused them, and how future sessions could be better.
I believe this step—listening to your learners—is where true course improvement happens. Numbers give you patterns, but feedback gives you direction.
Best Practices For Smooth LearnWorlds Zoom Integration
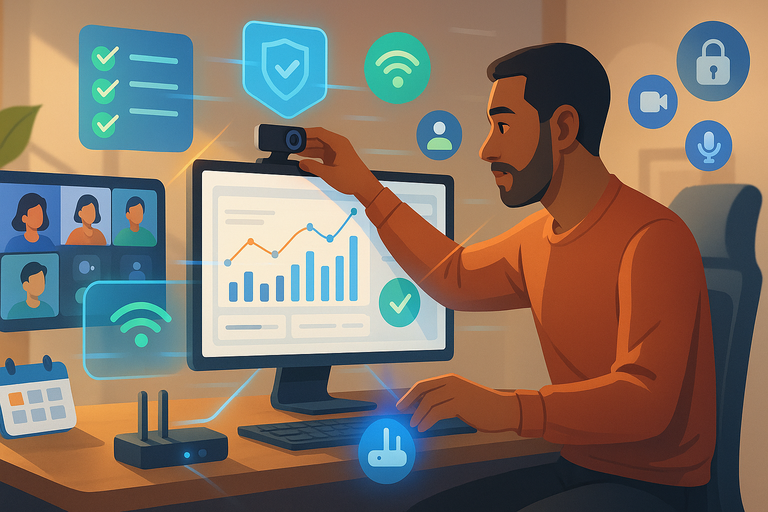
Even with the best tools, your live classes are only as strong as your preparation. These best practices ensure your LearnWorlds Zoom integration runs smoothly every time.
Maintaining Stable Internet And Audio-Video Quality
A shaky connection can ruin a great class. Always test your setup before going live.
Here’s a quick checklist I use:
- Test your speed: Aim for at least 5 Mbps upload and 10 Mbps download.
- Close unnecessary apps to free up bandwidth.
- Use a wired Ethernet connection instead of Wi-Fi if possible.
- Check your Zoom Audio Settings > Test Speaker & Microphone before class.
Also, invest in a decent external mic and ring light. The difference in clarity and professionalism is immediately noticeable. I suggest doing a quick 2-minute sound check before every session—it’s worth it.
Creating Professional Virtual Class Environments
Your virtual classroom is an extension of your brand. Make it look intentional and distraction-free.
Simple setup tips:
- Use a neutral or branded virtual background.
- Ensure good lighting (face the light, not the window).
- Keep your camera at eye level to maintain natural engagement.
Inside Zoom, go to Settings > Video > Adjust for Low Light for consistent quality. For LearnWorlds users running frequent classes, I recommend keeping your background consistent—it gives a sense of continuity between sessions.
Ensuring Security And Privacy During Live Sessions
Security is often overlooked until it’s too late. Thankfully, both LearnWorlds and Zoom offer robust controls.
Before starting a session:
- Enable Waiting Rooms in Zoom to screen participants.
- Use Meeting Passcodes or restrict access to enrolled students only.
- Disable “Join Before Host” to prevent early entry.
- Assign co-hosts to manage chat or remove disruptive participants.
LearnWorlds automatically ensures that only enrolled learners can access your session link—no need to share it manually. This prevents “Zoom bombing” and keeps your class environment safe and professional.
In short: A few minutes of setup equals peace of mind during teaching.
Troubleshooting And Technical Support
Even the smoothest systems can hit a snag. Knowing how to troubleshoot quickly keeps your sessions on track and your students confident in your reliability.
Common Integration Issues And How To Solve Them
Here are a few issues I’ve seen (and solved) firsthand:
- Problem: Zoom link not appearing in the course.
Fix: Reconnect your Zoom account under Settings > Integrations > Zoom and refresh the course page. - Problem: Meeting fails to start.
Fix: Ensure your Zoom license allows concurrent sessions. If multiple instructors are teaching, each should connect their own Zoom account. - Problem: Attendance not syncing.
Fix: Check your API credentials and reauthorize Zoom access inside LearnWorlds. Data syncing requires a valid, active connection.
Whenever possible, test integrations before live sessions—just start a “test class” to confirm everything connects properly.
Updating Integration Settings Without Losing Data
You can safely update your Zoom connection without disrupting existing class data.
Here’s how:
- Go to Settings > Integrations > Zoom.
- Click Disconnect to remove the old connection.
- Reconnect using the updated Zoom account.
LearnWorlds will retain your past session records since they’re stored within your platform database, not Zoom’s link itself.
I always suggest doing this between sessions, not during a live class day—it’s just good practice.
Getting Help From LearnWorlds And Zoom Support Teams
If you’re stuck, both platforms offer responsive support.
- LearnWorlds Support: From your dashboard, click Help > Contact Support. They typically respond within 24 hours.
- Zoom Support: Visit support.zoom.us for live chat or ticket requests.
Bonus Tip: LearnWorlds’ help center has detailed tutorials for Zoom setup, troubleshooting, and best practices. Bookmark that page—it’s gold for quick fixes.
Expert Tips To Maximize LearnWorlds Zoom Integration
Once you’ve mastered the basics, these expert-level tactics will help you get even more out of your LearnWorlds Zoom setup.
Customizing Zoom Settings For Different Class Formats
Different classes demand different energy. Adjust your Zoom settings to fit your session type:
- Workshops or coaching sessions: Enable “Allow Participants to Unmute Themselves” for real-time collaboration.
- Large webinars: Use “Mute Participants Upon Entry” and “Spotlight Video” for the main speaker.
- Group discussions: Turn on “Breakout Rooms” and “Gallery View” to encourage peer learning.
From Zoom, go to Settings > Meetings > In Meeting (Basic) to toggle these features.
I suggest saving presets for each class format—it makes switching between styles quick and seamless.
Using LearnWorlds Analytics To Optimize Live Classes
LearnWorlds’ built-in analytics give you a full overview of student behavior before, during, and after your Zoom classes.
Key metrics to track:
- Attendance duration
- Poll participation rate
- Replay views
- Quiz completion after sessions
Use this data to refine your future classes. For example, if students watch replays more than attend live, consider adjusting your schedule or offering flexible time slots.
This is where real growth happens—not just teaching, but learning how your students learn best.
Scaling Your Online Academy With Consistent Live Events
Live classes aren’t just educational—they’re powerful marketing tools. Consistency builds trust and community.
Here’s a scaling strategy I often recommend:
- Start with weekly live sessions for your core students.
- Record and repurpose the content into evergreen lessons.
- Host monthly “open classes” as lead magnets for new students.
- Use LearnWorlds’ automation tools to funnel participants into paid courses.
Over time, this rhythm establishes your academy as both reliable and engaging.
Example: One instructor I worked with began hosting biweekly Zoom coaching calls within LearnWorlds. Within three months, attendance doubled, and course sales increased by 35% simply because live engagement nurtured stronger trust.

