Table of Contents
The Hostinger website builder makes it possible to launch a fully functional site in less than an hour.
But how does it actually work? Can you really design, customize, and publish a professional-looking website without touching a single line of code? And what features help speed up the process so much compared to traditional web design?
This guide breaks down every step so you can see exactly how to use Hostinger’s tools to build your site quickly and confidently.
Why Choose Hostinger Website Builder For Quick Setup
If your goal is to get a website online without weeks of tinkering, the Hostinger website builder is built for speed and simplicity.
Instead of wrestling with complicated code or juggling plugins, you can drag, drop, and publish in a fraction of the time it would normally take. Here’s where it really shines.
Easy Drag-And-Drop Editing For Beginners
The beauty of drag-and-drop is that you don’t need to be a developer or designer to make your site look good. Everything works visually. Want a header at the top of your homepage?
Just grab it from the left-hand menu and drop it into place. Need to add a photo gallery? Pick the gallery block and drag it where you want it.
I suggest thinking of it like arranging furniture in a new apartment—you move things around until the layout feels right. The editor updates in real time, so you immediately see what your visitors will see. This eliminates the clunky “back and forth” some platforms force on you with separate preview modes.
From my experience, it’s especially helpful if you’ve never built a site before. There’s no coding barrier, and no steep learning curve. It’s as close to instant gratification as you’ll get in web design.
AI-Powered Features That Cut Design Time In Half
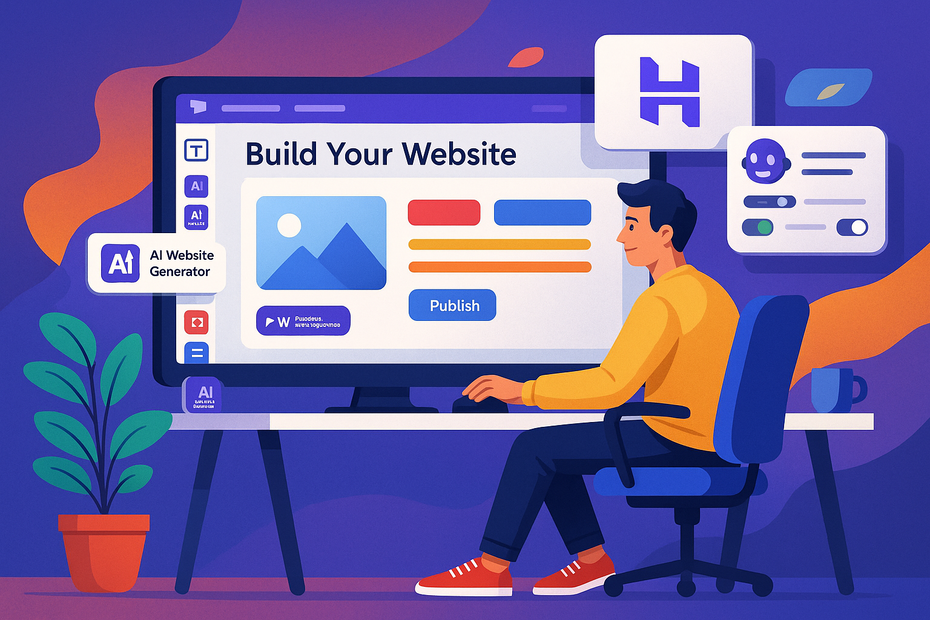
The real time-saver is the built-in AI. You can start with the AI Website Generator, which asks you a few simple questions—like your business type and what style you prefer—and it spits out a fully structured site in minutes. That alone can save hours of picking templates and manually creating pages.
There’s also the AI Writer. If you’ve ever stared at a blank screen trying to write an About page or product description, this tool is a lifesaver. Just type in what your business does, and it generates readable, starter copy you can tweak.
It’s not meant to replace your voice, but it gives you a solid foundation that removes the intimidation of starting from scratch.
In practice, I’ve used this to generate a quick service page in under five minutes. Instead of fussing over formatting and word choice, I had something on-screen I could edit and polish right away.
Responsive Templates Built For All Devices
One of the sneaky time drains in web design is mobile optimization. You get your site looking great on desktop, then discover it looks broken on a phone. Hostinger solves this by giving you responsive templates from the start.
Responsive simply means the design automatically adapts to any screen size—desktop, tablet, or mobile—without you having to manually fix spacing or resize images. Every template is pre-built with this in mind, so your site looks professional no matter how visitors access it.
I advise always checking the mobile preview before publishing, but nine times out of ten, the layout looks polished straight away. This means you can confidently move forward without spending hours patching design issues for smaller screens.
Affordable Pricing With Hosting Included
One underrated advantage of Hostinger’s website builder is that it’s bundled with hosting.
Normally, you’d have to pay for web hosting separately, then connect it to your site builder or CMS. That’s not just extra money—it’s extra setup steps that eat into your launch time.
With Hostinger, it’s one subscription, and everything you need is included: the builder, the hosting, and even a free domain in some plans. Plans start at a price point that’s hard to beat compared to WordPress setups where you pay separately for themes, hosting, and plugins.
If you’re starting small—like a personal site, a portfolio, or a local business page—you don’t need enterprise-level hosting costs. Hostinger balances speed, reliability, and affordability in one package, which is exactly what makes it practical for anyone wanting to get online quickly.
👉 Pro tip: if your main goal is speed, stick with the included features at first. You can always add advanced integrations later, but the drag-and-drop tools, AI features, and ready-to-use templates will get you from zero to published website faster than you might expect.
How To Create A Website In Under 1 Hour With Hostinger

Getting a website live doesn’t have to feel overwhelming. With Hostinger website builder, the setup process is streamlined so you can move from signup to a published site in less than an hour.
Let me break it down step by step.
Step 1: Sign Up And Pick Your Hosting Plan
The first step is simply creating your Hostinger account. Once you’re in, you’ll see a clean dashboard where you can select the Website Builder option.
Here’s where I recommend being strategic with your hosting plan:
- If you’re launching a personal blog or a portfolio, the Single Website plan works fine.
- For small businesses or online stores, the Premium or Business plans are smarter, since they come with extras like free domain names, more storage, and higher performance.
I’ve noticed the checkout is straightforward. Unlike some providers that overwhelm you with dozens of upsells, Hostinger keeps it simple.
Once your plan is chosen, the hosting is bundled with the builder, so you’re not dealing with the usual mess of connecting hosting and site platforms. That’s one less technical headache right out of the gate.
Step 2: Choose A Template Or Use AI Website Generator
After setting up hosting, you’ll be asked how you want to build your site. You can either:
- Pick a template: There are templates for restaurants, portfolios, online shops, blogs—you name it. Each one is fully editable.
- Use AI Website Generator: Answer a few quick questions about your business type, site goals, and style. The AI then builds a complete starter website for you.
I suggest the AI route if you’re short on time. When I tested it, I had a multi-page draft site in under three minutes—complete with pre-filled content I could edit instead of writing from scratch.
If you prefer more creative control, templates are the way to go. Either option puts you far ahead compared to starting on a blank page.
Step 3: Customize Pages With Drag-And-Drop Tools
This is where the fun begins. Inside the builder, you’ll see your site on the right and editing tools on the left. Want to change text? Just click and type directly. Need to add a new section? Drag a block like “Gallery” or “Testimonials” into place.
Some shortcuts I’ve found helpful:
- Use the duplicate section tool when you want to keep consistent design across pages (like repeating a call-to-action banner).
- Customize colors and fonts from the global settings so your whole site feels cohesive without editing each page one by one.
- Rearrange sections by dragging them up or down—super quick if you realize your contact info should be higher up.
This is the point where your site really starts looking like “yours,” and it’s satisfying because every adjustment is instantly visible.
Step 4: Add Essential Features Like Contact Forms And Menus
Every professional website needs a few core features to feel complete:
- Contact form: Go to “Elements” > “Contact Form.” Drop it onto your contact page, connect it to your email, and you’re set. No plugin hunting required.
- Navigation menu: From the settings, choose “Navigation” to edit your site menu. Add your key pages—Home, About, Services, Contact—and drag them into the right order.
- Social icons: Grab the Social Links block, add your Facebook, Instagram, or LinkedIn, and the icons appear instantly on your footer or header.
From my experience, skipping these basics makes your site feel unfinished. Hostinger makes them painless to add, so you don’t waste time chasing third-party integrations.
Step 5: Connect Your Domain And Publish Instantly
This is the final step—and it’s the most satisfying one. If your plan includes a free domain, you’ll see an option to claim it inside your dashboard. I
f you already own a domain, you can connect it by updating DNS settings, but Hostinger guides you through it with clear instructions.
Once the domain is set, click Publish, and your site is live within seconds. I’ve tested this multiple times, and the speed is noticeably faster compared to some builders where publishing can lag or stall.
It feels almost surreal going from “no site” to “a live, shareable website” in less than an hour.
👉 Pro tip: don’t get bogged down trying to make everything perfect before you publish. Launch the essentials first—home, about, and contact pages—then refine later. Speed is the biggest advantage here, and you can always polish as you go.
Key Features That Speed Up The Website Building Process
Hostinger website builder isn’t just simple—it’s designed to shave hours off your setup time.
The built-in tools let you skip the boring technical work and focus on getting your site live. Here’s where the real time-savers kick in.
AI Writer For Instant Website Copy Creation
Writing content can be the biggest bottleneck in building a site. The AI Writer in Hostinger solves this by generating copy instantly. You give it a prompt—like “local bakery in Chicago” or “freelance web developer offering portfolio services”—and it creates ready-to-use paragraphs for your pages.
I’ve used it when setting up a small service site. Within two minutes, I had an About page draft and a Services page outline. Was it perfect? Not exactly. But instead of staring at a blank page, I had content I could edit and refine, which cut my time in half.
Pro tip: Don’t copy-paste the AI text as-is. Treat it as a draft and sprinkle in your personality. It’s much faster to edit a foundation than to start from scratch.
SEO Settings To Optimize Your Site Fast
Hostinger includes built-in SEO (search engine optimization) tools, so you don’t have to hunt down plugins or third-party apps. From the dashboard, you can:
- Edit page titles and meta descriptions (these are the snippets Google shows in results).
- Add alt text to images directly in the media manager.
- Generate automatic sitemaps that help search engines crawl your site.
I advise filling these in as you go, not after you publish. It takes seconds per page and ensures your site is visible to the right people from day one. Think of it like labeling boxes when moving—do it upfront, and you save yourself frustration later.
Pre-Designed Blocks For Faster Layout Building
Instead of building each section of your website one by one, Hostinger offers pre-designed blocks like “Hero Banners,” “Pricing Tables,” or “Testimonials.” You drag them in, swap in your text and images, and you’re done.
I like using these for consistency. For example, if I’m setting up a three-service business page, I’ll drag in the “Service Block,” duplicate it twice, and just swap out the text and icons. It keeps the design clean without reinventing the wheel.
This is where speed multiplies—you’re not creating sections from scratch, you’re slotting in polished layouts that already look professional.
Built-In Integrations To Avoid Extra Setup Time
Every extra plugin you add usually means extra setup, potential bugs, and slower load times. Hostinger removes that headache by bundling popular integrations directly into the builder.
Some examples:
- Google Analytics for tracking visitors.
- Facebook Pixel for running ads.
- Email marketing integrations so you can capture leads straight from forms.
The integrations are literally a matter of pasting in your tracking ID or connecting your account—no coding, no chasing updates. That alone can save hours you’d otherwise spend configuring third-party tools.
Customization Options Without Slowing Down The Build
One fear beginners have is that a quick setup means a cookie-cutter website. But Hostinger balances speed with customization—you can tweak fonts, colors, layouts, and media without slowing yourself down.
Easy Font, Color, And Layout Adjustments
The builder has a global design panel where you can set your fonts and colors across the entire site. This is a huge time-saver compared to editing each page individually.
Here’s what I do:
- Go to Design > Global Styles.
- Choose your primary and secondary colors.
- Pick two fonts—one for headings, one for body text.
Within seconds, your whole site updates. It’s like applying a filter across every page, keeping things consistent while still reflecting your brand identity.
Adding Multimedia Without Code
Images, videos, and icons are easy to insert. Just drag the media block where you want it, click upload, and you’re set. Hostinger even has free stock image integration, so you can grab high-quality visuals without leaving the builder.
When I built a portfolio site, I uploaded a video intro to my homepage in under two minutes—no embedding code, just drag-and-drop. For beginners, this simplicity makes multimedia feel less intimidating and more accessible.
Using Section Duplication For Consistency
Here’s a little hack: instead of recreating the same design element across different pages, use the duplicate section feature.
For example:
- Create one polished call-to-action block.
- Duplicate it onto your homepage, services page, and contact page.
- Just tweak the text to fit the context.
This not only saves time but also gives your site a professional, consistent look—something that usually takes advanced design knowledge to achieve.
Creating Navigation Menus Quickly
A messy menu slows visitors down. Hostinger makes building navigation easy:
- Open the menu editor from the top bar.
- Drag and drop page links into the order you want.
- Add dropdowns for subpages if needed.
I suggest keeping your main menu simple—5 to 6 top-level items max. If you overload it, users bounce. By setting this up once, your navigation automatically appears across all pages, which means you don’t waste time duplicating menus manually.
👉 Pro tip: The key is to focus on global changes first (colors, fonts, layout), then refine page-specific details. That way, you save hours of repetitive editing while still ending up with a unique site that reflects your brand.
How Hostinger Website Builder Helps With E-Commerce

If you’re planning to sell products or services online, Hostinger website builder has built-in e-commerce tools that make it surprisingly quick to set up an online store.
You don’t need separate software or complicated add-ons—it’s all ready to go from the same dashboard.
Ready-Made Online Store Templates
The fastest way to launch a store is by starting with an e-commerce template. Hostinger offers pre-designed layouts for shops, boutiques, and service-based businesses.
These templates already include store pages like Shop, Product Details, Cart, and Checkout, so you don’t have to design them from scratch.
When I tested this, I chose a clothing store template. Within minutes, I had a complete storefront layout with placeholder products. All I had to do was replace the demo items with my own. The layout was clean, responsive, and already optimized for mobile shoppers.
Pro tip: Don’t waste time redesigning the wheel—start with a template that’s closest to your niche, then customize only what you need.
Simple Product Upload And Management
Adding products is straightforward. From your builder dashboard:
- Go to Store Manager > Products.
- Click Add Product.
- Fill in product details (name, description, price, SKU).
- Upload images or videos.
You can also create categories to keep things organized. For example, if you’re selling skincare, you can group items under “Moisturizers,” “Serums,” and “Masks.”
What I appreciate is how fast the process is. I uploaded ten products in less than 15 minutes, including descriptions and images. Everything updates instantly on the live site.
Payment Gateways Integrated Without Hassle
Payment setup is often where beginners get stuck. Hostinger makes it painless. From the Store Settings, you can activate secure payment gateways like:
- Credit/Debit cards
- PayPal
- Stripe
- Apple Pay / Google Pay
It’s literally as easy as pasting in your account credentials. No coding, no third-party plugin headaches. Transactions are SSL-secured automatically, which is critical for building trust with customers.
I always recommend testing your checkout by adding a test product at $1 and buying it yourself. It’s a quick way to confirm that payments flow correctly before you announce your store publicly.
Automated Shipping And Tax Calculations
Another time-saver: shipping and tax settings are built into the dashboard. You can set:
- Flat shipping rates
- Free shipping thresholds (e.g., free delivery over $50)
- Real-time tax rates by region
For example, if you’re in the U.S., you can set tax to auto-calculate based on customer location. That means you’re not manually adjusting orders later, which can be a nightmare for compliance.
I believe this is one of the most underrated features. Many DIY site builders force you to install plugins for shipping and tax, but here it’s handled natively, saving both time and stress.
👉 Pro tip: Keep your first store setup lean. Start with your best-selling products and a simple payment option like Stripe. Once sales start rolling in, you can expand your catalog and shipping rules without slowing yourself down in the beginning.
Common Mistakes To Avoid When Building In 1 Hour
Building a site in under an hour with the Hostinger website builder is completely doable, but speed can sometimes lead to shortcuts that hurt your site later.
Here are the big pitfalls I’ve seen people run into—and how you can avoid them.
Skipping SEO Settings That Impact Search Rankings
The website builder makes SEO settings easy to find, but it’s tempting to skip them to save time. That’s a mistake. Search engines rely on details like page titles, meta descriptions, and alt text for images to understand your content.
For example, if you’re building a portfolio site and don’t add meta descriptions, your site might show up in Google results with a random block of text instead of a clear pitch.
I advise this quick routine:
- After editing each page, click the SEO settings tab on the left menu.
- Add a page title with your primary keyword.
- Write a short meta description in plain English.
- Double-check that your images have descriptive alt text.
It takes maybe 2 minutes per page but can make the difference between being found or being invisible.
Overloading Pages With Too Many Elements
A common beginner mistake is thinking “more is better.” Too many blocks, animations, or large images can overwhelm visitors and slow down your site speed.
I’ve reviewed sites where the homepage had ten different call-to-action buttons competing for attention. Instead of looking professional, it looked chaotic.
Keep things simple:
- Stick to 1 clear call-to-action per page.
- Limit homepage sections to what matters most (about, services, contact).
- Use white space—blank space is not wasted space; it gives breathing room.
Speed-building doesn’t mean stuffing everything in—it means choosing the essentials and keeping it clean.
Ignoring Mobile Optimization Checks
Over 60% of website traffic comes from mobile. The good news is that Hostinger’s templates are responsive by default. The bad news? If you don’t check the mobile preview, you might still miss issues like:
- Buttons too close together.
- Text blocks that run too long.
- Images that crop awkwardly.
I suggest always clicking the mobile preview toggle before publishing. If something looks off, you can adjust padding and spacing in seconds. Skipping this step can cost you visitors—especially if they bounce because the site feels clunky on their phone.
Forgetting To Preview Before Publishing
When you’re racing to get a site live in under an hour, it’s easy to skip the preview. But this is your safety net. The preview mode shows exactly how your site looks to visitors—without risking a public mistake.
I once published a client’s site without previewing and realized later the navigation menu overlapped with the header image. Not a good look.
So here’s my workflow:
- Build your site.
- Preview desktop view.
- Preview mobile view.
- Then publish.
This extra 2–3 minutes ensures your site looks polished and avoids embarrassing first impressions.
Expert Tips To Get The Most Out Of Hostinger Website Builder
Once you’ve mastered the basics, there are ways to squeeze even more efficiency and quality out of Hostinger’s tools. These tips can help you build faster, smarter, and with more confidence.
Use AI Tools To Kickstart Content Creation
If you hate writing, let the AI do the heavy lifting. The AI Writer can instantly draft headlines, service descriptions, or blog posts.
Here’s how I use it:
- Generate copy for a “Services” page.
- Keep the structure but edit key details to match my voice.
- Repurpose that copy into a quick social media post promoting the site.
The point isn’t to let AI speak for you—it’s to overcome blank-page paralysis and save valuable time.
Start With Fewer Pages And Expand Later
You don’t need a 10-page site on day one. In fact, trying to build too much too fast often leads to half-finished pages.
I recommend starting lean:
- Home
- About
- Contact
- (Optional) Services or Shop
Once the essentials are live, you can add a blog, gallery, or additional product pages later. Publishing a smaller, finished site is far better than leaving a bloated draft sitting unpublished.
Take Advantage Of Hostinger Tutorials And Guides
One underrated feature is Hostinger’s knowledge base. From your dashboard, you can access tutorials with screenshots walking you through things like domain setup, SEO tweaks, or e-commerce settings.
When I first tried connecting a custom domain, I followed the step-by-step guide inside Hostinger instead of Googling around. It saved me time and gave me confidence I was doing it right.
My advice: if you get stuck, check their built-in guides before panicking. They’re surprisingly beginner-friendly.
Regularly Update And Refine After Launch
Publishing is just the start. Your site will evolve as your business grows. Maybe you’ll want to add testimonials, update product photos, or tweak your branding colors.
The Hostinger website builder makes updates painless—you just log in, edit, and hit publish. No complicated update cycles or broken plugins.
I recommend setting a reminder every month to log in, review your pages, and refresh anything outdated. Regular small improvements keep your site looking alive and relevant.
Conclusion With Pro Tip
The Hostinger website builder makes it possible to go from idea to live site in under an hour. By focusing on drag-and-drop simplicity, AI-powered tools, and ready-made templates, it removes the usual barriers that slow people down.
If I can leave you with one pro tip, it’s this: aim for progress, not perfection. Get your core pages live, then refine over time. The biggest mistake people make isn’t publishing a messy site—it’s never publishing at all. With Hostinger, speed is your advantage. Use it.

